The following article provides information on how to use the optional Under Construction Page provided with your hosting account. Additionally, to prevent any confusion we briefly discuss the first page that you see called the default.htm page. This page appears when you first open your site before you load any of your website files. This page is designed to be replaced by an index page of your choice. The under construction page is provided as part of the files that come with your account. You can enable it or even modify it using a text editor and some basic HTML. In order to modify the files it is assumed that you have a basic knowledge of HTML and your website files.
Note that older or existing accounts may not have the under_construction.html file in the account files. You can use the link below in order to get the file, or you can simply open it and copy the source code if you need a copy of the file
The Default.HTM page
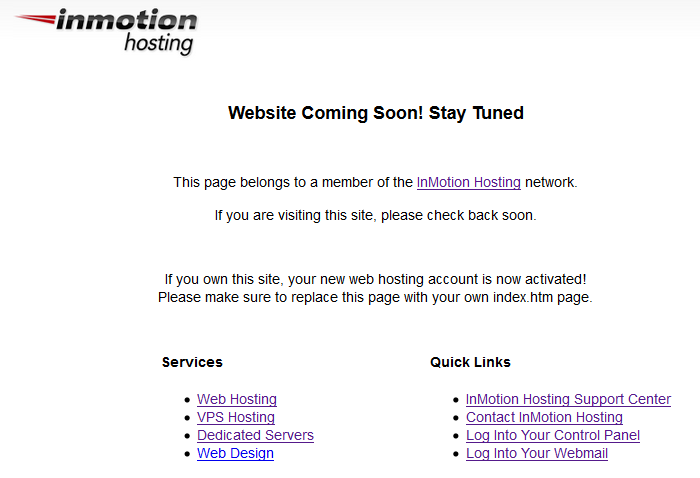
When you first open your account and before you have any files loaded you will see a page that indicates that your website is coming soon. This file is named DEFAULT.HTM. It provides a page that appears with the InMotion Hosting logo and also can be modified through a text editor with HTML. The file is set to be automatically replaced the moment that any type of INDEX file (index.htm, index.html, or index.php) is uploaded to your account on the webserver. If you want the page with no branding, or if you wish to modify the page to your needs then you may prefer to use the Under Construction page below.
<!DOCTYPE html PUBLIC "-//W3C//DTD XHTML 1.0 Transitional//EN" "https://www.w3.org/TR/xhtml1/DTD/xhtml1-transitional.dtd"> <html xmlns="https://www.w3.org/1999/xhtml"> <head> <meta http-equiv="Content-Type" content="text/html; charset=utf-8" /> <meta http-equiv="CACHE-CONTROL" content="NO-CACHE" /> <meta http-equiv="PRAGMA" content="NO-CACHE" /> <meta http-equiv="EXPIRES" content="0" /> <title>Web Hosting by InMotion Hosting</title> <style type="text/css"> body { background:transparent url(https://www.inmotionhosting.com/_img/body_bg.gif) repeat-x scroll center top; } #container { font-family: Arial, Helvetica, sans-serif; font-weight: normal; width: 810px; margin: 0 auto; } #container p { text-align: center; } #logo { float: left; width: 217px; margin-bottom: 50px; margin-top: 12px; } #links_container { clear: both; position: relative; top: 255px; padding-left: 165px; height: 200px; } #content_container { position: relative; top: -225px; height: 300px; } #services { float: left; width: 300px; } #links { float: left; width: 300px; } h4 { font-size: 16px; font-weight: bold; } </style> </head> <body> <div id="container"> <div id="logo"><a href="https://www.inmotionhosting.com"><img src="https://www.inmotionhosting.com/_img/head_logo.gif" border="0" alt="We b Hosting by InMotion Hosting" /></a> </div> <div id="links_container"> <div id="services"> <h4>Services</h4> <ul> <li><a href="https://www.inmotionhosting.com/">Web Hosting</a></li> <li><a href="https://www.inmotionhosting.com/vps-hosting">VPS Hosting</a></li> <li><a href="https://www.inmotionhosting.com/dedicated-servers">Dedicated Servers</a></li> </ul> </div> <div id="links"> <h4>Quick Links</h4> <ul> <li><a href="https://www.inmotionhosting.com/support/">InMotion Hosting Support Center</a></li> <li><a href="https://www.inmotionhosting.com/contact">Contact InMotion Hosting</a></li> <li><a href="../cpanel">Log Into Your Control Panel</a></li> <li><a href="../webmail">Log Into Your Webmail</a></li> </ul> </div> </div> <div id="content_container"> <p style="font-size: 20px; font-weight: bold; clear: both;">Website Coming Soon! Stay Tuned</p> <p> </p> <p>This page belongs to a member of the <a href="https://www.inmotionhosting.com">InMotion Hosting</a> network.</p> <p>If you are visiting this site, please check back soon.</p> <p> </p> <p>If you own this site, your new web hosting account is now activated!<br />Please make sure to replace this page with your own index.htm page.</p> <p> </p> </div> </div> </body> </html>Understanding the Generic Under Construction Page
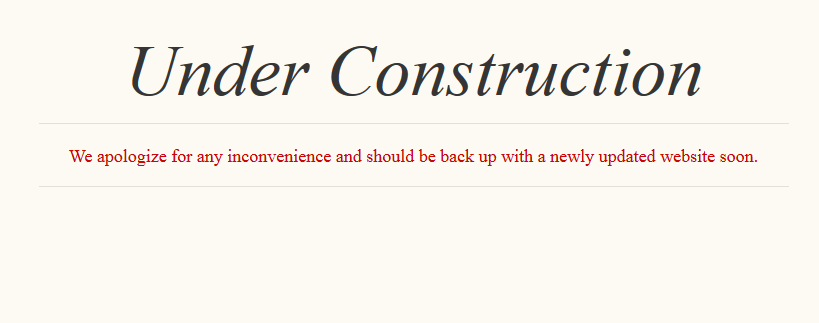
The optional construction page is provided on your account or is available through download through the link provided at the bottom of this article. The screenshot at right illustrates how the page appears. This page is not used until you actually save it as the index file. The page is a generic under construction page that simply states “under construction.” You are welcome to change the text and its appearance to meet your website building needs. When you look at the HTML file for the under construction page, you will find instructions on how to use the file if you need it. The file can be modified through the File Manager Code Editor, or through any text editor that you wish to use.
<!-- This is an under construction page provided by InMotion Hosting to use with your sites as needed. This file includes instructions on how to activate it as a landing page for your site, how to incorporate your personal logo, and how to change the text. --> <!DOCTYPE html PUBLIC "-//W3C//DTD XHTML 1.0 Transitional//EN" "https://www.w3.org/TR/xhtml1/DTD/xhtml1-transitional.dtd"> <html xmlns="https://www.w3.org/1999/xhtml"> <head> <meta http-equiv="Content-Type" content="text/html; charset=utf-8" /> <meta author="InMotion Hosting" /> <title>Our Site is Under Construction</title> <link href='https://fonts.googleapis.com/css?family=Gentium+Book+Basic:400,400italic' rel='stylesheet' type='text/css'> <style type="text/css"> body{ background: #fcfaf2; font-family: Vollkorn; padding-top: 100px; text-align: center; } #heading{ color: #353535; font: italic normal normal 72px 'Gentium Book Basic'; } p{ border-bottom: 1px solid #e2e1d9; border-top: 1px solid #e2e1d9; color: #c90707; font: normal normal normal 18px 'Gentium Book Basic', serif; margin: 10px auto 0; padding: 20px 0; width: 750px } #logo{ display: block; margin: 0 auto 10px; } </style> </head> <body> <!-- If you would like to use your own logo, please follow these instructions: 1.) Name your logo file "logo.jpg." Ensure the extension is "jpg" in lowercase, rather than in uppercase "JPG," because the code that calls the file is case sensitive. 2.) Login to your cPanel account. For instructions, copy and paste the following link into your browser: https://www.inmotionhosting.com/support/edu/cpanel/getting-started-cpanel/how-to-log-into-cpanel 3.) Click on "File Manager" under the "Files" Section 4.) You will get prompted with a pop-up menu asking what directory you would like to start in. Select the public_html directory and click Go. 5.) Click the Upload link at the top of the File Manager. 6.) Browse your local computer for the file you want to upload. 7.) Select the file and click Open. 8.) Close the Upload files page. Refresh your File Manager by clicking the Reload link at the top middle of the File Manager. You should see "logo.jpg" listed in the File Manager now. 9.) If you downloaded this HTML file from the Support Center, follow steps 5 through 8 to upload this file as well. 10.) In the File Manager, select the file under-construction.html and click the "Code Editor" icon on top of the page. 11.) This will open a dialog box with instructions for using the code editor. Click "Edit" in the lower right corner of the box to open the under construction file for editing. 12.) You will see the page is written in HTML and CSS. Locate the line numbers on the left hand side of the page, then locate the following code on line number 61: <!--<img src="logo.jpg" id="logo"> --> <!-- 13.) The code on line 61 is for the logo and it is commented out, meaning it is not viewable to the public. Remove the comment portions of the code by deleting the first four characters that are <!-- and the last three characters that are --> <!-- 14.) Click the "Save Changes" button in the top right. 15.) Click the "Close" button in the top right. This will lead you back to the File Manager. 16.) Select the file under-construction.html and click the "Rename" icon on the top of the page. This will open the dialog box for renaming the HTML file. 17.) Delete the text "under-construction.html" in the input box and type in "index.html". Click the "Rename File" button on the bottom right. This will activate the under construction page in your site. You should see the logo appear at the top of the page, as well. If you accidentally break the code and you're unsure of how to fix it, you can always download an original copy of this HTML file in our Support Center and reupload it to the public_html folder. You can access the original copy here: You may also change the text that appears on the page by locating the text in the code below --> <!--<img src="logo.jpg" id="logo"> --> <div id="heading"> Under Construction <!-- Updating this line of code will change the larger text on the top --> </div> <p> We apologize for any inconvenience and should be back up with a newly updated website soon. <!-- Updating this line of code will change the smaller text --> </p> </body> </html> <!-- This is an under construction page provided by InMotion Hosting to use with your sites as needed. This file includes instructions on how to activate it as a landing page for your site, how to incorporate your personal logo, and how to change the text. -->How to Change the Under Construction page
If you need instructions on opening the page, the following steps will explain how to open and edit the file. The actual name of the file provided to you will be called under_construction.html. To open the file using the cPanel File Manager:
- Login to the cPanel
- Open your File Manager
- Click on “Web Root(public_html/www)”, then select GO to open the file manager
- You will see the list of files in the public_html folder. Find the file labeled under_construction.html
- Right-click on the file and then select CODE EDIT from the menu that appears. Or you can also left-click to select the file and use the menu bar at top to select your editor
At this point you will be viewing the HTML code for the Under Construction file. There are instructions provided within the file that tell you how to use the Under Construction file. Here is a summary of that text and some other suggestions that you can use to edit the under construction page:
- Changing the logo graphic – Tells about how to name your logo file. Note by default, the under_construction.html file has NO graphics. This instruction is for the graphic being used for the logo. If you change the file name, you will need to change the file as it is referenced in the code for the under construction page. You can do this by simply searching for “logo.jpg” and replacing it with the file name that you are going to use.
- Replacing the index file – The instructions are also given on how to replace any index file so that the under construction page is used. Basically, it tells you how to replace the existing file and how to rename the generic construction page to the actual index.htm page.
- Fonts – If you wish to change the fonts that are being used, you will need to change the code to use a different font name. The file uses a Google font. You can find more about using Google fonts in this article: Using Google fonts. The main difference is that you will be making the changes in the under_construction.html file (instead of the index.php).
- Colors – If you are interested in changing the colors that are used in the under construction page, you can also modify the code to do this. You will need to know the HTML color code. You can use the HTML Color picker to select a different color. Then in the code for the under construction page look for the word “color”. Each section of the page will have a color defined with the HTML color code. The color of that portion of the web page will change once you change the code with the value that you get from the HTML Color picker.
Link to the Under Construction HTML code
Note: The file is saved as a text file. In order to use it as an HTML file, you will need to save it using the extension .HTML or .HTM. For example, “under_construction.html”.
Once you have the Under Construction page modified to your needs you can then upload it into the root folder of your website as an index.htm file and it will appear when you display your website in a browser.
That’s it for the basic under construction page, but be sure to check out our guide on Bootstrap under construction pages if you want to get fancy with your CSS!