Using Redis for WordPress can improve more than just the performance of your website. One of the benefits of using Redis is the option for an optimized search solution. One of the easiest solutions to implement in WordPress site is RediSearch. This easy-to-use plugin provides search options that include:
- Scoring search fields – allowing you to designate a higher value to a particular search term
- Fuzzy search – allowing the search to accept multiple spellings for a particular term
- Autosuggest – provides suggested search text when typing in a search
- Synonyms – provides support for related words that you can define in synonym groups
RediSearch provides extended search capabilities that you won’t find in the search provided with a typical MySQL-only WordPress installation. And, because of its use of Redis, it provides performance improvements for searches while including simpler ways to create indexes, synchronize data and send query requests.
How to Install RediSearch
Before you begin installing RediSearch, remember that Redis will need to be implemented on your VPS or Dedicated server. For more information on installing Redis, please see this tutorial. There is also a Redisearch module that will need to be added.
RediSearch is an open-source software solution that you can find in the WordPress plugins page. You can also follow the steps below to load it onto your WordPress site.
- Log in to your WordPress Administrator Dashboard.
- Click on Plugins in the menu to the left of the screen.
- Click on Add New, then in the search field type “Redisearch.”
- When the plugin appears, click on the Install button.
- When the installation completes, click on the Activate button.
Connecting Redisearch to Your Redis Server
The first step you need take before beginning to use Redisearch is to configure the server connection. You will need your Redis server connection information.

- If you’re not already in the WordPress Administrator, then log in.
- When Redisearch is installed you’ll see Redisearch listed in the menu on the left side of the screen. Click on Redisearch, then click on Redis Server.
- As per the image above you can see the options you need to fill in. They provide the default settings. If you are not sure of your settings, then contact your host’s support team for further assistance. The default setting for the server is 127.0.0.1. The default is 6379.
- Click on the Save Changes button to the right the screen when you are finished making your changes.
Searching for a way to speed up your WordPress site? Look no further! Go to the InMotion Hosting home page and check out the WordPress Hosting solutions!
Configuring Redisearch
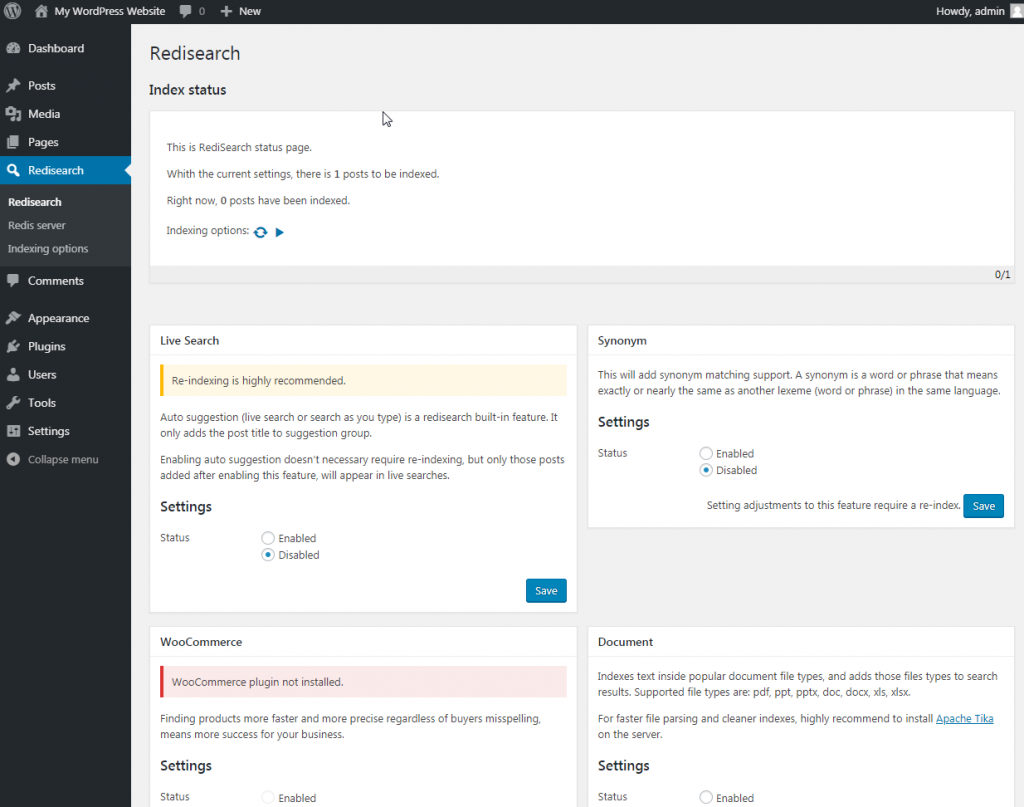
The options in Redisearch can be easily set on its main screen in the WordPress Administrator Dashboard. Each of these options can be enabled or disabled as per your preference. As you enable each section, you can see the left side of the box turn green. The WooCommerce option requires that you have the WooCommerce plugin installed for the option to be available. Once you have enabled an option, you would need to click on Save to save the change.
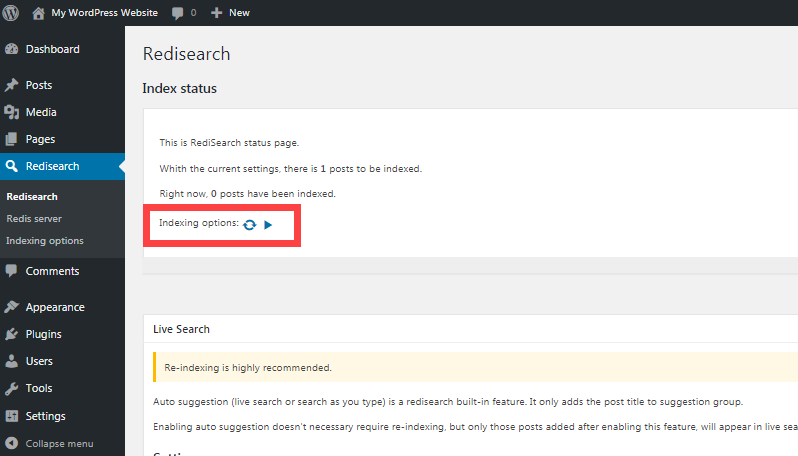
Some changes may require that you re-index. To re-index, go to the top of the page and click on the circular symbol next to “Indexing options.” If you hover over it, you’ll see a pop-up that says, “Dump existing index and re-index.
Indexing Options
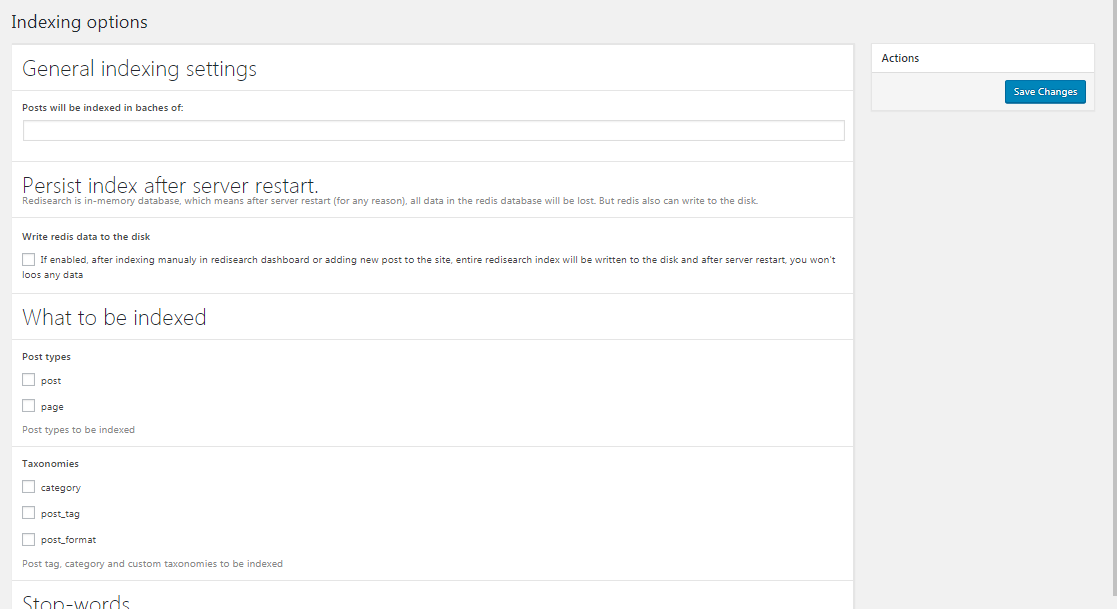
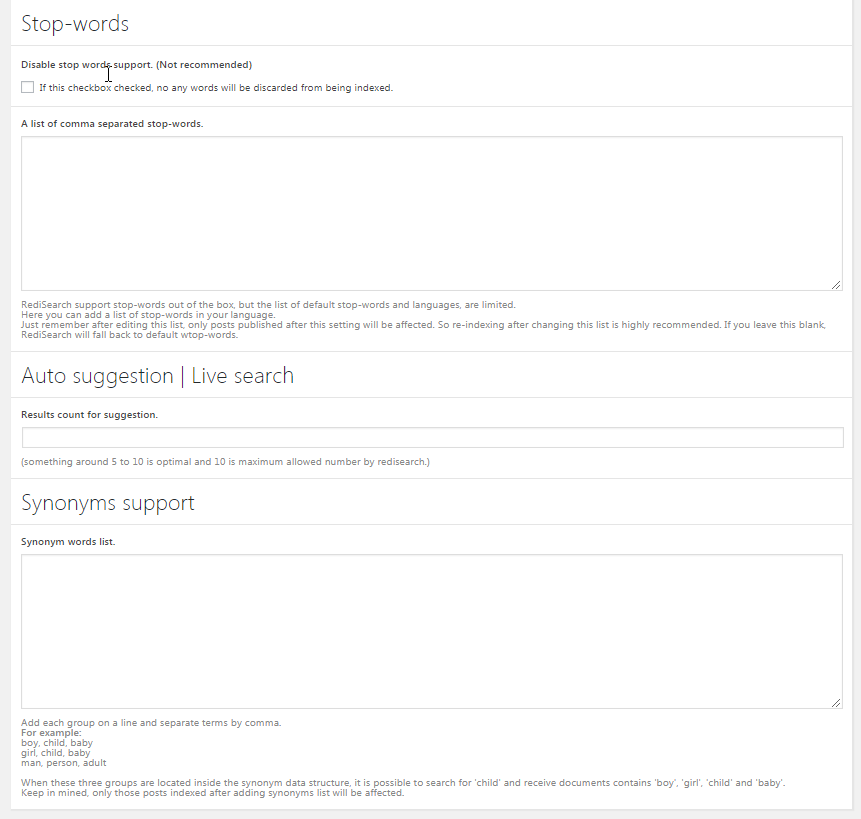
The Indexing options in Redisearch can be seen in the two screenshots used in the slideshow above. Click on the arrows or dots to view the options described below. For more detailed information for each of the Redisearch settings, please see their official documentation page.
- General Indexing settings – Posts can be indexed in batches. Batch indexing requires some knowledge of Redisearch. Leave this field blank unless you are working with a knowledgeable developer or a specific Redisearch expert.
- Persist index after server restart – Redis works in RAM, but it can be set to save to disk if needed. Click on the box under, “Write redis data to the disk,” to enable the option.
- What to be indexed – You can select the WordPress data to be indexed: Post and/or page.
- Taxonomies – These selections give you the option to index category, post_tag, and/or post_format.
- Stop-words – Here you can add “stop-words” which do not get indexed. Stop-words are common words unnecessarily take up a lot of space if indexed.
Congratulations! You now know how to implement the Redisearch WordPress plugin. Using Redisearch will help improve your odds of getting your information to a searcher’s browser as soon as possible. For information on using Redis, check out our tutorial How to Edit the Redis Configuration File,