
After purchasing Google Workspace and activating your subscription, you will then need to verify your domain with Google. This is done by adding a specific TXT record to your domain’s DNS.
This guide will show you how to verify your domain with Google using a TXT record, so you can complete the Google Workspace setup process.
Topics include:
Benefits of Verifying Your Domain
The primary benefit of verifying your domain with Google Workspace is that it prevents other users from setting up Google Workspace under your chosen domain name. If you’ve invested in a unique and recognizable domain name, you will likely want to use that domain name for your Google services.
To ensure that you can use your chosen domain name, you will want to verify the domain name using the steps in the following section. Please note that if you selected your domain name when setting up your Google Workspace account, you do not need to verify it.
Verifying your domain in Google Workspace involves the creation of a TXT record, a type of record used for the Domain Name System (DNS) that acts as a type of phonebook for the internet. When Google sees that the TXT record exists in your DNS configuration, it can verify the domain and associate it with your account. It is important to note that the TXT record will not affect your website or email services.
Verify Your Domain
- Login to the Google Workspace Admin Panel using the following URL:
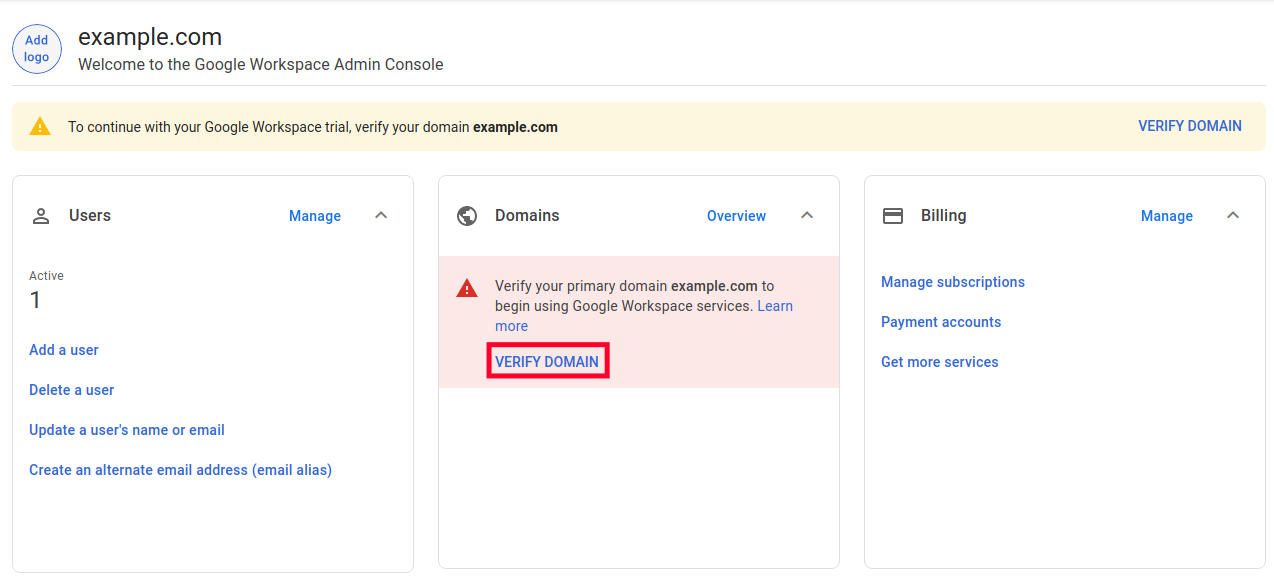
https://admin.google.com. - Click the Verify Domain button under the Domains section.
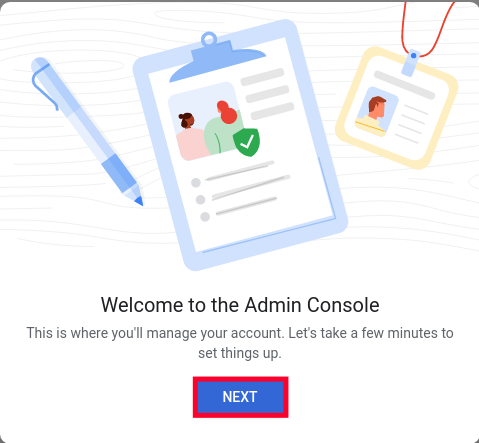
- You’ll see a “Welcome to the Admin Console” message. Click the Next button.
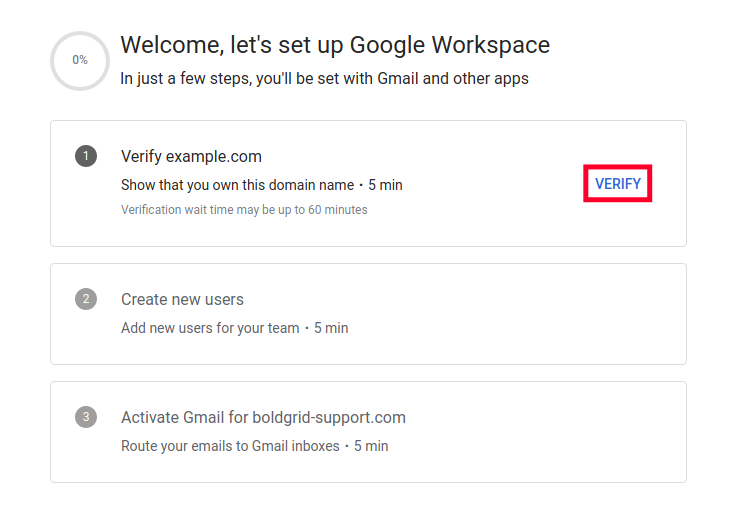
- Click the Verify button.
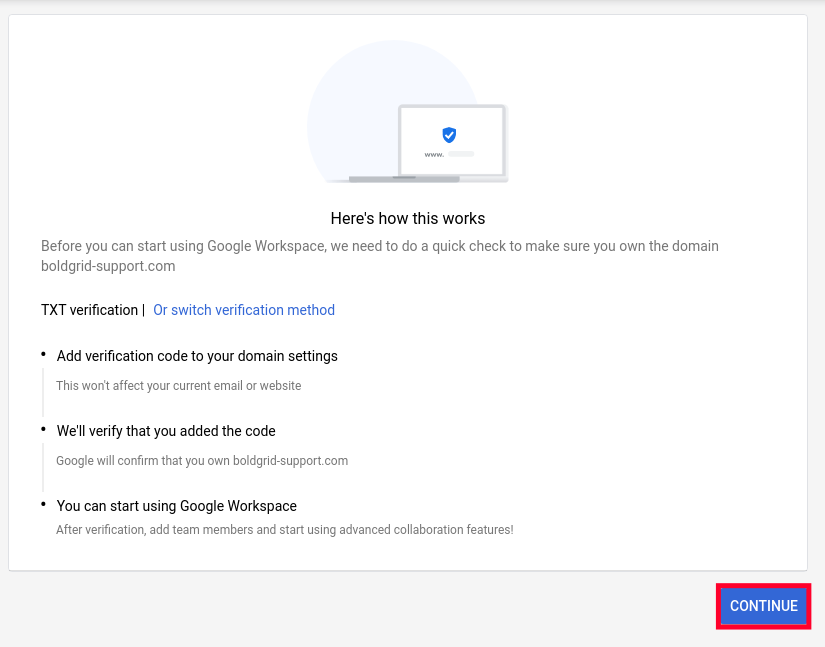
- On the next page click the Continue button.
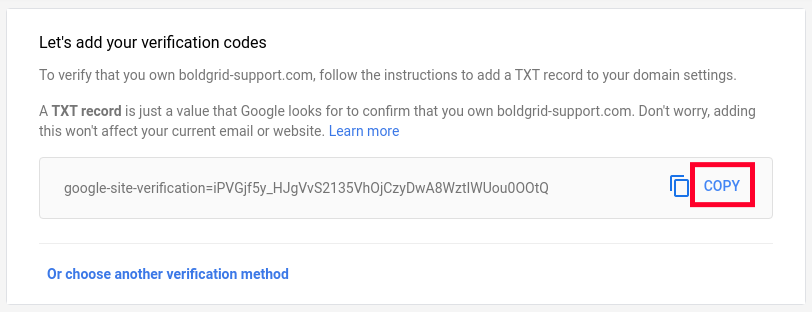
- You will then see your TXT record listed. Click the Copy button. It may be helpful to paste this into notepad or a similar editor for later use.
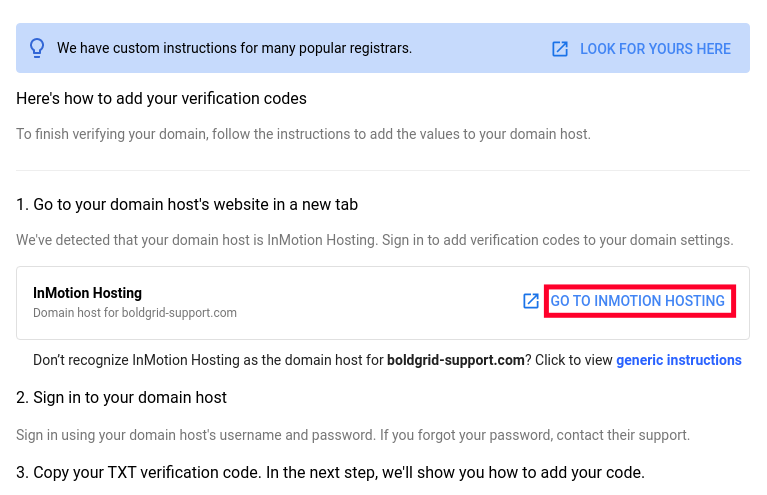
- Scroll down and click the Go to InMotion Hosting link. It should open in a new tab.
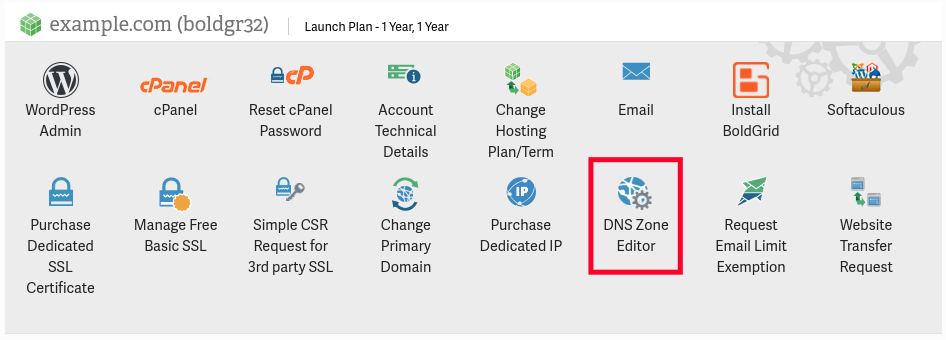
- Click the Login button on the top right, then login to AMP.
- Under your hosting plan click the DNS Zone Editor option.
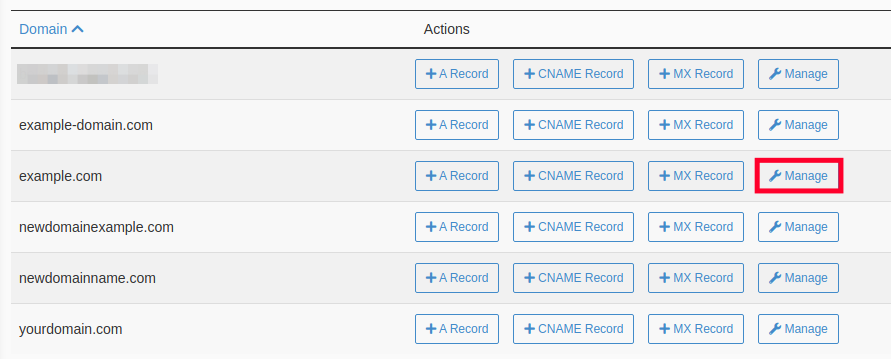
- Next to your domain name click the Manage button.
- Click the + Add Record button.
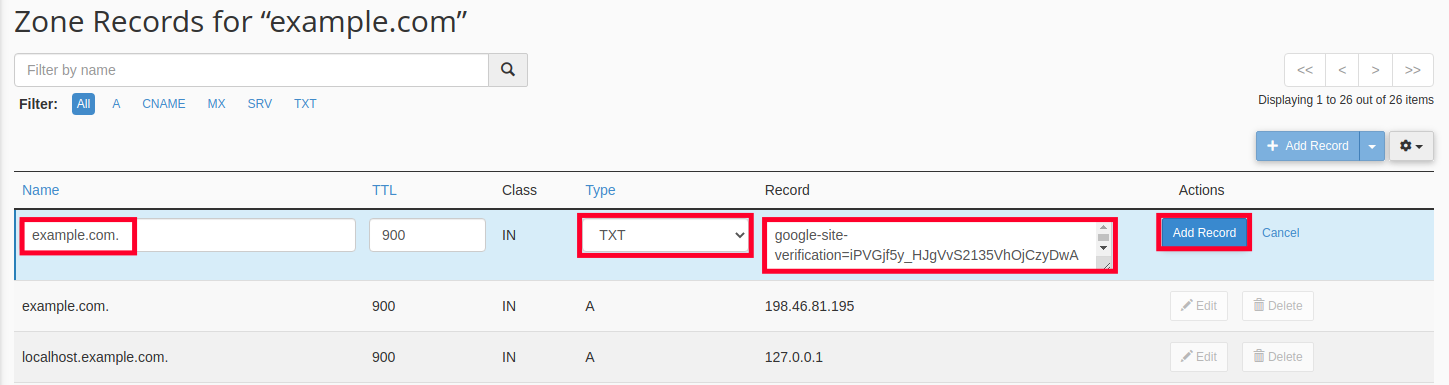
- On the top row, enter your domain under Name followed by a period. Such as:
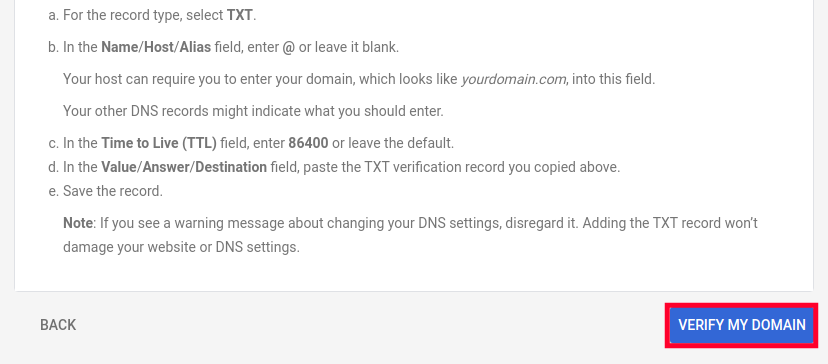
example.com. - Under Type select TXT from the drop-down menu.
- Paste your Google Workspace TXT record into the Record section then click the Add Record button.
- Return to the Google Workspace tab and click the Verify My Domain link. The verification can take several minutes to complete.
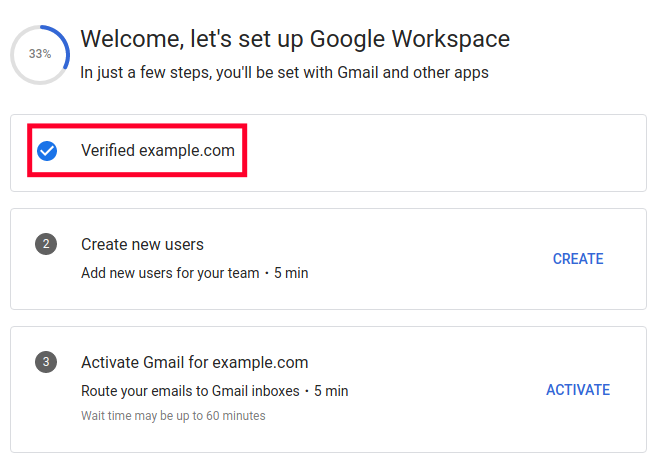
You will then see a checkmark confirming that you have successfully verified your domain with Google. You can now begin using Google Workspace with your domain. We recommend our next guide on how to Activate Gmail in Google Workspace.
Thank you for this article. Google Search Console gave almost no instructions on how to do this.
John
You’re welcome, John! Glad we could help.
What is a benefit of google workspace?
Hi, Edupak! Google Workspace let’s you use Google for your mail hosting. Some businesses already have long established mail accounts with Google, and other businesses simply want to keep mail on an external server. Hope that helps!