If you have subscribed to a VPS or Dedicated server account for InMotion Hosting, make sure that your mail server has been updated to use Dovecot. The old Courier mail server is no longer being used on VPS or Dedicated server accounts.

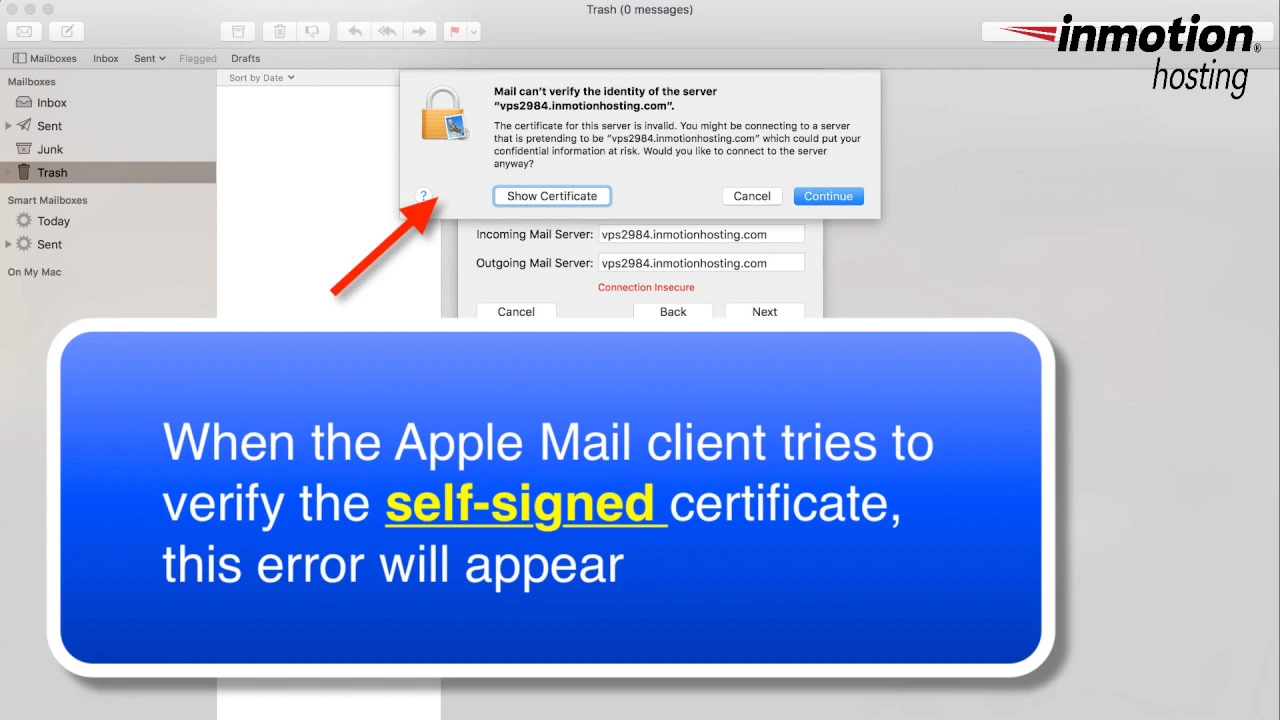
Nothing is more frustrating for new (or old) Apple users than trying to get the Apple mail client working properly during it’s initial setup. The main thing that we are addressing in this article is the verification of the mail server during setup. The error “Mail can’t verify the identify of the server xxxxxx” often appears when working with the secure (SSL) settings for your mail client (where “xxxxxx” is the name of your server). This tutorial will walk you through the steps needed to make sure that your secure settings will work and your self-signed certificate is saved on your computer so that you don’t have to continually confirm the identity of your mail server.
Troubleshooting the Can’t Verify the Server with Mac or Apple Mail
Steps to setup Trust for Self-signed Certificate
The first step involves the setup of your mail client. Check out How to Setup your Mac Mail client if you need help with the configuration settings. If you are using the secure settings and you are seeing a window pop up that says “Mail can’t verify the identify of the server xxxxxx” then follow the steps below:
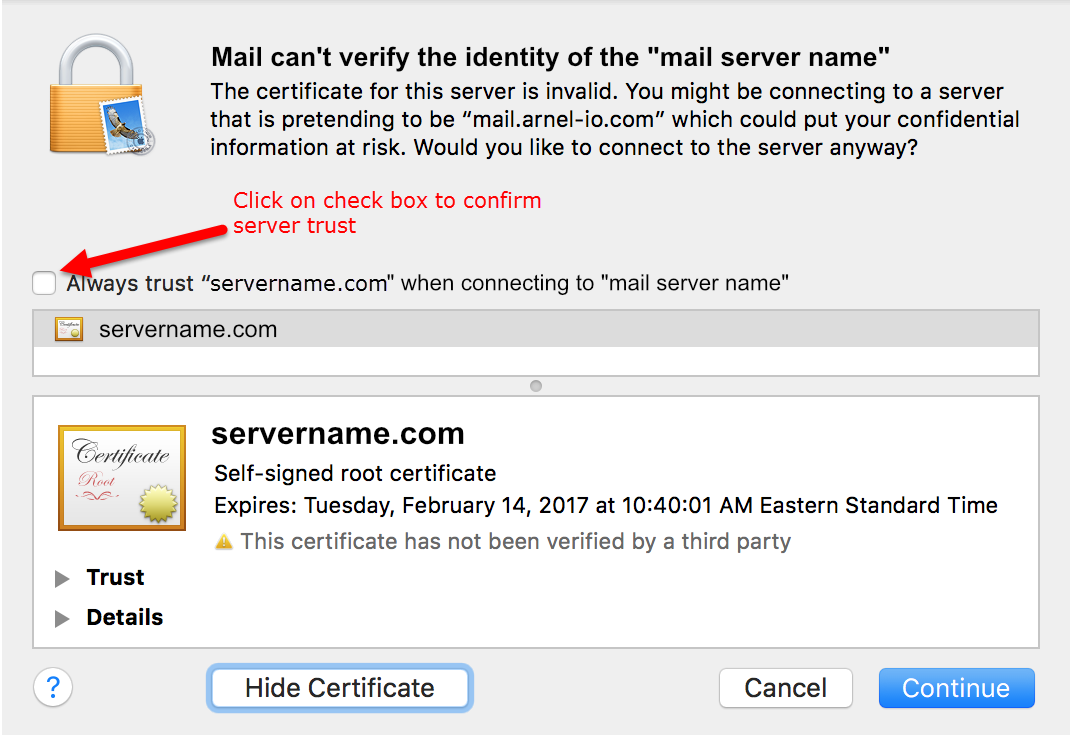
Click on Show Certificate. When you get to this screen click on the check box labeled “Always trust “servername” when connecting to “mail server name”.
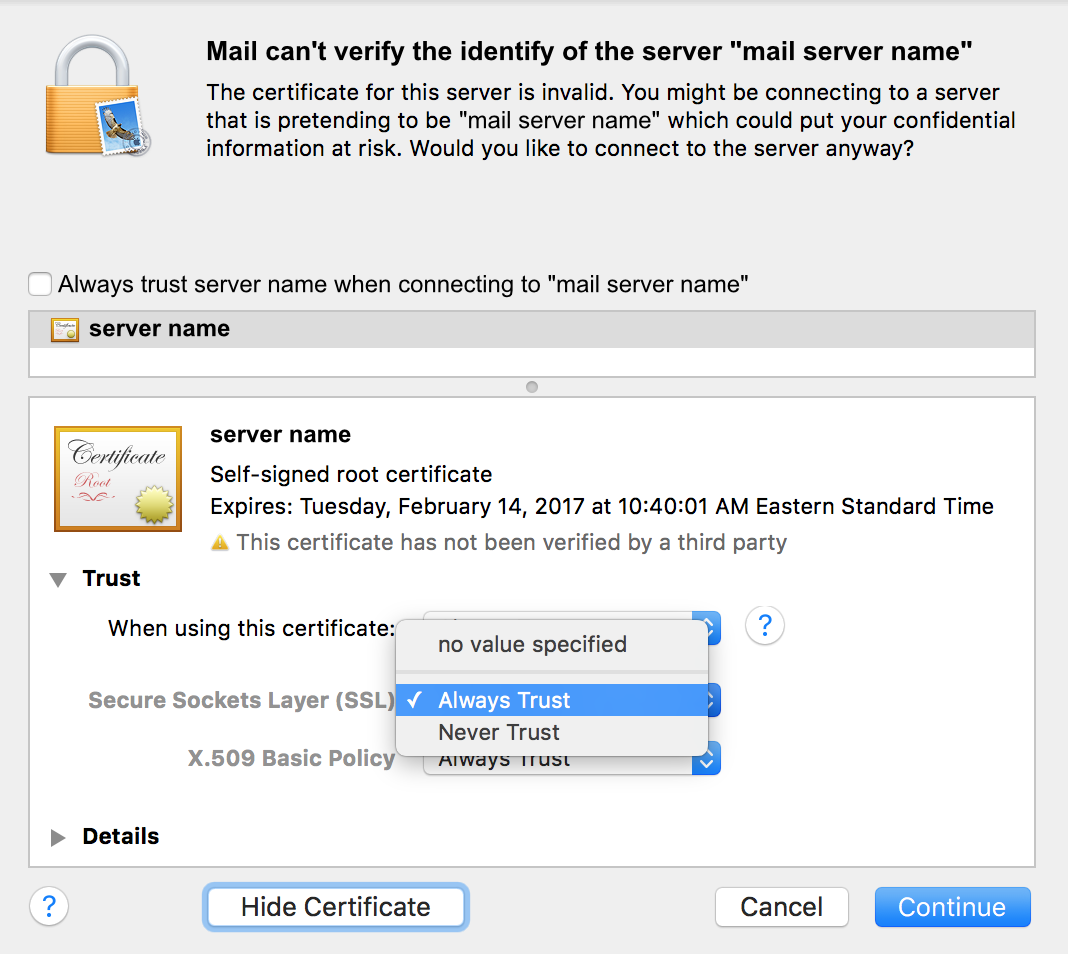
Next, click on the drop-down arrow where it says TRUST.
- You will need to make sure that server listed on this message is the correct server. If you know it’s right, then click on “Always trust” next to Secure Sockets layer (SSL).
- Do the same thing for X.509 Basic policy.
Next at the top of the warning window you’ll see a check box with the line “Always trust ‘xxxxx’ when connect ‘server'”. Click the check box.
- Finally, click on the button labeled Continue
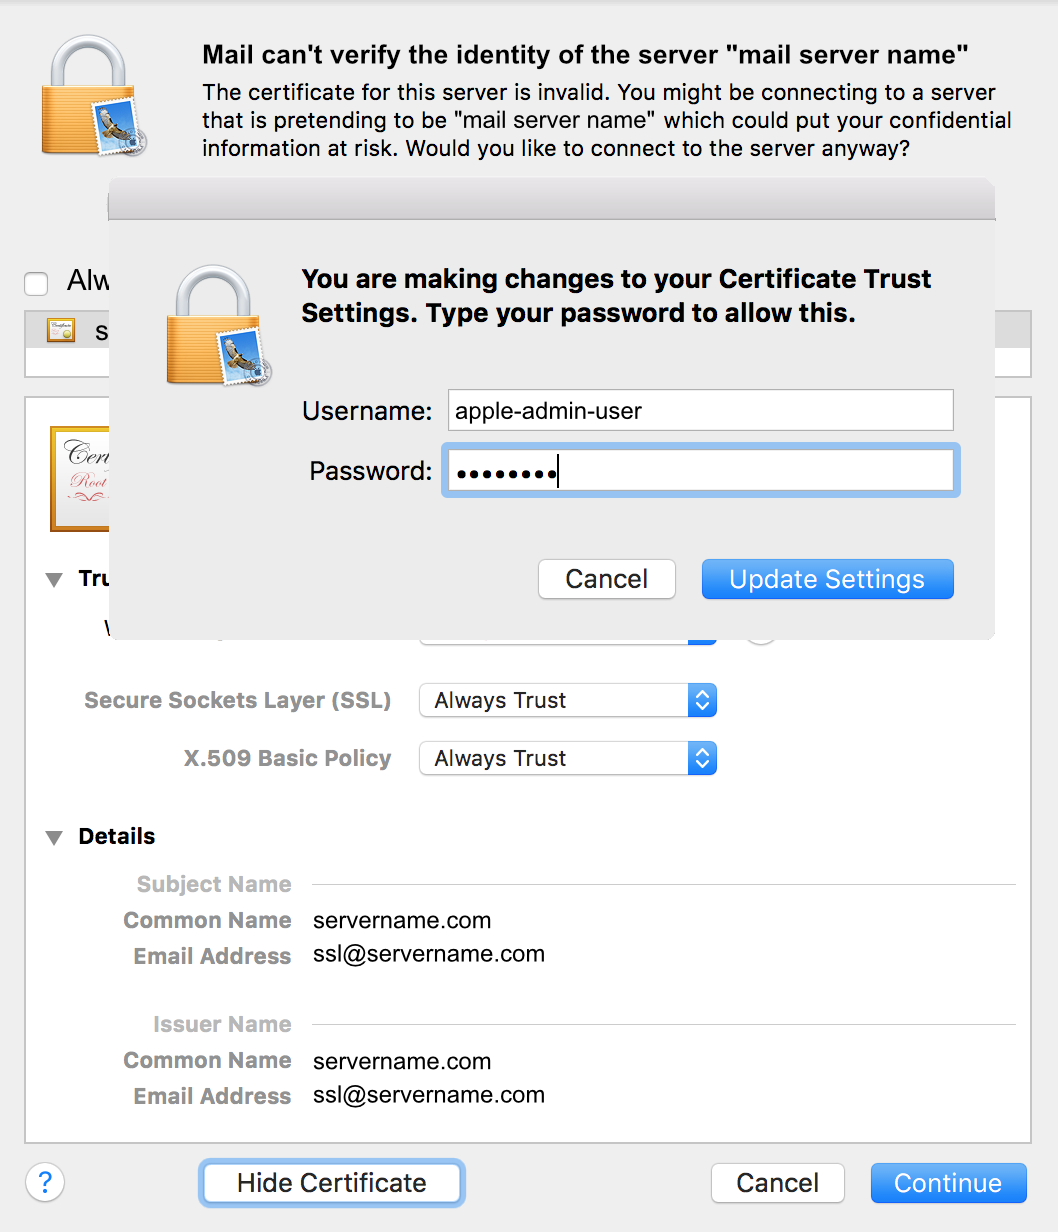
You may need to approve the change using your Apple login. Type in your user ID and password, then click on Update Settings
- After you have finished the approving the certificate, you will need to make sure that both incoming and outgoing emails work. You might need to specify an outgoing mail server depending on how your email account is setup. Make sure to select the one that matches your mail server for your account. If necessary, repeat the steps above in order to make sure that the server settings are saved properly. You’ll know it’s working when you are able to send and email and receive an email without seeing the server verification window pop up.
If you continue to have problems with the verification of the server, please make sure to contact our live technical support team via email/chat/phone.
I kept getting this over and over when I changed my PW. The fix for me was to reboot the router and modem. Then it worked.