In this article:
This article is based on the Apple Client in iOS 13.1.2.
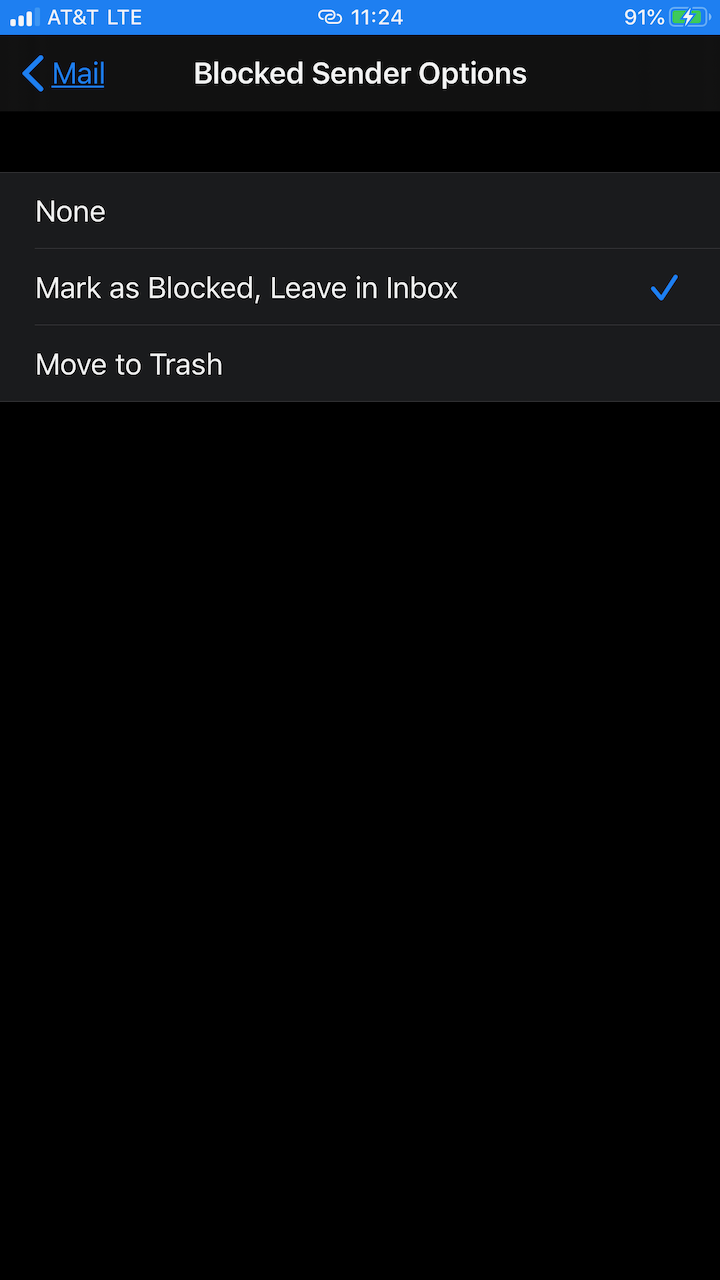
When an email sender is blocked the email is not immediately deleted by default. Apple Mail will mark the email as blocked, but will not delete it unless you changed the setting. You can change this in the Blocked Sender Email option. Follow the instructions below to make the changes.
Changing the Blocked Sender Email Option
- You will need to be in the Settings option on your iPhone.
- Tap on Mail when you are on the settings page.
- In Mail, scroll to the Threading section. Tap on Blocked Sender options.
- Here you will see the options that can be selected for Blocked Sender email: None, Mark as Blocked, Leave in Inbox, and Move to Trash. The default setting is checked. Select the option you wish to use.
Congratulations! You now know how to make changes to the Blocked Sender Options in your iPhone email application. To learn more about the iPhone Mail client, please see our iPhone tutorials in the InMotion Hosting Support Center websites.