
Backing up your WordPress site is important. You already know that fact. However, the act of backing up your site shouldn’t be complicated.
With the BackWPup backup plugin, you can create backups and restore your WordPress site within minutes. Allowing you to protect your website from potential hacks and perform site maintenance without the fear of breaking your site.
Continue reading to learn how to:
Install the BackWPup Backup Plugin
- Log into your WordPress Dashboard.
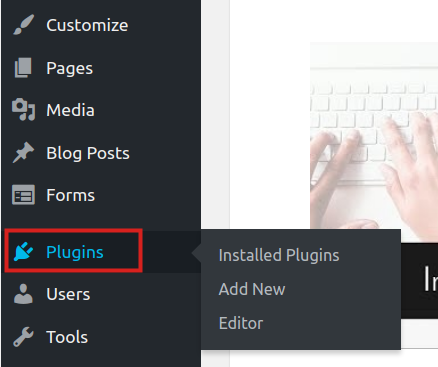
- Navigate to Plugins > Add New.
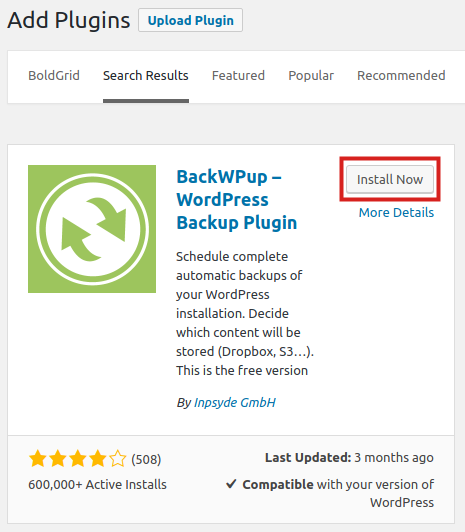
- Type ‘backwpup‘ into the search box.
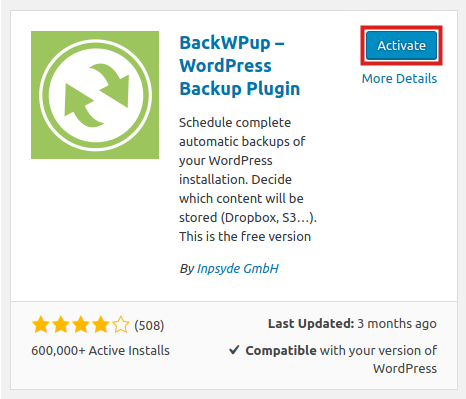
- Click the Install Now then Activate.
Create a Backup with BackWPup
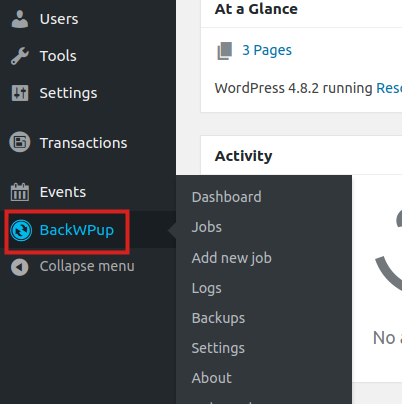
- Click BackWPup in the left menu.
- Click Add new job.
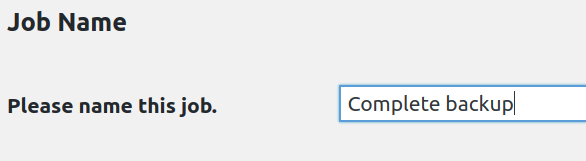
- Name your backup in the Job Name section.
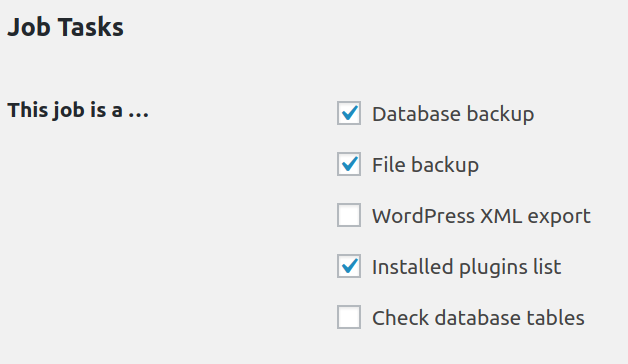
- Under Job Tasks, choose the backup you want to perform. Options are Database backup, File backup, WordPress XML export, Installed plugins list, and Check database tables. We recommend choosing Database backup and File Backup at the very least.
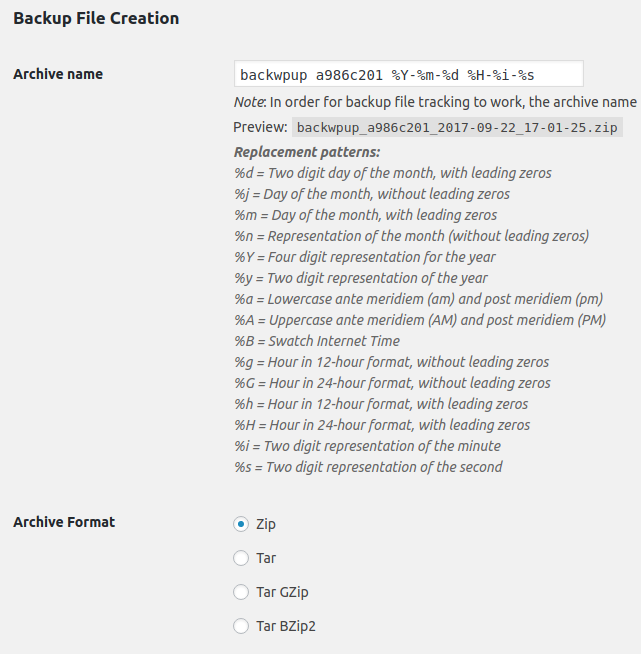
- Under Backup File Creation, change or customize the Archive name or format. In our tests, we used the default settings.
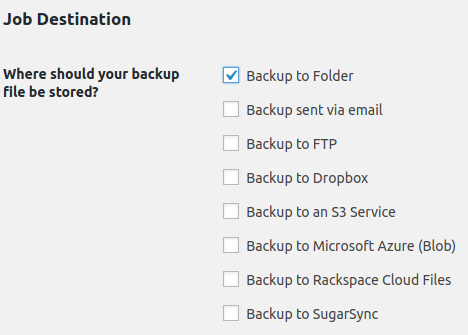
- Next, choose where you want your backup file stored under Job Destination. For this guide, we choose the Backup to Folder option.
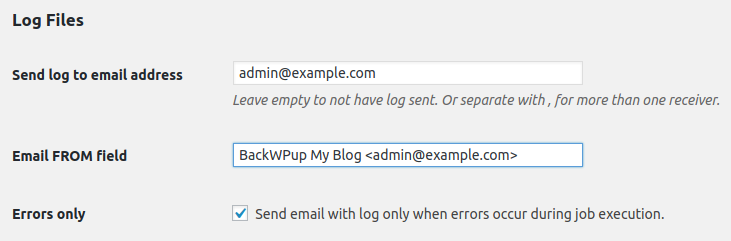
- To be notified of errors, enter an email address under Log Files.
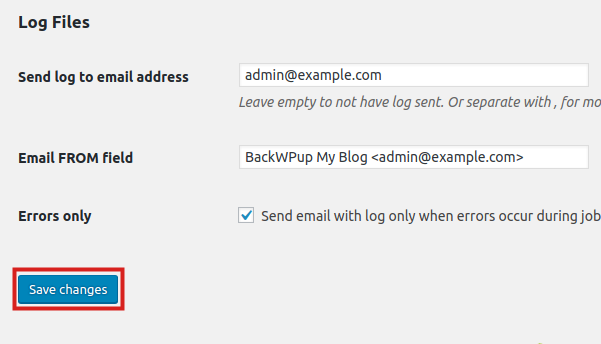
- Click Save changes to save the backup job.
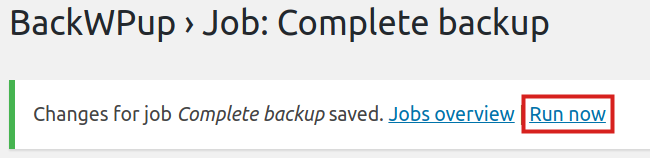
- You will then see a message stating the changes have been saved. Click Run now to backup your WordPress site.
This may take several minutes to complete, depending on the size of your site.
Schedule Backups with BackWPup
Of note, you will need to first create a backup before completing the steps below.
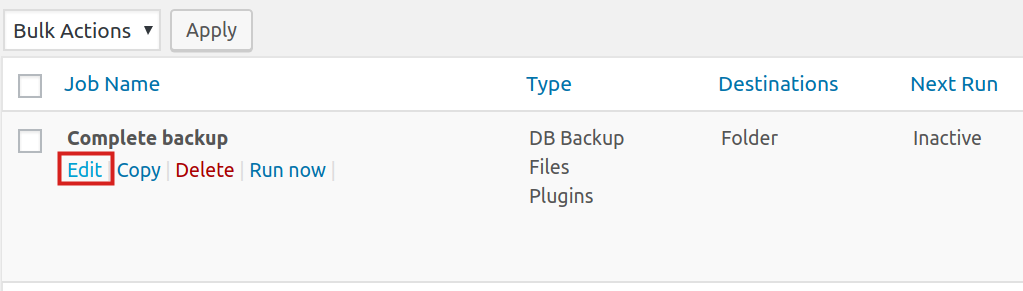
- Click BackWPup > Jobs in the left menu.
- Navigate to your backup and click Edit.
- You will see a summary of your Backup Job. Click the Schedule tab.
- Next to Start job select the “with WordPress cron” option.
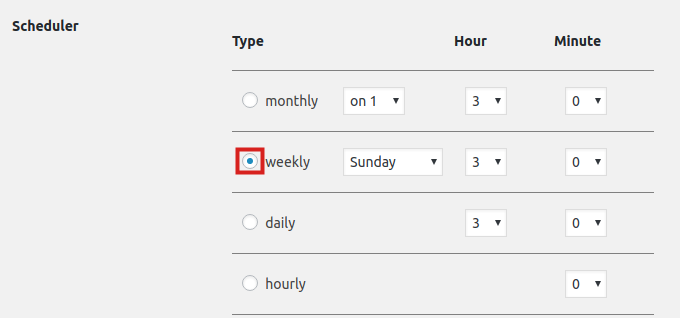
- Scroll down to the Scheduler section and choose your backup option. In this example, we are scheduling weekly WordPress Backups.
- Click the Save changes to schedule the backup.
- You will then see a message stating “Changes for job saved.”

If you would like to another plugin for backups, check out Backup & Restore Your Site With the WordPress Duplicator Plugin.
Learn more tips and tricks about WordPress backups to protect your website from risks!
