Search engine optimization (SEO) helps people find your organization and website among search engine results in Google, Bing, DuckDuckGo, etc. There are many important components to improving SEO:
- Adding descriptive meta data for search engine results to summarize pages
- Manually managing search engine information for your website
- Disavowing bad links from spam and x-rated websites
- Producing content with popular topics and keywords
- Schemas for search engine results
It’s a lot of work, especially when you’re new to the topic and don’t have actionable guidelines to walk you through related tasks. Fortunately, there is a WordPress SEO plugin that can do just that – All In One SEO Pack.
All In One SEO Pack is one of the most popular SEO plugins for WordPress today with over 2 million active installations. It assists with everything mentioned above and more with additional free and paid addons. Below we’ll cover:
- Installing All In One SEO Pack
- Social Meta information
- Creating a Robots.txt file
- Importer and Exporter options
- Creating an XML Sitemap
Ask how you can enhance your website performance with our Nginx-optimized WordPress Hosting.
Installing the All In One SEO Pack Plugin
- Log in to your WordPress dashboard.
- Install and activate All In One SEO Pack using your WordPress dashboard or WP-CLI.
- On the left, select All In One SEO.
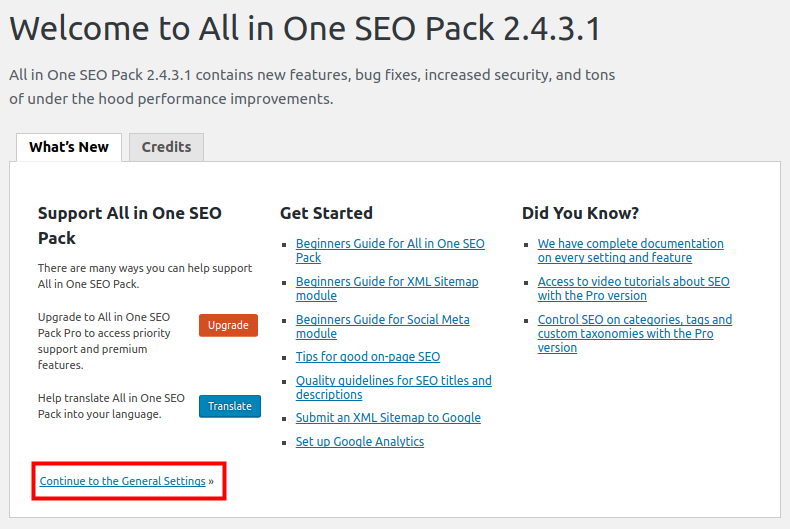
- You’ll then see a “Welcome to All In One SEO Pack” message and some information to help you get started. Select Continue to the General Settings to configure All In One SEO Pack.
Set Social Meta Information
One of the first things you should do is set the Social Meta, also known as Open Graph, for your WordPress site. Social meta information affects how your pages and posts appear, or preview, when shared on social media platforms including Facebook or Twitter, and communications software like Slack and Mattermost. Along with proactive social media management, this is a great way to increase the number of interactions your website receives.
- Log into your WordPress dashboard.
- On the left, hover over All In One SEO and select Feature Manager.
- You will see the Social Meta feature listed. Click the Activate button. You will then see a message stating “All In One SEO Pack Options Updated.”
- On the left under All In One SEO, select the new Social Meta option.
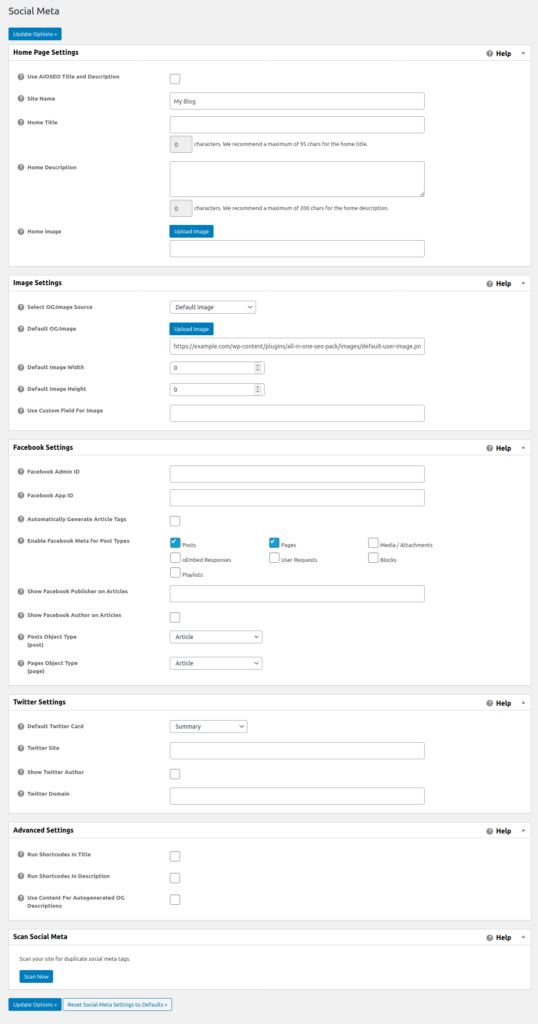
- You will then be on the Social Meta settings page. Choose your options as needed. A description of the available options provided by All In One SEO Pack can be referenced below these steps.
- At the bottom, select Update Options. You are finished when you see a message stating “All In One SEO Pack Options Updated.”
Breakdown of all Available Settings
Home Page Settings
| Use AIOSEO Title and Description | Checking this box will use the Home Title and Home Description set in All In One SEO Pack, General Settings as the Open Graph title and description for your home page. |
| Site Name | The Site Name is the name that is used to identify your website. |
| Home Title | The Home Title is the Open Graph title for your home page. |
| Home Description | The Home Description is the Open Graph description for your home page. |
| Home Image | The Home Image is the Open Graph image for your home page. |
Image Settings
| Select OG:Image Source | This option lets you choose which image will be displayed by default for the Open Graph image. You may override this on individual posts. |
| Default OG:Image | This option sets a default image that can be used for the Open Graph image. You can upload an image, select an image from your Media Library or paste the URL of an image here. |
| Default Image Width | This option lets you set a default width for your images, where unspecified. |
| Default Image Height | This option lets you set a default height for your images, where unspecified. |
| Use Custom Field For Image | Enter the name of a custom field (or multiple field names separated by commas) to use that field to specify the Open Graph image on Pages or Posts. |
Facebook Settings
| Facebook Admin ID | Enter your Facebook Admin ID here. You can enter multiple IDs separated by a comma. You can look up your Facebook ID using this tool https://findmyfbid.com/ |
| Facebook App ID | Enter your Facebook App ID here. Information about how to get your Facebook App ID can be found at https://developers.facebook.com/docs/apps/register |
| Automatically Generate Article Tags | Automatically generate article tags for Facebook type article when not provided. |
| Enable Facebook Meta for Post Types | Select which Post Types you want to use All In One SEO Pack to set Open Graph meta values for. |
| Show Facebook Publisher on Articles | Link articles to the Facebook page associated with your website. |
| Show Facebook Author on Articles | Allows your authors to be identified by their Facebook pages as content authors on the Open Graph meta for their articles. |
| Posts Object Type (post) | Choose a default value that best describes the content of your post type. |
| Pages Object Type (page) | Choose a default value that best describes the content of your page type. |
Twitter Settings
| Default Twitter Card | Select the default type of Twitter Card to display. |
| Twitter Site | Enter the Twitter username associated with your website here. |
| Show Twitter Author | Allows your authors to be identified by their Twitter usernames as content creators on the Twitter cards for their posts. |
| Twitter Domain | Enter the name of your website here. |
Advanced Settings
| Run Shortcodes In Title | Run shortcodes that appear in social title meta tags. |
| Run Shortcodes In Description | Run shortcodes that appear in social description meta tags. |
| Use Content For Autogenerated OG Descriptions | This option will auto generate your Open Graph descriptions from your post content instead of your post excerpt. WooCommerce users should read the documentation regarding this setting. |
Scan Social Meta
| Scan Now | Scan your site for duplicate social meta tags. |
Create a Robots.txt File
Every website can benefit from a robots.txt file. This helps you control what content is being crawled by search engines and how often to improve your site SEO rankings.
First, we will walk you through installing the Robots.txt feature, then show you how to update the robots.txt file. For more information on robots.txt files, see our article on how to stop search engines from crawling your website.
- Log into your WordPress dashboard.
- On the left under All In One SEO, select Feature Manager.
- You will see Robots.txt listed. Click the Activate button.
- On the left under All In One SEO, click the Robots.txt link.
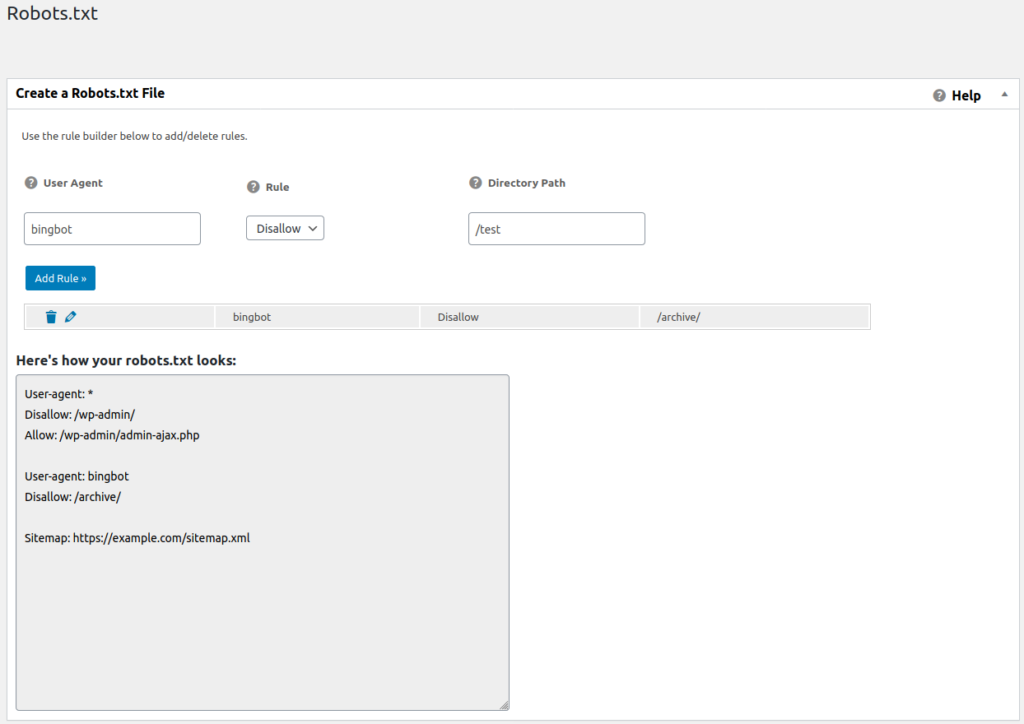
- You will be forwarded to a section where you can create a Robots.txt file. Create new rules as needed:
Rule Type – Choose to Allow or Block a bot from crawling your site
User Agent – Enter user agents to allow or block. Popular search engines you typically want to allow include Googlebot, Yahoo! Slurp, bingbot. Commonly blocked agents include AhrefsBot, Baiduspider, Ezooms, MJ12bot, and YandexBot.
Directory Path – Enter the path to the directory you want to block or allow access to. - Click Add Rule to add the new rule to the robots.txt file.
- After you add a rule to your robots.txt file, you can select the trash or edit button beside it to remove or modify it.
Importer & Exporter Feature
Web developers charged with maintaining multiple websites can quickly migrate All In One SEO Pack settings between separate WordPress sites with the Importer & Exporter feature. This way you can easily save your settings for later use or import your settings into other websites to get them optimized faster. First, we will show you how to activate the “Importer & Exporter” feature, then walk you through exporting and importing your All In One SEO Pack settings.
- Log into your WordPress dashboard.
- On the left under All In One SEO, select Feature Manager.
- You will then see the Importer & Exporter feature listed, click the Activate button to enable it.
Export All In One SEO Pack Settings
Now that you have activated the Importer & Exporter feature, we will show you how to export your All In One SEO Pack settings.
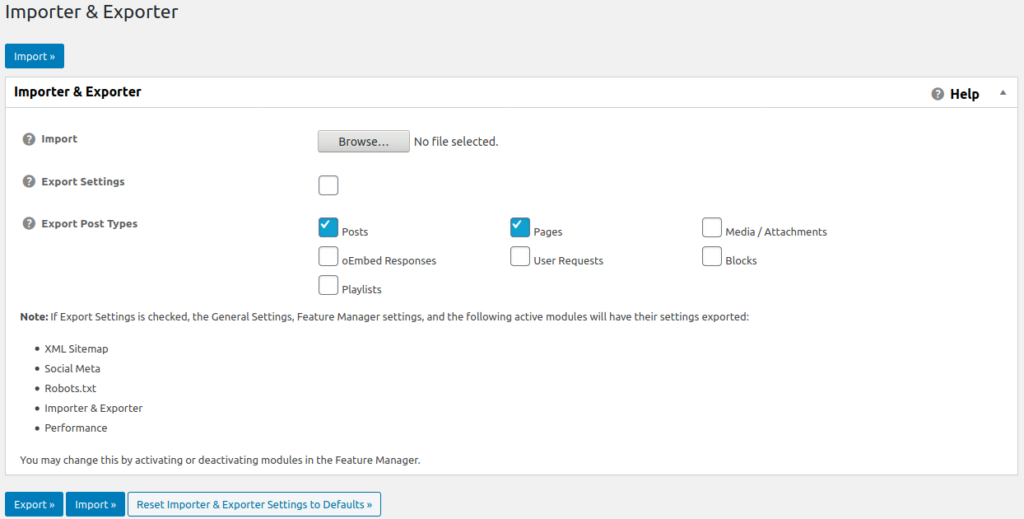
- In your WordPress dashboard, hover your cursor over All In One SEO and select Importer & Exporter.
- For Export Settings, choose if you want to export your General Settings and Post Data.
- For Export Post Types, choose which post types you want to export. The options available will differ based on your specific site setup and installed plugins.
- Once you have chosen your options, click the Export button to download the All In One SEO Pack settings to your local workstation. The file will be titled “settings_aioseop.ini”.
Import All In One SEO Pack Settings
- In your WordPress dashboard, hover your cursor over All In One SEO and select Importer & Exporter.
- Besides Import, select Choose File button.
- Select your All In One SEO Pack settings file, then Open.
- Select the Import button. You are finished when you see a message stating “All In One SEO Pack Options Updated.”
Creating an XML Sitemap
An XML sitemap is a document that helps Google and other major search engines better understand your website while crawling it. Sitemaps are a protocol that allows the webmaster for a website to inform Google and other major search engines about URLs on a website that are available for crawling. For more information, see our full article What is a XML sitemap.
- Click the All in One SEO option in your WordPress Dashboard menu.
- Click the Feature Manager option in the All in One SEO section.
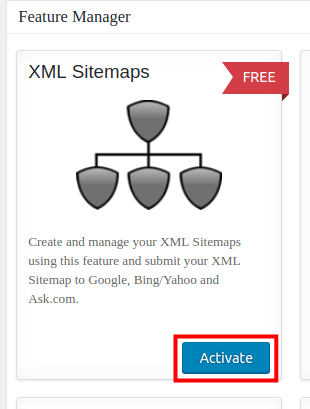
- You will see the XML Sitemaps option, click the Activate button.
- Click the XML Sitemap link in the All in One SEO section of the navigation menu.

- You can then choose your sitemap settings as needed. The table below shows descriptions of the available options provided by All in One SEO plugin.
Option Description Sitemap Status Access your sitemap or the status of your sitemap. Filename Prefix Specifies the name of your sitemap file. This will default to ‘sitemap’. Schedule Updates Notify search engines based on the selected schedule, and also update static sitemap daily if in use. (this uses WP-Cron, so make sure this is working properly on your server as well) Enable Sitemap Indexes Organize sitemap entries into distinct files in your sitemap. Enable this only if your sitemap contains over 50,000 URLs or the file is over 5MB in size. Post Types Select which Post Types appear in your sitemap. Taxonomies Select which taxonomy archives appear in your sitemap. Include Date Archive Pages Include Date Archives in your sitemap. Include Author Pages Include Author Archives in your sitemap. Exclude Images Exclude Images in your sitemap. Create Compressed Sitemap Create a compressed sitemap file in .xml.gz format. Link From Virtual Robots.txt Places a link to your Sitemap.xml into your virtual Robots.txt file. Dynamically Generate Sitemap Dynamically creates the XML sitemap instead of using a static file. Additional Pages Enter information below for any additional links for your sitemap not already managed through WordPress. Excluded Items Excluded Categories Entries from these categories will be excluded from the sitemap. Excluded Pages Use page slugs or page IDs, separated by commas, to exclude pages from the sitemap. Priorities Homepage Manually set the priority of your homepage. Posts Manually set the priority of your posts. Taxonomies Manually set the priority of your taxonomies. Frequencies Homepage Manually set the frequency of your homepage. Posts Manually set the frequency of your posts. Taxonomies Manually set the frequency of your taxonomies. - Click the Update Sitemap button to save your changes. You are finished when you see a message stating “All in One SEO Options Updated.”
Want to do more for your SEO? Check out WordPress SEO: Complete Beginner Guide.
Become a master of WordPress plugins! Protect, optimize, secure, and expand the functionality of your website easily with the help of WordPress plugins!

Very much helpful.
Thanks! Glad it was useful to you.