The WordPress front page can consist of a header image, a post or page, and then a footer section at the bottom of the page. The default footer section is found within the widgets section of WordPress. Note that footer positioning and appearance may vary based on the theme that you are using.
The following tutorial will walk you the steps to add a footer to your WordPress site through the Widgets section in the Dashboard and the Customize section using the Twenty-twenty theme.
Need a new home for your WordPress site? Check our BoldGrid recommended WordPress Hosting solutions!
How to Add a Footer using Widgets in the WordPress Administrator Dashboard
- Login to the WordPress Administrator Dashboard.
-
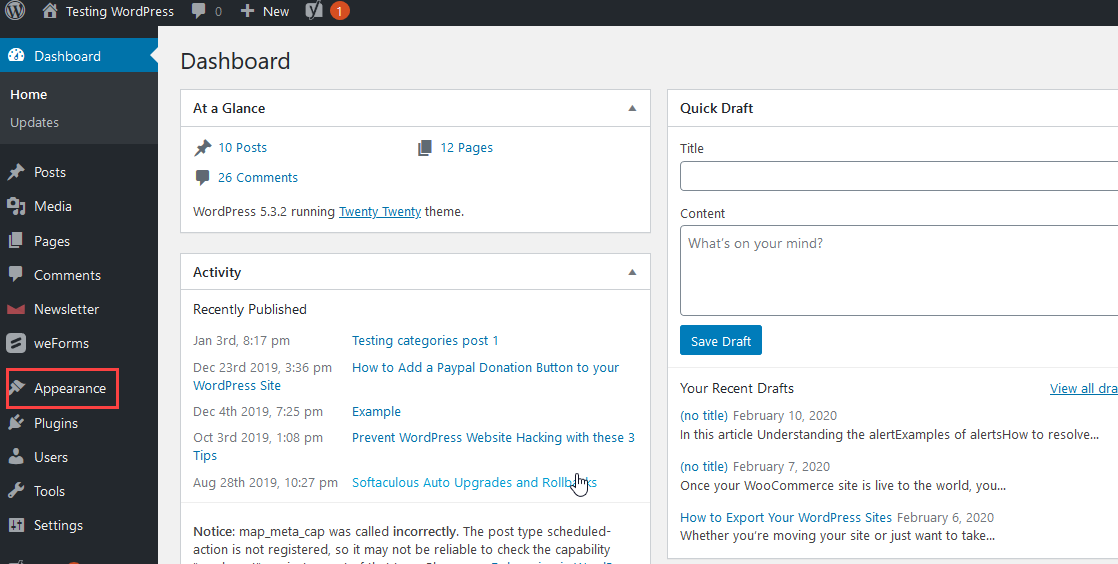
 Click on Appearance
-
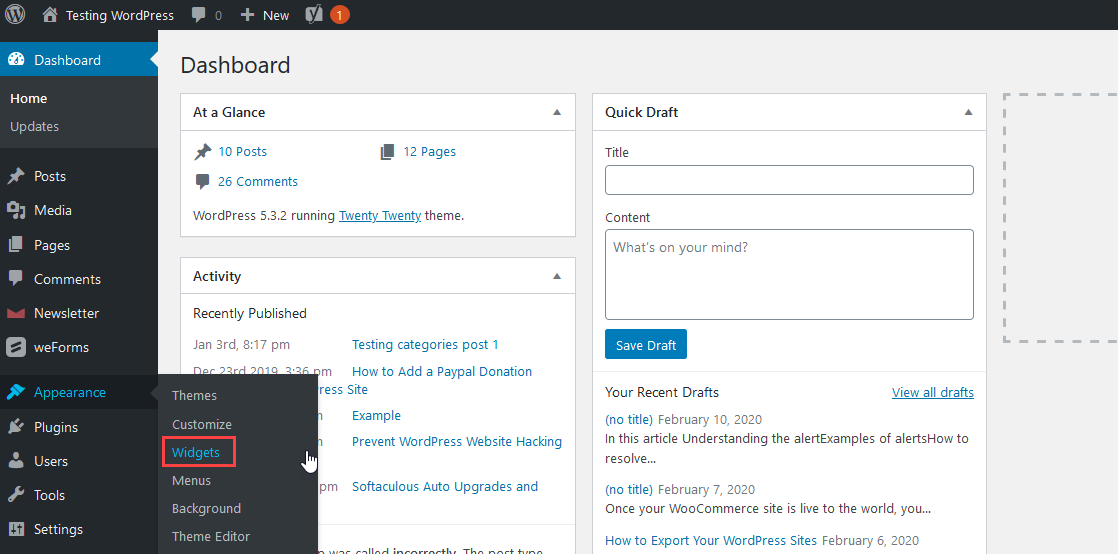
 Click on Widgets
-
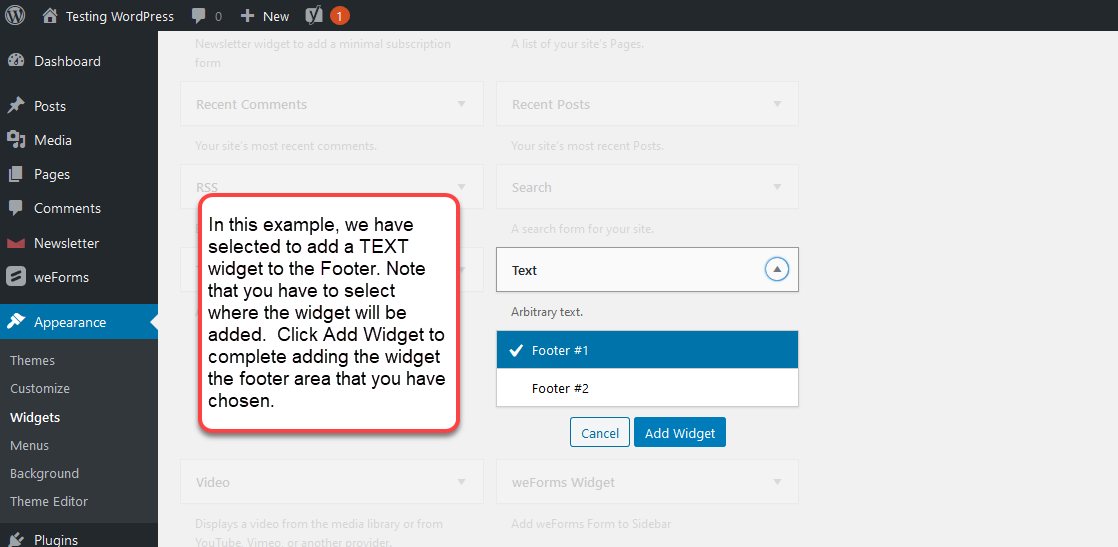
 When you look at the Widgets page you will see that the widgets are organized into two groups: Available Widgets and Inactive Widgets. Depending on the theme you may already see the footers listed in the right column. This example is using the Text widget as an example. You can select a widget of your choice from the Available widgets if you’re not following this example. When the arrow is click in the widget there is a preset choice of footers that you can select. This screenshot shows footer #1 as being selected. This places the text on the left side of the page.
-
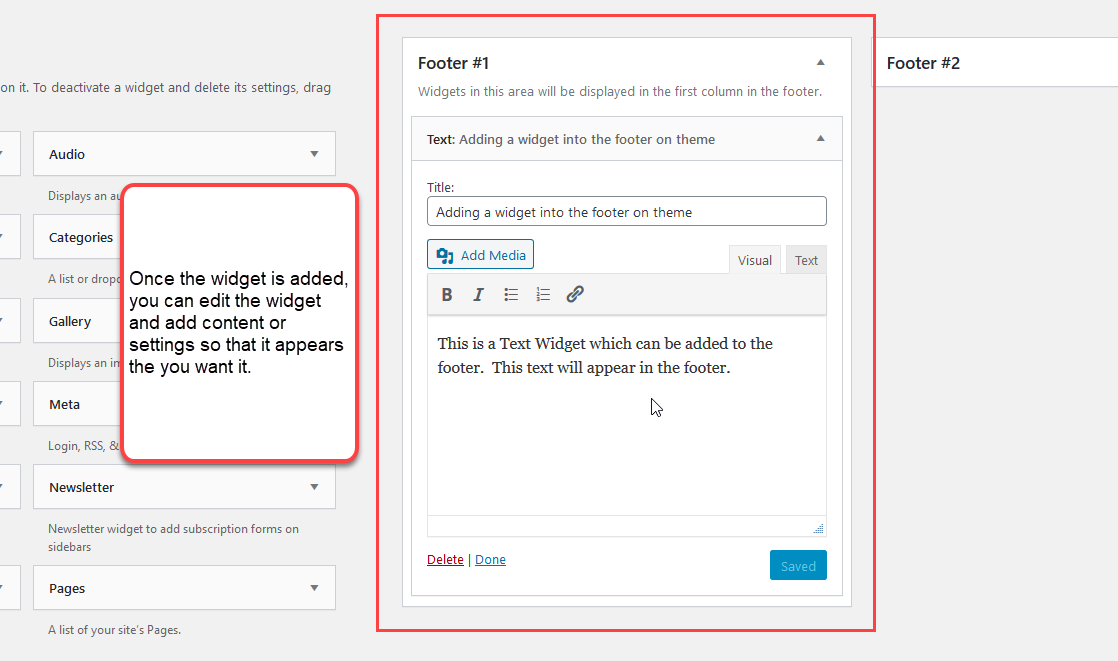
 Once the widget position has been selected, you can edit it to add content. Since this is a Text widget, you will be adding text to it. You can title the text widget and then add text or other media to it. Click on the blue Save button once you’re done adding content.
-
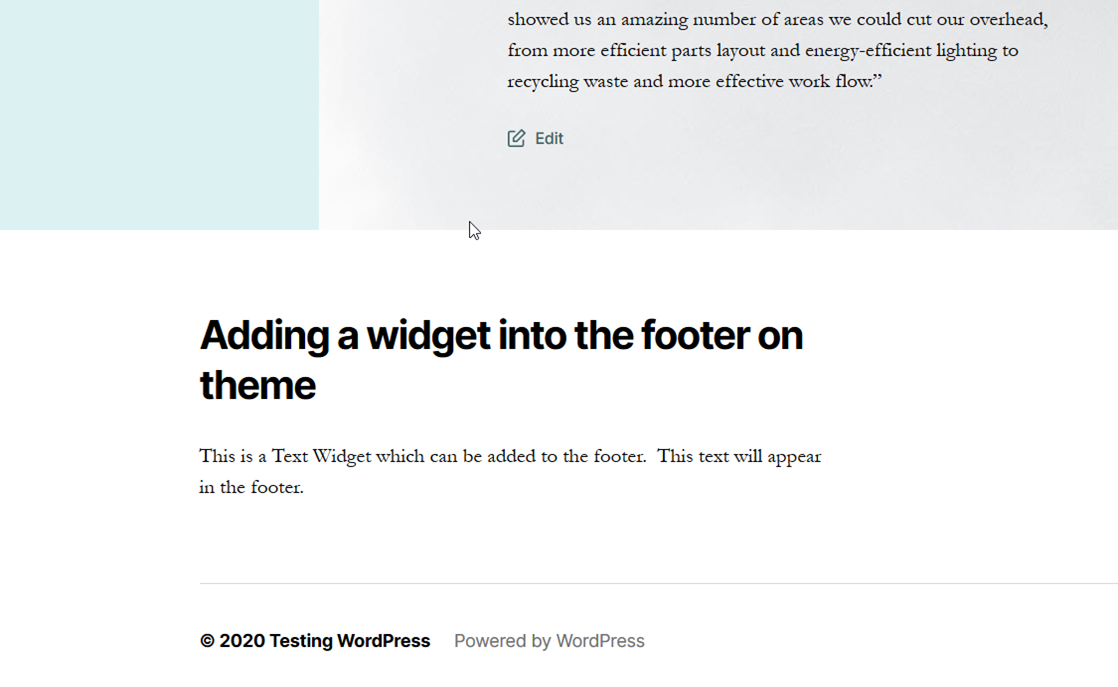
 You can view the widget that was added by visiting the site. The screenshot shows the added footer widget from the Administrator Dashboard.
Adding a Footer Using Customize
- There are few ways to get into the Customize option to make changes to the theme. To make changes you will need to log in as an Administrator. First, Login to the Administrator. You can find the Customize option in the Appearance section of the main menu, or you can click on the domain name for your site in the top left corner. You will see the site and a Customize link appear in the top left corner. Click on Customize to proceed.
-
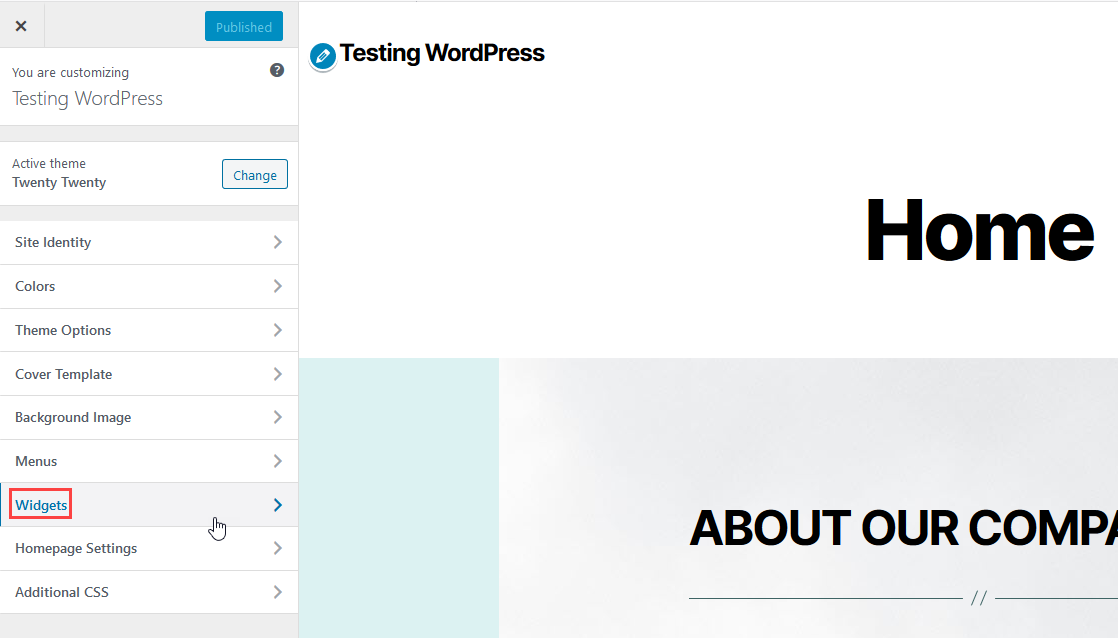
 Click on Widgets in the menu.
-
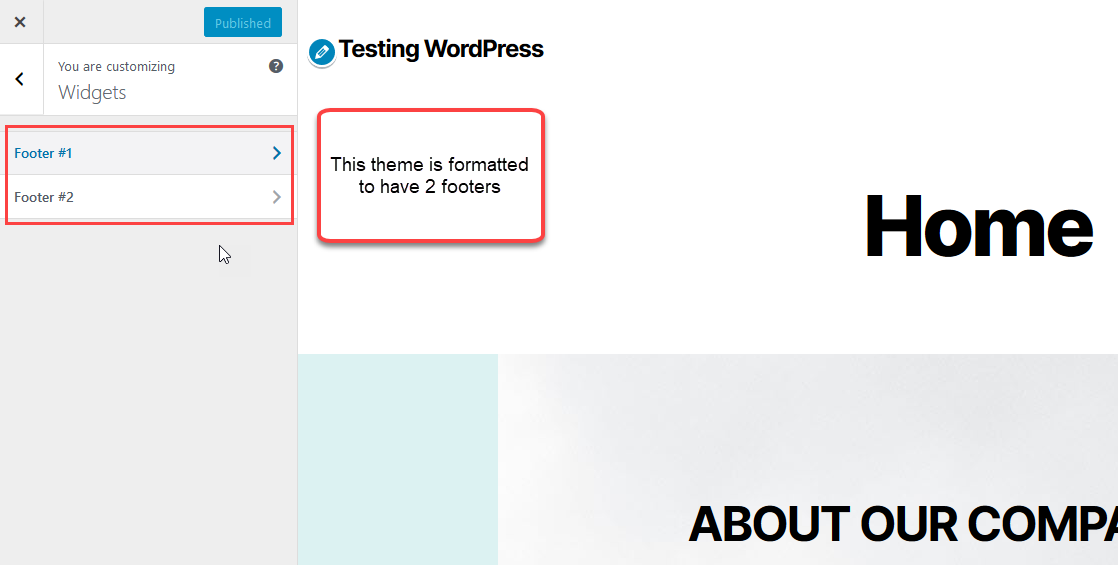
 Click on the Footer that you want to use. The Twenty Twenty theme has two preset footers.
-
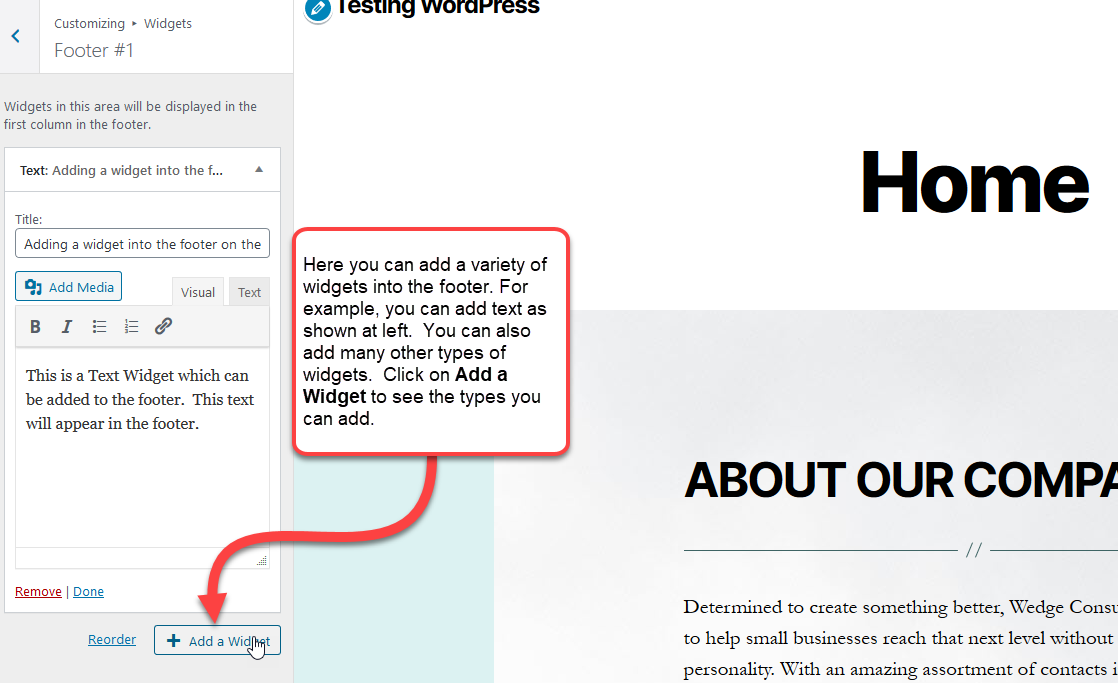
 Click on the Add a Footer button.
-
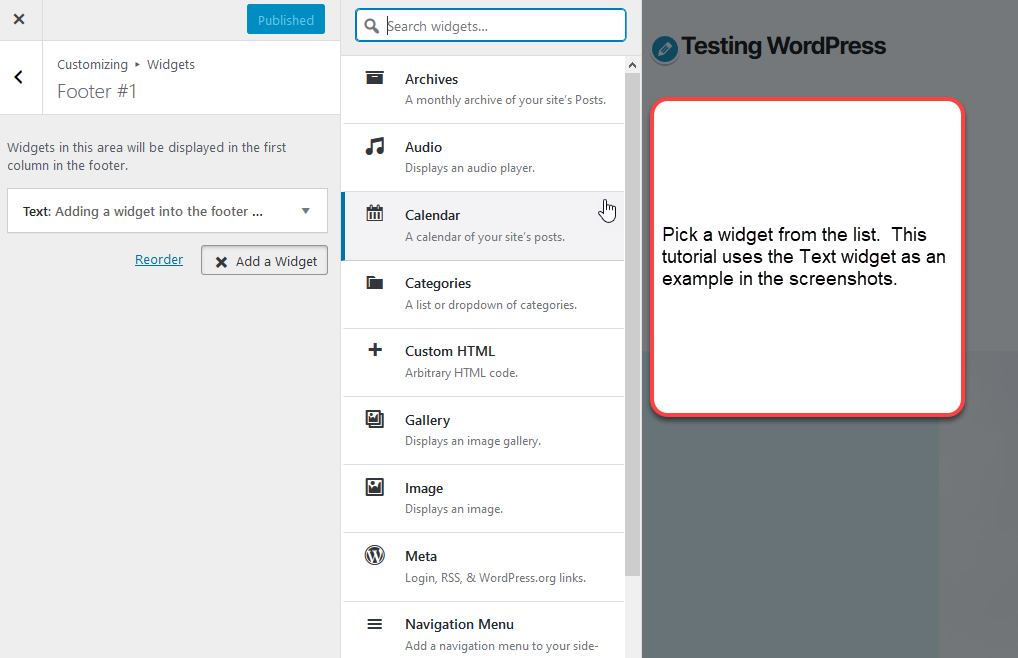
 You will a Select the widget that you want to use for your footer. This tutorial uses the Text widget.
-
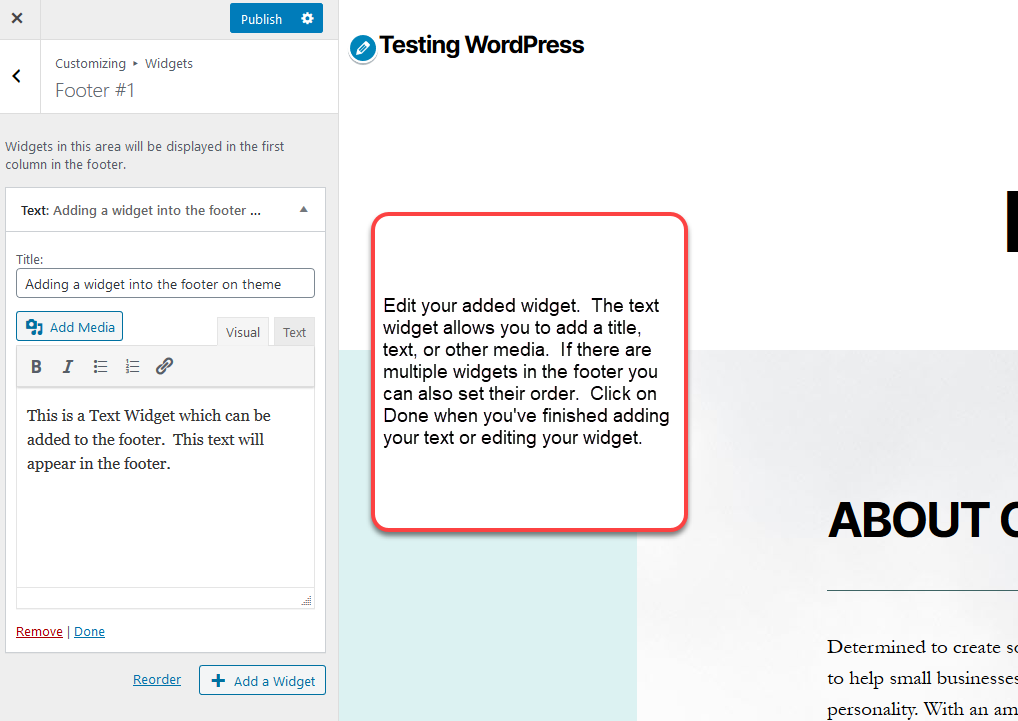
 Edit your added widget. The text widget allows you to add a title, text, or other media. If there are multiple widgets in the footer you can also set their order. Click on Done when you’ve finished adding your text or editing your widget.
-
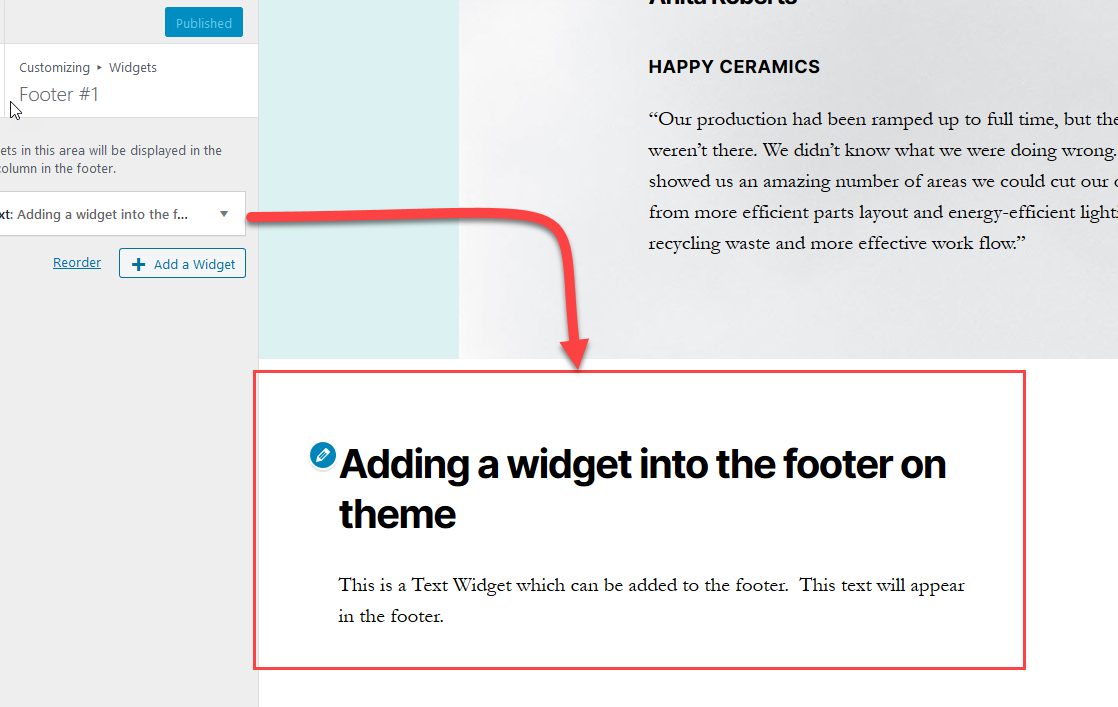
 To save your changes you will need to click on the Publish button. You can then scroll to the bottom of the page to see the added footer.
Congratulations! You now know how to add a footer in WordPress. You can learn more about how to use WordPress by going to our WordPress Hosting Product Guide.


2022, this still works! Thank you!
We’re happy it helped you!
Thanks a lot
Glad we could help!
can you get a footer that doesn’t require a plan upgrade??
You should be able to create a footer with any InMotion plan. Are you having trouble or getting any errors when working with the footer?
What if the theme I began with does not have a footer widget?
You can use a WordPress plugin to add one or edit the footer.php file manually.
How do you get the widget to be longer length wise, right now mine is tall and short and I would like it to be longer
Hello Allyson,
Thank you for your question. To do this you will need to modify the CSS for your theme. Look for the section in the widget CSS that pertains to “width” and modify that value to increase the width. This can be done by opening the style.css file in your theme.
Best Regards,
Alyssa K.
Thanks you so much
We’re glad we could help.