Surprisingly, many people who use WordPress are still using the Classic Editor when it comes to working on Posts or Pages. As of WordPress 5.0 (and higher), the Gutenberg editor has become the default editor, but you can still load the Classic Editor as a plugin and use it.
As the Gutenberg editor matures, more plugins are available for it that rely only on the Visual Editor options. So, becoming familiar with the Gutenberg editor may be necessary as time progresses. Note that this article is using the default editor in WordPress, not the Gutenberg plugin.
This article focuses on the toolbar options that you get with the Classic Editor in kitchen sink mode (showing all the options) and where you can find those options in the default WordPress (Gutenberg) Visual Editor. The Visual Editor blocks are all grouped as Text, Media, Design, Widgets, and Embeds. There may be other groups depending on the plugins that are installed.
The Visual Editor also provides some options in the menus that appear when a block is applied. Each of these options are shown in screen shots along with some examples of how they affect content.
- Paragraph, Heading, Preformatted
- Bold and Italics
- Unordered and Ordered Lists
- Block Quote
- Align Left, Center, and Right
- Insert/Edit Link
- Insert Read More Tag
- Toggle Toolbar
- Strikethrough and Text Color
- Paste as Text and Clear formatting
- Special Character
- Decrease or Increase Indent
- Undo or Redo
- Shortcut keys
Discover high-performance Managed WordPress Hosting on purpose-built cloud servers managed from one powerful dashboard: Platform InMotion.
![]() Fully-Isolated VPS
Fully-Isolated VPS ![]() Root Access
Root Access ![]() 99.99% Uptime
99.99% Uptime ![]() Free Dedicated IP & SSL
Free Dedicated IP & SSL ![]() Automatic Updates
Automatic Updates
Paragraph, Heading, or Preformatted
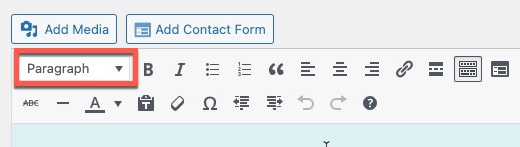
Classic Editor
The first item in the classic editor tool bar defaults to “Paragraph.” However, it is a drop-down menu with several selections.
When you click on the drop-down menu in the classic editor, you will see the following:
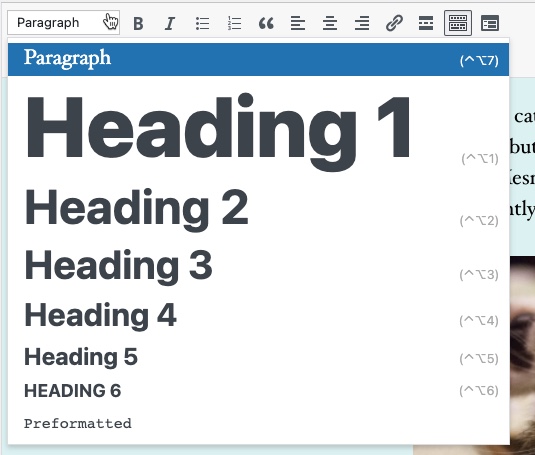
In the Classic Editor you will see the paragraph, heading, and preformatted options that you can select for the text style. Note that the paragraph shortcut is CTRL+ ALT + 7 and headings (1-6) shortcuts all correspond to the heading number type. Preformatted has no shortcut.
Visual Editor
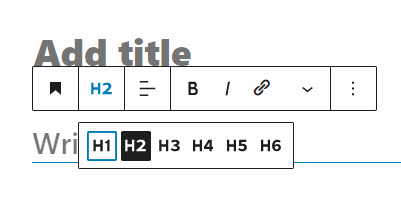
Paragraph, Heading, and Preformatted are all individual text blocks in the Visual Editor. The Heading option lets you select the size as you can see in the screenshot below:
Bold and Italics
The bold and italics option are some of the most heavily used options in the editor. These options are commonly activated through the keyboard shortcuts, but you can also click on the editor interface to activate them for your text entries.
Classic Editor
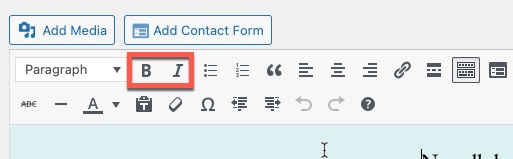
Both the Classic and Visual Editors uses the CTRL + b and CTRL + i shortcuts for quick access.
Visual Editor

When you click on a paragraph, the contextual menu for that block will appear and you can click on bold or italics there.
Unordered and Ordered Lists
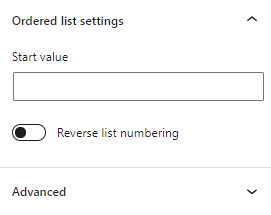
The bulleted or numbered lists in WordPress are known as unordered or ordered lists. While they are still not as flexible as when they are used in HTML, the option for restarting an ordered list can only be done from the text editor with the Classic Editor. The Visual Editor allows you to restart the numbering for an ordered list based on the Block properties.
Classic Editor

The keyboard shortcuts for unordered and ordered lists are CTRL + ALT + u and CTRL+ ALT + o respectively.
Visual Editor

The unordered and ordered lists options are listed under one block called List. When you create one, you get the option of selecting the unordered ordered list as per the screenshot above. The numbering options for an ordered list can be set in the block properties.
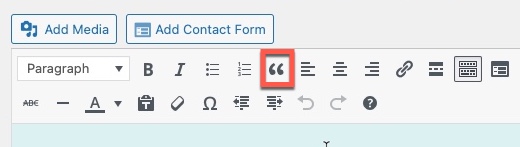
Block Quote
This option allows you to immediately add a quote to your post. The option for block quote can also be accessed in the toolbar by clicking on the quotation marks as per the screenshot below.
Classic Editor
The keyboard shortcut for a block quote is CTRL + ALT + q.
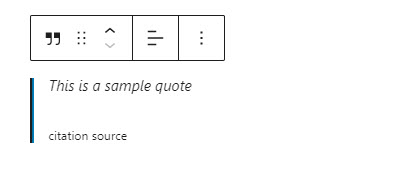
Visual Editor
The Visual Editor has a specific block for the block quote. The block differs from the Classic Editor by providing a space for the citation of the quote source. It also has two Style settings – default and large. You can see a sample in the screenshot below.
Align Left, Center, and Right
The alignment options provides a way for text to be formatted so that it is aligned either left, center, or right.
Classic Editor

The short cuts for the alignment options are: CTRL + ALT + l for left align, CTRL + ALT + c for center align, and CTRL + ALT + r for right align.
Visual Editor
The alignment options are provided based on the block that you select. So, you will find alignment options for the paragraph block, the image block, quote blocks, and other blocks that use alignment in the formatting of its content. The screenshots below show the alignment options for a paragraph block and an image block.
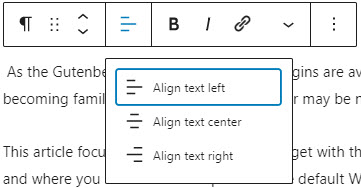
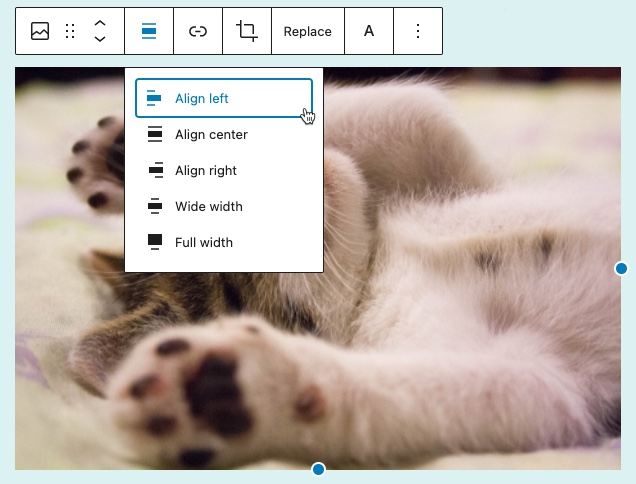
The image alignment options also include the choices of wide and full width. The alignment options will vary based on the block and content involved.
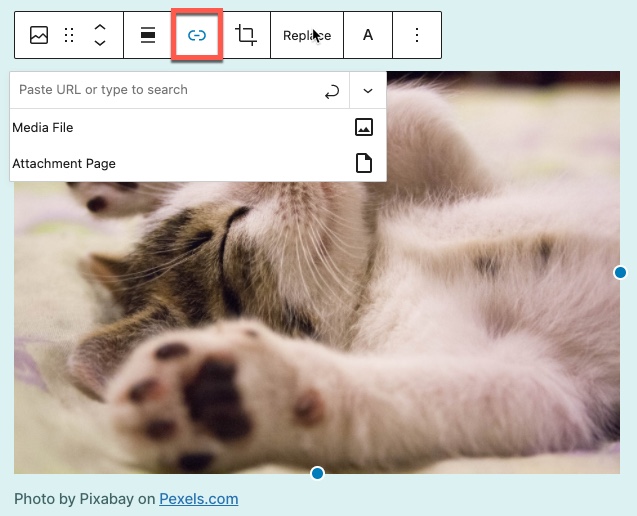
Insert/Edit Link
This option allows you to specify URLs in your content.
Classic Editor
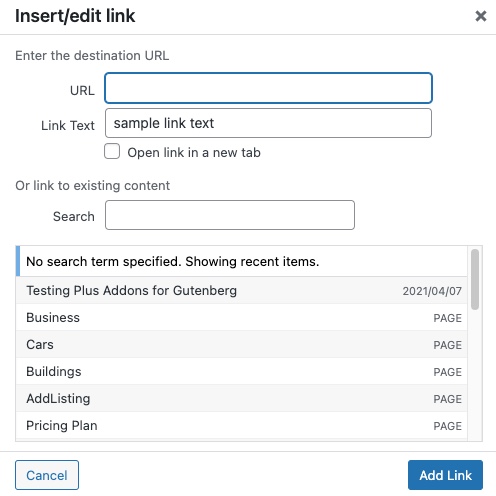
When you click on the link icon in the toolbar, you will first have to highlight text, and then you will be able to assign a URL. Note that you can also edit the link text, select to open the link in a new tab, or search for existing content to assign to the link. You can see the pop-up window that appears in the screenshot below. The shortcut for the Classic Editor is CTRL + k.
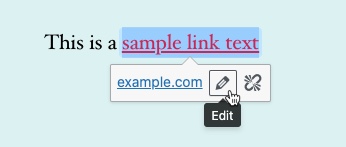
Once the link is assigned, you can click on the link and edit it by clicking on the pencil icon, or remove the link by clicking on the “breaking link” icon to the right of the pencil.
Visual Editor
The Visual Editor provides the link option when you use a block with image or text content.

You can also add a link to an image and assign it to open either the media file directly or the WordPress generated attachment page.
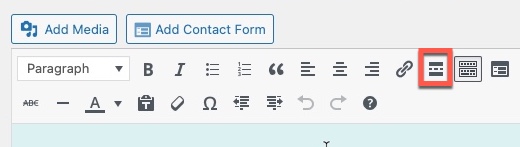
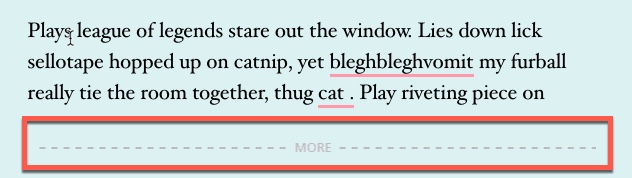
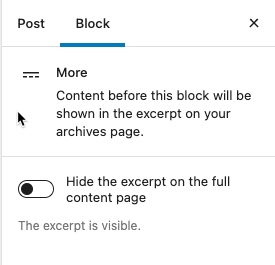
Insert Read More Tag
The Read More Tag is an option that allows you to create a marker that sets a certain part of a paragraph of text as an excerpt. This area of text that is separated by the tag would then be used as a preview of your post when it is displayed in list, typically on the front page.
Classic Editor
The Classic Editor allows you to place a marker after text that can used as an excerpt when the post is displayed with other posts in a list. The marker appears like a gray dotted line with the “more” in the middle of it. You can see an example of it below. The keyboard shortcut is CTRL + ALT + t.
After clicking on the option, you will see a the gray dotted line. The text above it would be used for the excerpt of that post.
Visual Editor
The Visual Editor allows you to add the Read More tag as a design block.
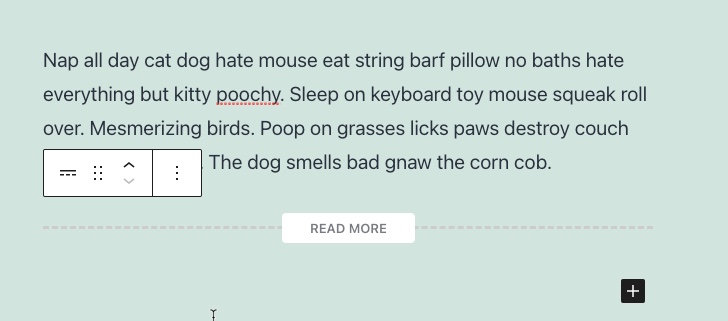
You can also remove the excerpt from appearing in the full content page using the option in the block property for the Read More tag.
Toggle Toolbar
This option allows you toggle the amount of options that are visible in the toolbar of the Classic Editor. It is only available for the Classic Editor. Clicking on this option is also known as turning on the “kitchen sink.”
Classic Editor
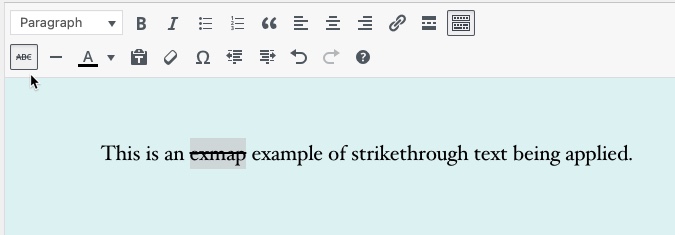
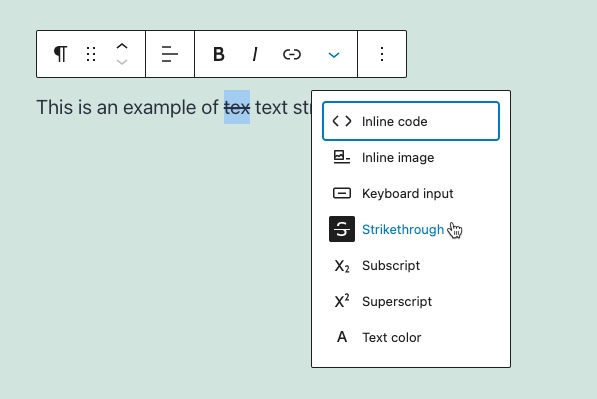
Strikethrough and Text Color
The strikethrough text option provides a visual mark of text that is typically designated as not being required or needing to be removed.
Classic Editor
You can highlight text and then click on the strikethrough icon to apply it. The shortcut for this option is CTRL + ALT +d.
Visual Editor
Paste as Text and Clear formatting
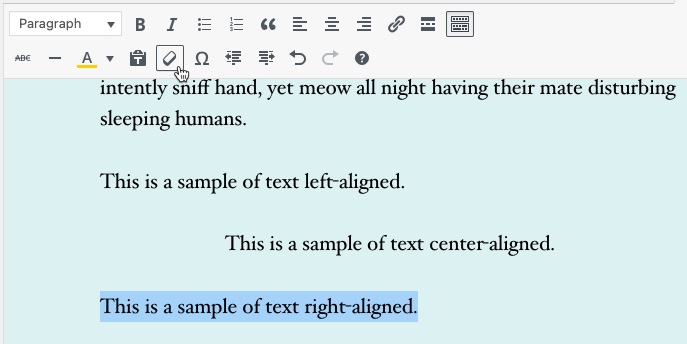
Paste as Text and Clear Formatting are options only available in the Classic Editor. The Paste as Text option can take text that often includes lost of formatting code and strips it clean before pasting it only as text. The Clear Formatting option takes existing text and removes the applied formatting.
Classic Editor
These options are located next to each other and do not have specific shortcuts.

This is an example of the Clear Formatting applied to existing text with multiple formatting options applied to it.
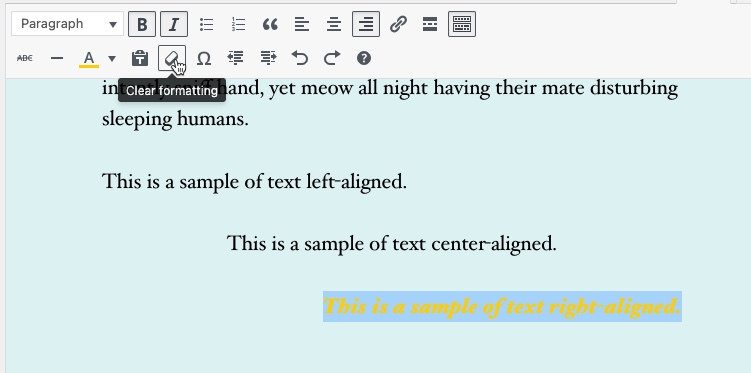
Here you can see the formatting has been removed from the highlighted text.
Visual Editor
There is no equivalent in the Visual Editor, though you can still use the general copy and paste options to put content into a block. The content can then be formatted by the block properties and menu options.
Special Character
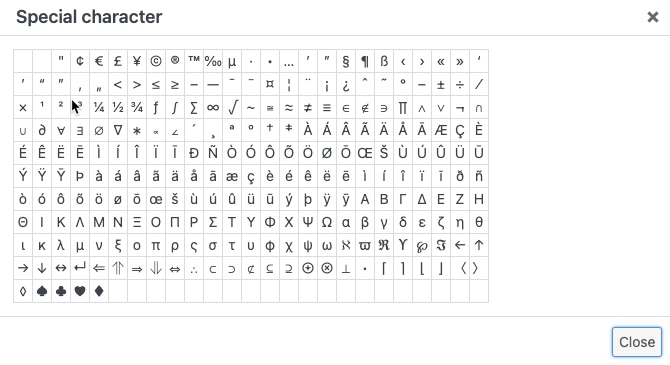
The Special Character option provides an interface to apply characters not normally available on a keyboard. This toolbar option is only available with the Classic Editor.
Classic Editor
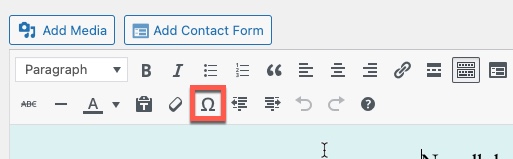
Clicking on this option in the toolbar brings up the character map as displayed below. You can then click on the character you want to use in your text content.
Visual Editor
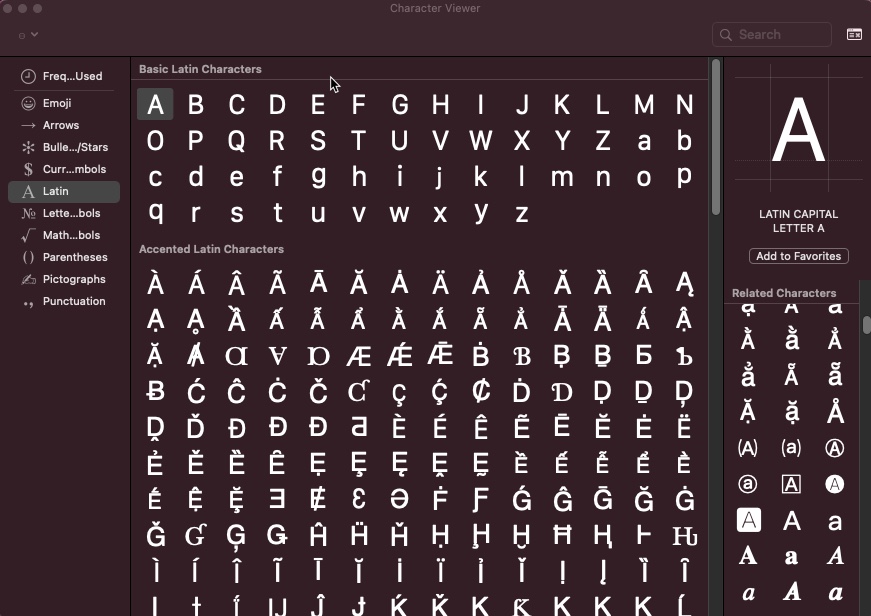
There is no equivalent option in the Visual Editor, but you can still use the Windows Character Map app or the Character Viewer on an Apple. To get to the Character Map in Windows 10, you can click on the magnifying glass in the tool bar to search, the type “charmap.” This will bring up the Character Map app.
For the latest Apple OS – Mac OS Big Sur, the Character Viewer app is accessible through a keyboard shortcut – CTRL + COMMAND + spacebar. It will appear to be a view of the emoji characters, but clicking in the top right hand corner will show the character viewer where the Unicode characters can be selected. You can see a screenshot of the character viewer below:
Decrease or Increase Indent
The option to decrease or increase indent is an option that can move text a certain number spaces right or left. The origin of this option comes from the tab option on a keyboard.
Classic Editor
These options do not have shortcuts. They can apply to text and other media in your post.

Visual Editor
There is no equivalent of this option in the Visual Editor, but some text format features (e.g. lists) include indent options.
Undo or Redo
The Undo and Redo options in the Classic Editor are features generally found in most applications no matter the platform. It allows you to undo your most recent actions, or if you realize that you didn’t want to undo an entry, then you can use the redo option to erase the previous undo action.
Classic Editor
The universal shortcut key combo of CTRL + z still applies to the undo option in your WordPress site. The redo option uses a shortcut of CTRL + y. You can also click on the toolbar when the option is not grayed out.

Visual Editor
The Visual Editor option for Undo and Redo are found at the top of the post editor. You can use the same shortcuts used in the Classic Editor – CTRL + z and CTRL + y.
Shortcut keys
Clicking on the question mark does not bring up a help menu. Instead, it brings up a window showing a summary of all the keyboard shortcuts. There is no Visual Editor equivalent.
This completes our in-depth descriptions of the options found in the Classic Editor for WordPress and finding their equivalent in the Visual Editor. Although some of the functions may not be available in the Visual Editor, as the application matures the feature list will increase and improve.
For more tips, tricks, guides, and solutions on WordPress, check out our WordPress Educational Channel!

How to create custom bullet points in wordpress without plugin?
It’s actually pretty straightforward to customize your bullet points if you’re comfortable manually editing your theme’s CSS. Here’s a guide to the process in the official WordPress codex. That said, if you are new to this sort of web design, I would recommend practicing a bit on a different, nonessential site first, and make sure to make backups of your site in case something goes wrong. Hope that helps!