WooCommerce is a customizable, open-source eCommerce platform built on WordPress.
In this tutorial, you will learn how to install and uninstall the WooCommerce plugin within WordPress. Take the first steps to start building your online store.
- How to Install WooCommerce
- WooCommerce Setup Wizard
- How to Install WooCommerce Sample Data
- How to Uninstall WooCommerce
If you’re ready to start an eCommerce store, get up and running fast with a WooCommerce Hosting plan from InMotion.
How to Install WooCommerce
Congratulations on your arrival at the WooCommerce installation phase. After reading this section you will know how to install WooCommerce and go through the optional Setup Wizard.
Before you install WooCommerce you must have a functional WordPress installation. If you haven’t completed this step you must visit our full WordPress installation guide.
Installation of WooCommerce consists of two parts. The first part is necessary, the second part is optional but recommended.
Both of these steps will be explained in more detail below.
Installing the WooCommerce Plugin
- Log into WordPress Dashboard
- Click Plugins > Add New
- Search for WooCommerce
- Choose Install
Now you may begin working with WooCommerce immediately, or you can go through the optional Setup Wizard.
The WooCommerce Setup Wizard
The setup is a guided question and answer walk-through that will gather some information about your store and set up some default pages.
If you would like to go through the Setup Wizard click Let’s go. If you would like to go through the Setup Wizard later you can click Not right now.
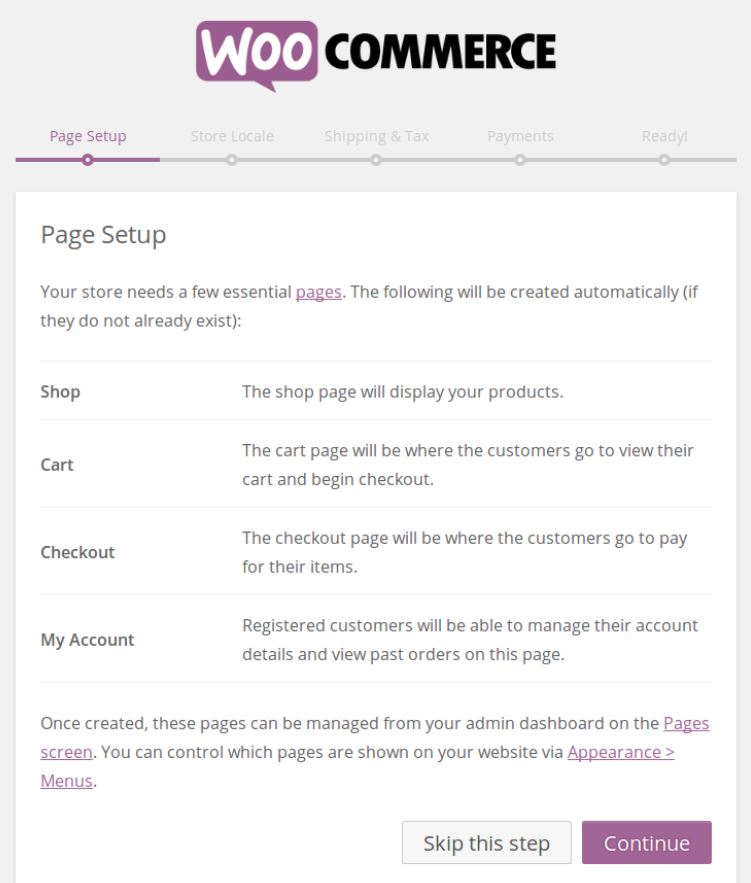
Page Setup
The first stage of the Setup Wizard is the Page Setup option. WooCommerce will check your WordPress installation for certain pages: Shop, Cart, Checkout, and My Account. If WooCommerce cannot find these pages it will create them automatically.
These pages will be used for exactly what they say. Shop will be used to display your products, Cart is where your customer can view items they have selected, Checkout is where your customer will finalize their purchase, and, finally, My Account is where your customer can access their account information.
You have the option to keep these pages set to their default configuration (as WooCommerce set them up), or you can make them specific to your needs.
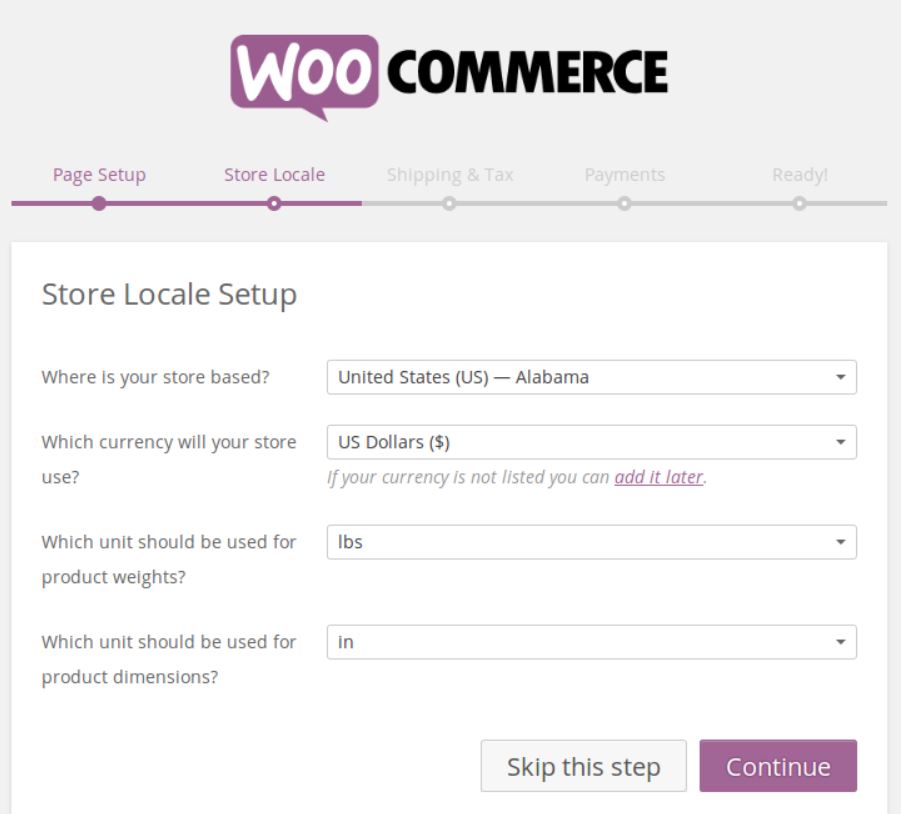
Store Locale
The Store Local section gathers some important information about your store. This information includes the geographical location of your store, which currency your store will use, and units of weight and physical dimensions for your products.
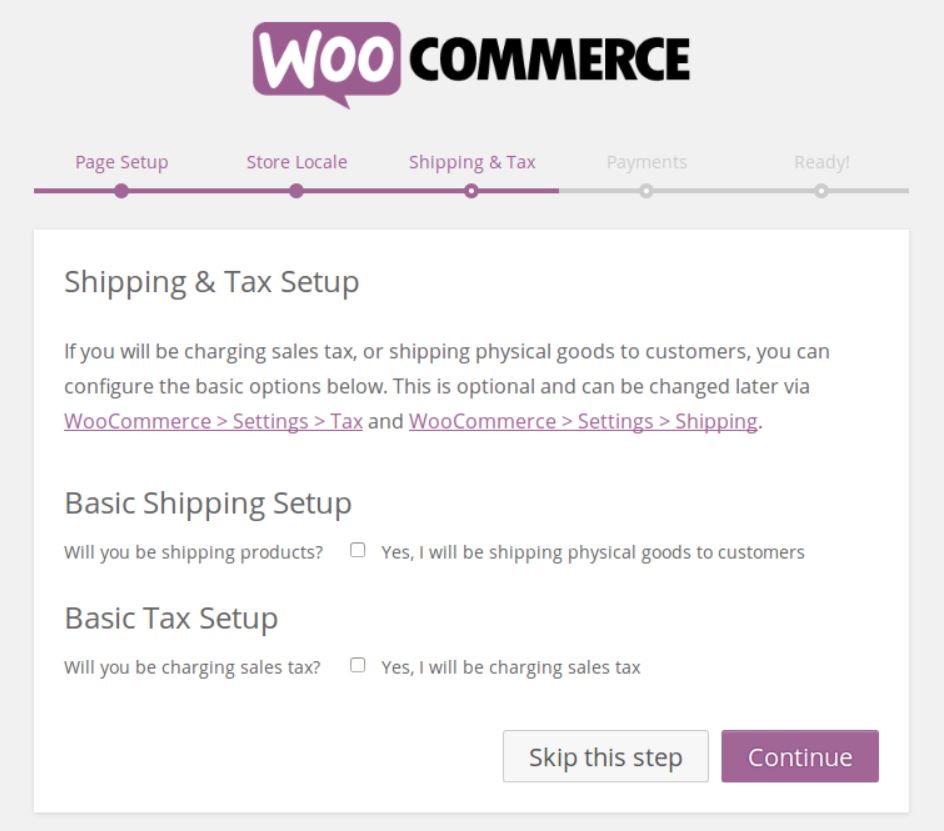
Shipping & Tax Setup
This screen will gather some information about shipping and taxes if you’re going to be shipping physical goods to customers or charging sales tax.
If you are going to be shipping physical goods to customers you can configure domestic and international shipping costs right here. Likewise, if you plan on charging sales tax you can pre-configure some options from here or Import starter tax rates based on your location. (Bear in mind these can be updated or changed later.)
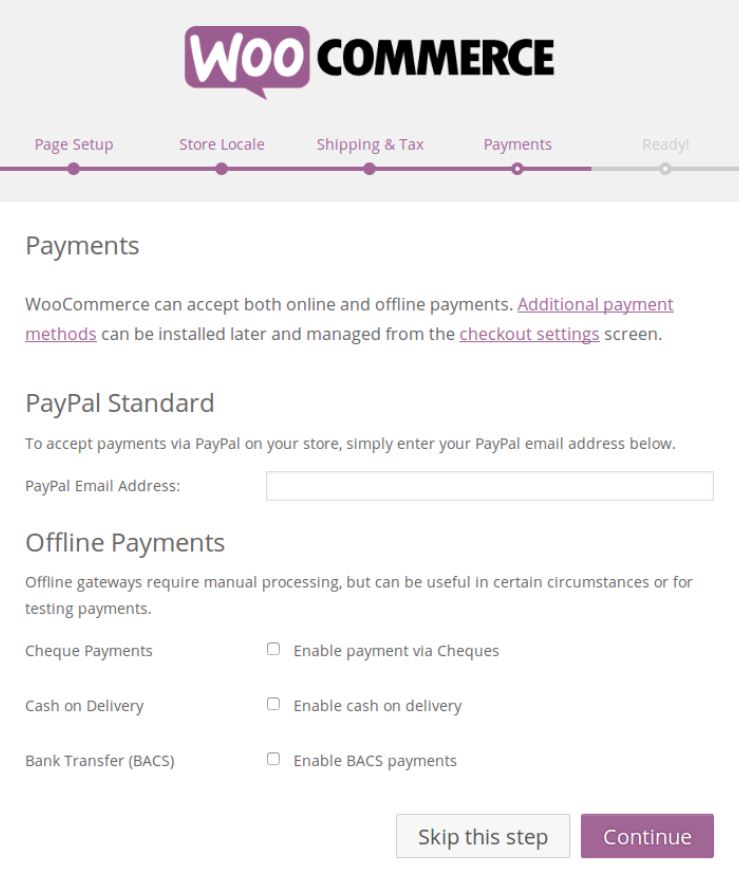
Payments
This is important because you’ll want to make sure you get paid for your products and/or labor. WooCommerce offers a variety of payment methods. You can start with accepting PayPal payments by simply putting in your PayPal Email Address. You can also choose to enable offline payments or configure them later.
When choosing the payment methods you’ll accept through your store, you’ll need to have accounts with those same payment methods to receive your funds. For example, if you choose PayPal as a payment method, you’ll need a PayPal account for the customer’s money to be transferred to.
Even though WooCommerce can automatically calculate and add a tax to the purchase price of an item, as the small business owner, it’s your responsibility to ensure the information is correct. WooCommerce does allow users to tweak the tax settings if needed. The best course of action is to check with your own tax professional to ensure you’re collecting the right amount of tax and forwarding it to the proper agencies on time.
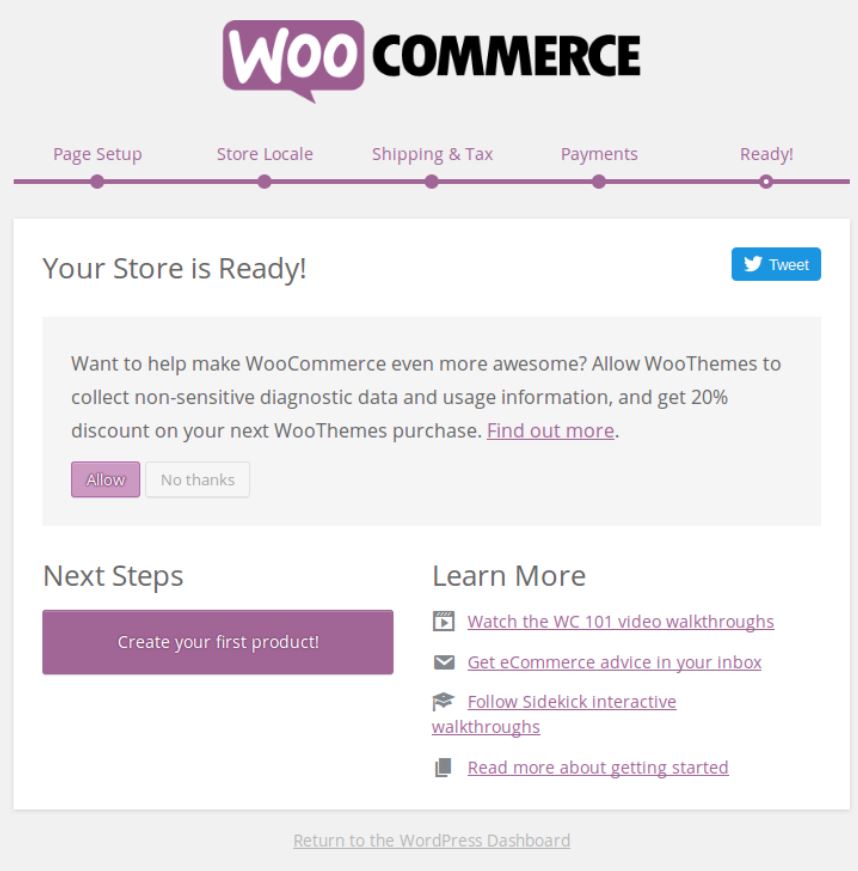
Your Store is Ready!
The last screen of the Setup Wizard gives you the option of sending diagnostic data to WooThemes in exchange for a 20% discount toward the purchase of a premium theme. Choose Allow if you’re interested, other choose No thanks.
Included on this screen is a direct link to creating your first product and some help resources. You can also send a tweet to let your followers know you just set up your store.
How to Install WooCommerce Sample Data
In this section, we will show you how to install sample data in WooCommerce. When you are using WooCommerce to build an online store it can be helpful to set up example products.
You can then get familiar with using WooCommerce by seeing how a live site would look. You can import the sample data with an “.xml” or “.csv” file. In this guide, we are using the .xml file option.
- Download WooCommerce from the plugin page and extract (or unzip) the folder to your computer.
- Log into your WordPress Dashboard.
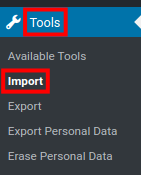
- Click Tools then Import in the navigation menu.
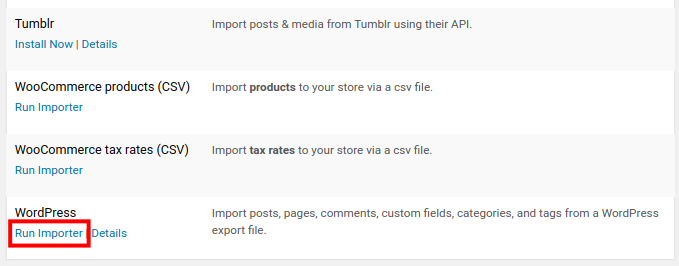
- Under WordPress click the Install Now link. *If you already installed the WordPress importer, skip to the next step.
- Click the Run Importer link under WordPress.
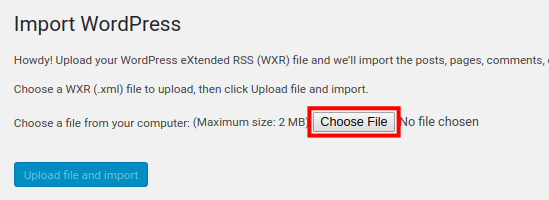
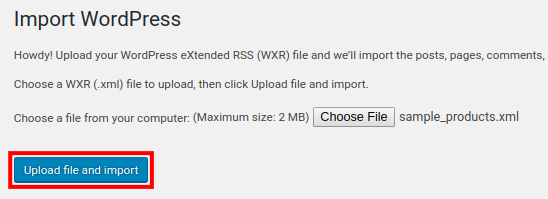
- On the Import WordPress page, click the Choose File button.
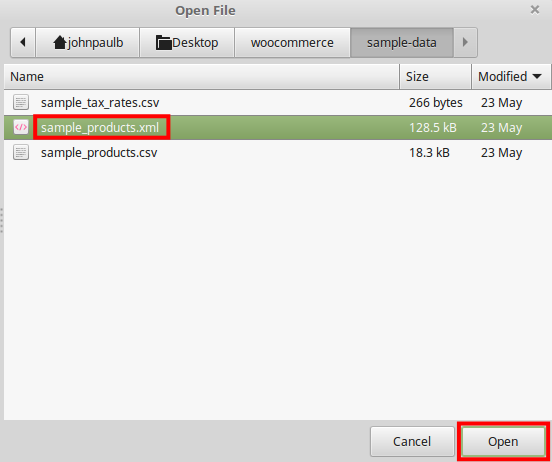
- Open the WooCommerce folder you extracted in “Step 1” and select the “sample-products.xml” file in the “sample-data” folder.
- Click the Upload file and import button.
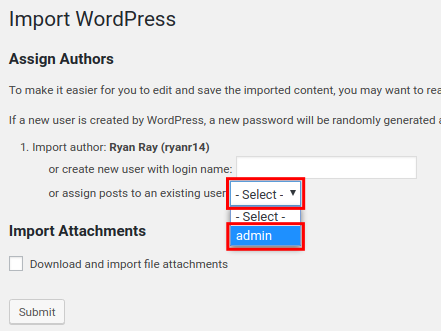
- By default, the imported products will be assigned to an author named “Ryan Ray” but you can enter a new user name, or assign it to an existing user. In this example, I am assigning the posts to the “admin” user.
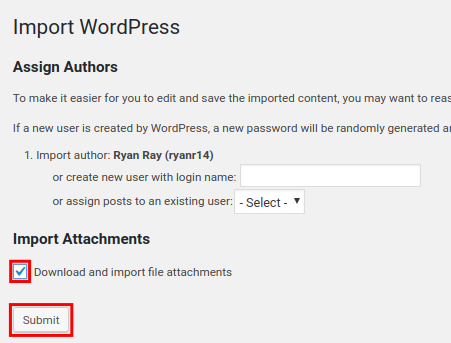
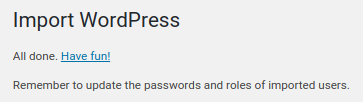
- Check the box to “Download and import file attachments” then click the Submit button to import the products. You will then see a message stating “All done.”
- Click the Products link to see the newly imported sample products.

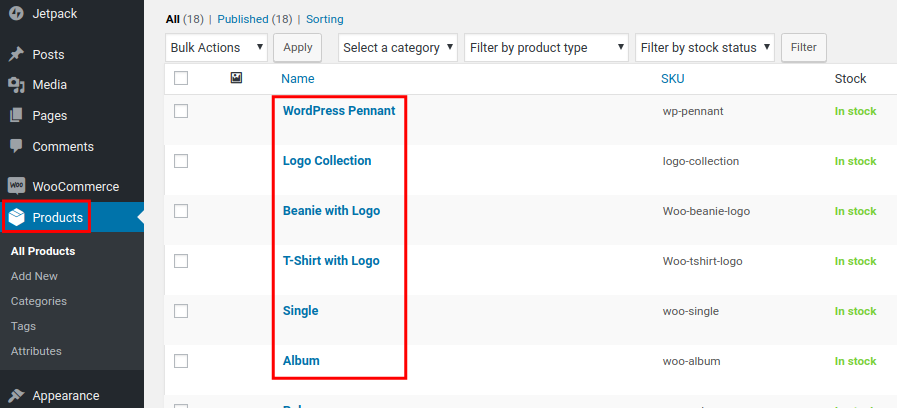
Congratulations, now you know how to install sample data in WooCommerce!
How to Uninstall WooCommerce
If you choose to stop using WooCommerce, or if you decide to install it in a different WordPress site, you can easily uninstall WooCommerce. In this section we will cover how to remove WooCommerce from WordPress.

Removing the WooCommerce Plugin
The first step of the uninstall process is to remove the WooCommerce plugin and associated files.
- Go to your WordPress Dashboard
- Click Plugins
- Under WooCommerce click Deactivate
- Click Delete
- Choose “Yes, delete these files and data”
Delete the WooCommerce Pages
This step is optional. When you installed WooCommerce you dedicated a series of pages to your Shop, Cart, Checkout, etc.
Now that you are no longer using WooCommerce in this WordPress site you have some options for what to do about these pages.
- You can edit the pages to link to another site or Shop.
- You can delete the pages
- You can set these pages to Draft, which will unpublish them; and you can decide later what their final purpose will be.

