When working with your images in Drupal 7, there are many settings you can adjust to optimize and customize the site you have in mind. One of these settings is to set a minimum size for uploading images. This is for when you may have a particular width and height range you want to work with. Setting this minimum size means that any users who upload images must ensure that the image is at least the height and width that you specify, otherwise the image will be rejected. Modifying the minimum height and width for uploadable images in Drupal 7 is easily done within the admin dashboard. Below are the instructions on how to perform just that.
Modifying the minimum height and width for image uploads in Drupal 7:
- Log into the Drupal 7 admin dashboard.
- Using the top menu bar, locate and click on the Structure option.

- From this next page, click on the Content Types link.

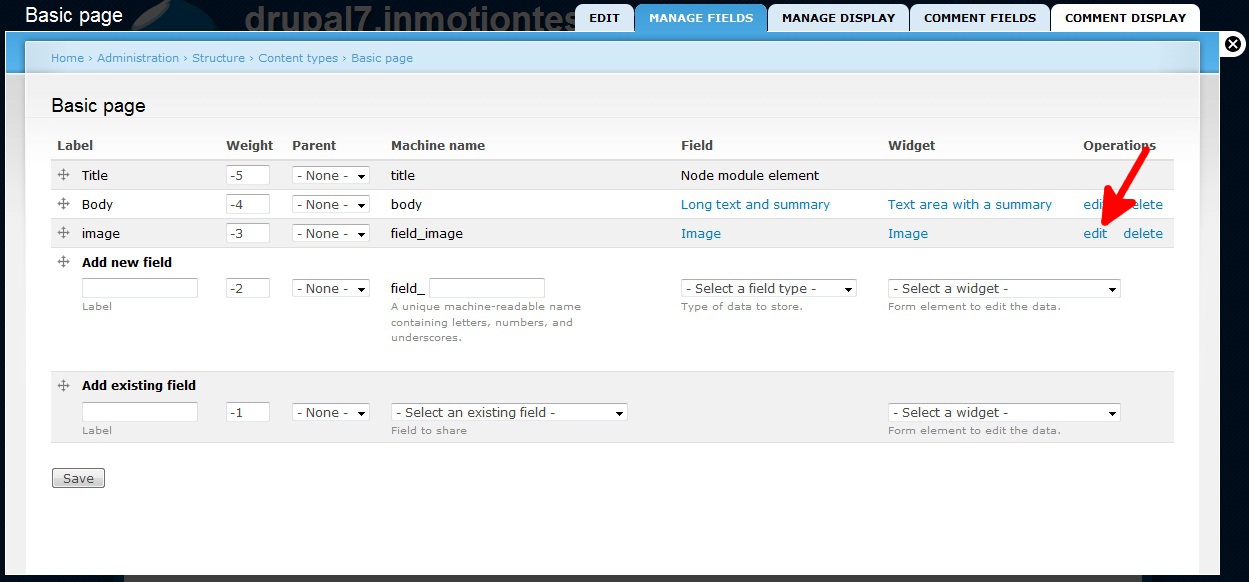
- On the Content Types page, find the Basic Pages row and click on the Manage Fields link.

- Find the Image row and then click on the Edit link to take you to the settings page.
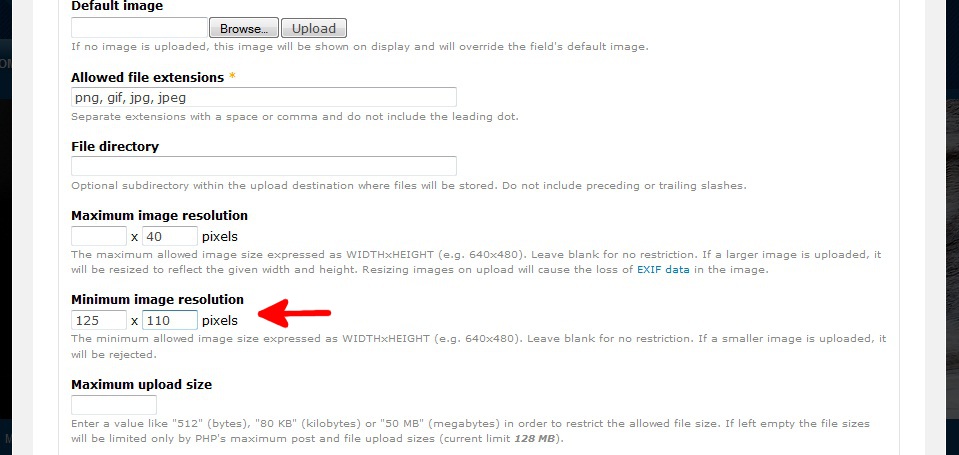
- On the settings page, scroll down and find the Minimum Image Resolution setting. The defaults are blank, which means there is no minimum setting. To set the minimum range, simply enter your desired minimum range in pixels. In this example, we have set it for 100 width x 110 height. If a user uploads a site that is smaller than the range, Drupal will reject the image for uploading.
- Click on the Save Settings button at the bottom of the page to save your new minimum upload size settings.


Now that you have specified your minimum settings, all users must ensure the image is at least that big for this image field to accept it for upload.