Sometimes there is a need to embed or nest a page of content within another. This often done with iFrames and can also be implemented within Movable Type webpages. The following article explains how iFrames can be added within webpages published from the Movable Type dashboard.
Inserting Iframes into Movable Type Web Pages
Adding iFrames is a two part process that will require that the content of your page be uploaded into the server as a separate HTML file and the addition of HTML code into the page where the iframe will be embedded. The first part of this tutorial explains how to upload the HTML page onto the webs.
Uploading the Iframe Web Page
The following steps will be described using the Cpanel File Manager. If you want more information on an alternative option, try using FTP: Getting Started: FTP.
- Login to the Cpanel.
- Scroll down to the FILES section and click on FILE MANAGER.
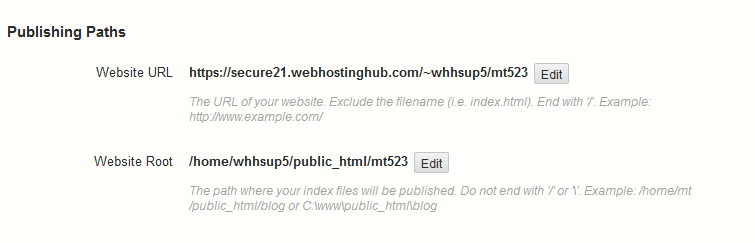
Find the directory where Movable Type is publishing the website files. If you do not know where this is, login to your Movable Type Dashboard, then go click on SETTINGS in the menus on the left hand side. You will see the PUBLISHING PATHS if you scroll down screen at this point. The location of the directory will be published there. Use this location to help you identify where you need to navigate in the File Manager (or FTP client).
- Open the folder where the files have been published. Click on UPLOAD in the menu bar the top of the file manageer interface. Find the file that you want to use in the iframe. Upload this file onto the server. Make sure that you remember the exact name of the file.

Adding the Code for the Iframe in Movable Type
- Login to the Movable Dashboard as an administrator.
- Click on the site that want to edit.
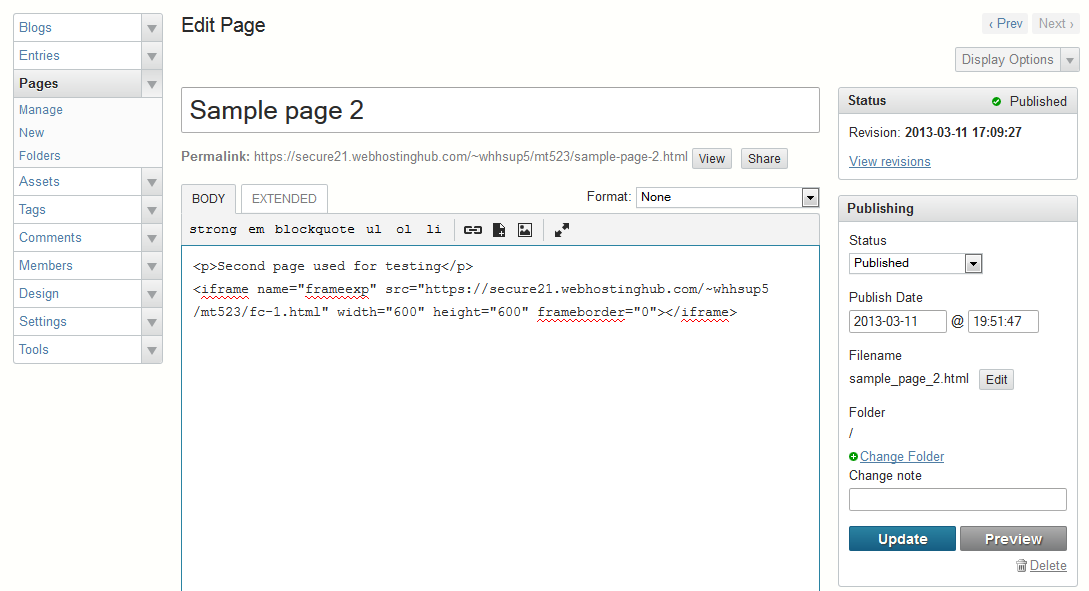
Scroll down the interface on left until you find PAGES. Click on PAGES, then select the page you want to edit when the list appears. Click on the title of the page you are going to edit.
- Before you can add code to the page, you will need to change the FORMAT option on the far right. Click on the drop-down arrow and click on NONE when it appears in the drop-down menu. If you do not do this, then the code will be affected by automatic formatting changes with the editor. The code that is inserted in the page will be similar to the following – these are the basic commands for using an iframe:
<iframe="" name="iframename" src="contentpage.htm" width="600" height="600" frameborder="0">
If you want more information about using the iFrame HTML command, go to W3Schools.com. The command includes a name for the iFrame (however you want to name it), the name of the source file (framcontent.htm) in the example above. The dimensions are specified by pixels. The last option is for a border to appear. When it is set to 0, then there is no border. The larger the number the thicker the border.
- Click on the blue UPDATE button on the right of the screen. This will automatically publish the changes.


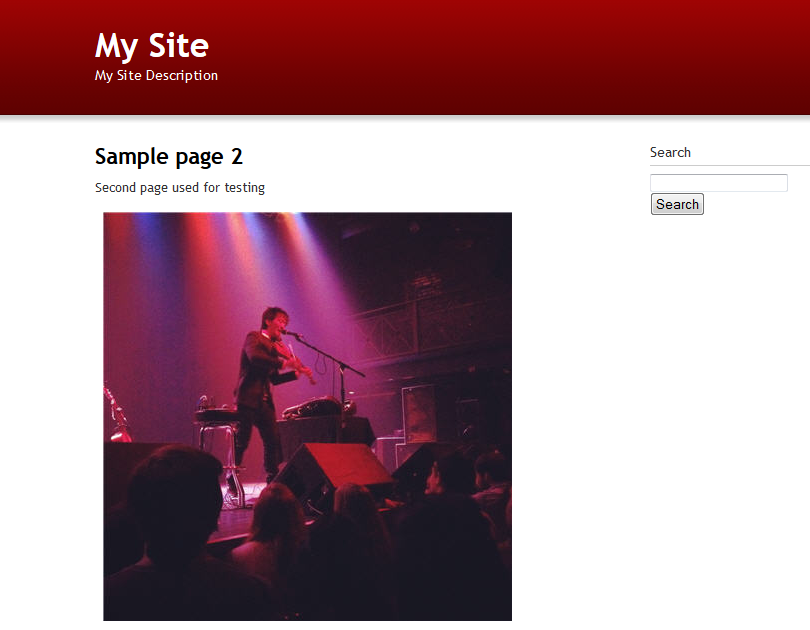
After the asset is setup and added to the Movable Type webpage in an iFrame, it will appear as follows: