Once the backup is created through the Moodle Dashboard, like what was outlined in the Creating a backup of Moodle tutorial, the backup can be restored through the Moodle Dashboard. The following article will demonstrate how to import or restore the backup created by the Moodle dashboard.
Restore backup through Moodle
- Log into Moodle
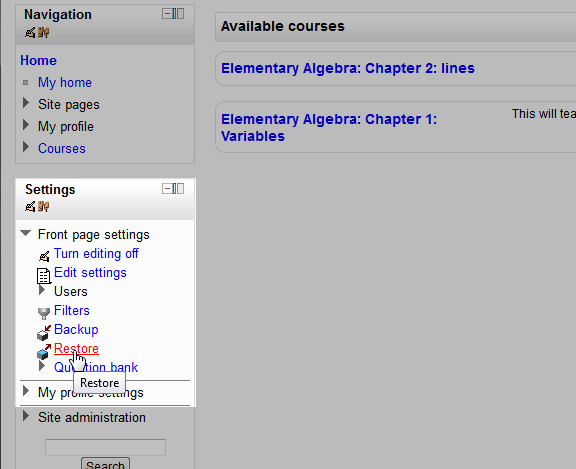
Click the Restore link found in the Settings of the right navigation bar.
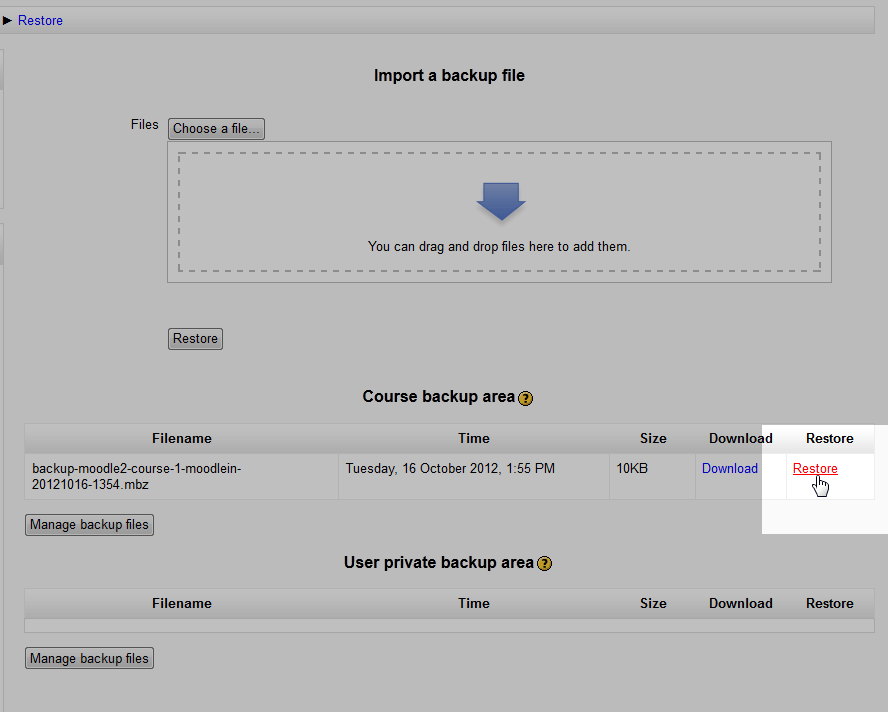
This page will allow a backup file to be restored either by dragging the backup file to the Import a backup file window or by clicking Restore in the Course backup area. The backup that will be restored in this tutorial will be one from the Course Backup Area. In this section, the previous backup that was made will be listed under the filename column. If multiple backups were ran, there will be more than one listed in this section. In this case there was only one backup. These backups can also be downloaded by clicking the Download link. For now, click Restore next the the backup listed. If there is no file listed, then no backup was ran.
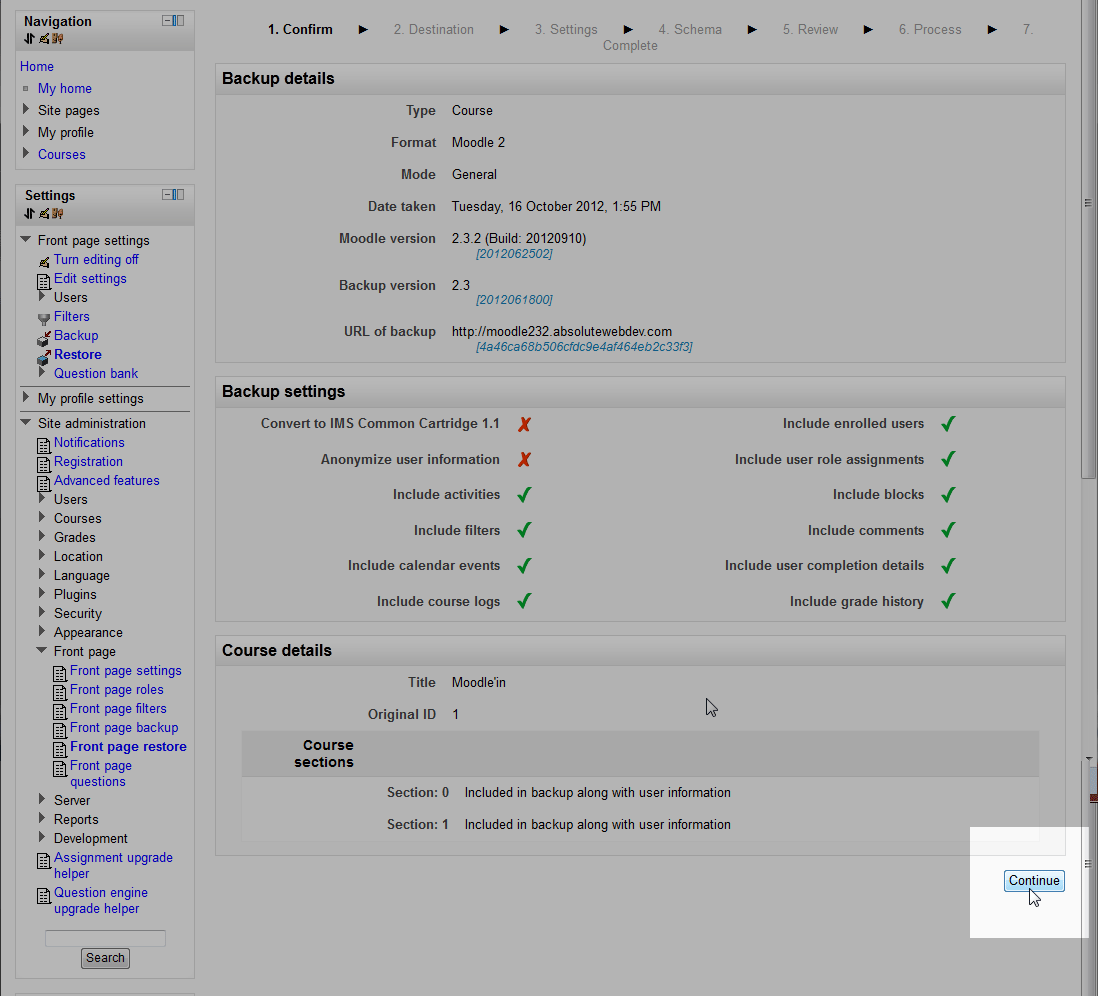
Next the Confirm page will load. Here there will be listed the Backup details, Backup settings, and Course Details. This will display what is in the backup. Preview what is in the backup to ensure the correct backup is being restored. Once the backup is confirmed to be the correct one, click Confirm.
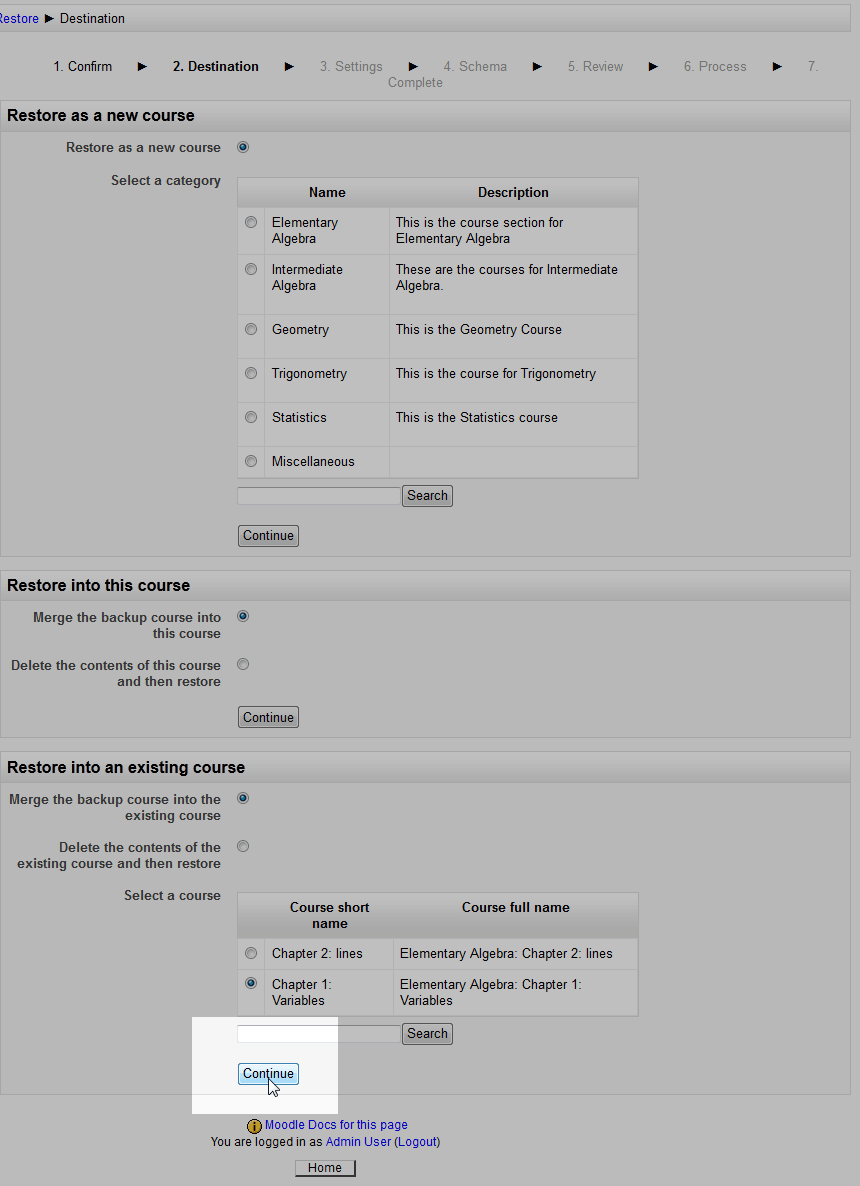
Next the Destination page will load. This page will display the Restore as a new course, Restore into this course, and Restore into an existing course options. This section gives the Moodle Administrator the option to Delete the current Moodle data, merge the backup to the existing Moodle Data, or to restore the data as a new course. In this case, the backup will be merged to the existing data. Select the course to restore and click Continue.
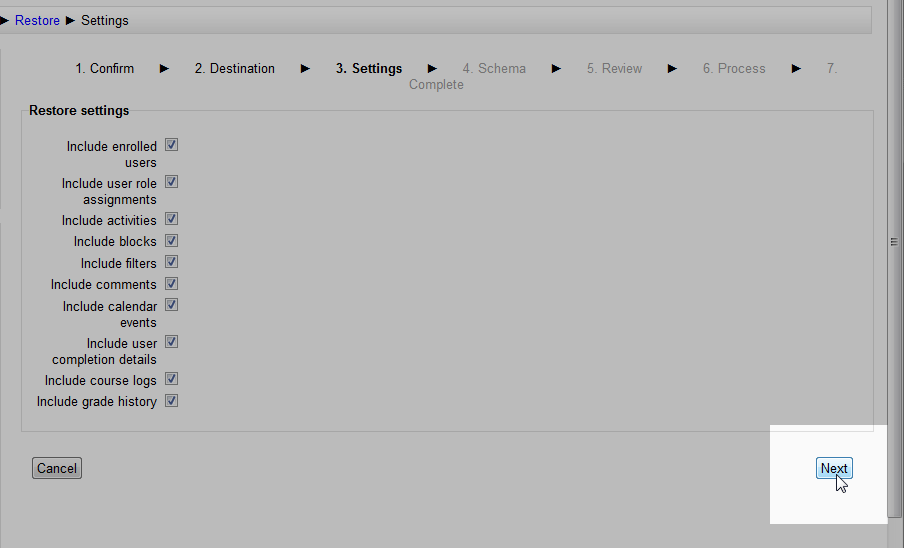
Now the Settings page should Display. The Restore Settings gives the options to include or to not include User settings, logs and histories. Select the data to include and click Next.
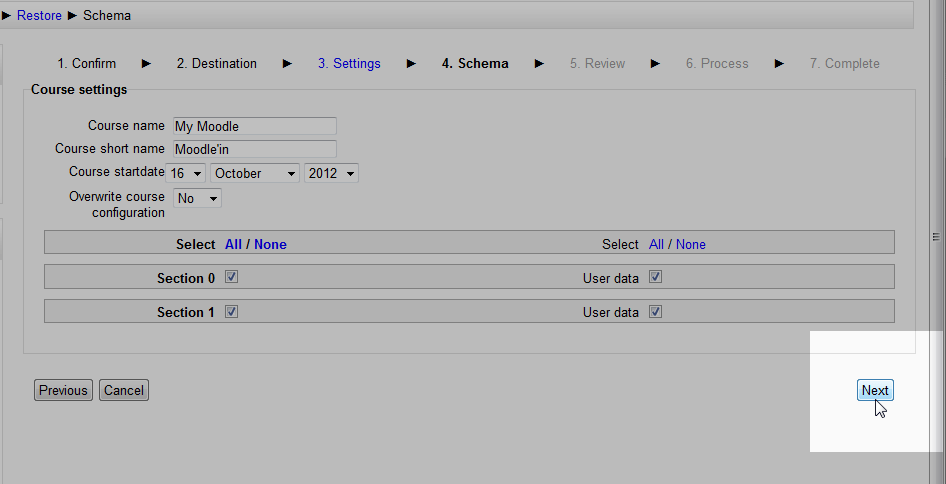
This next screen is to select the Databases that were included in the backup. In this example, all the databases are selected. Click Next.
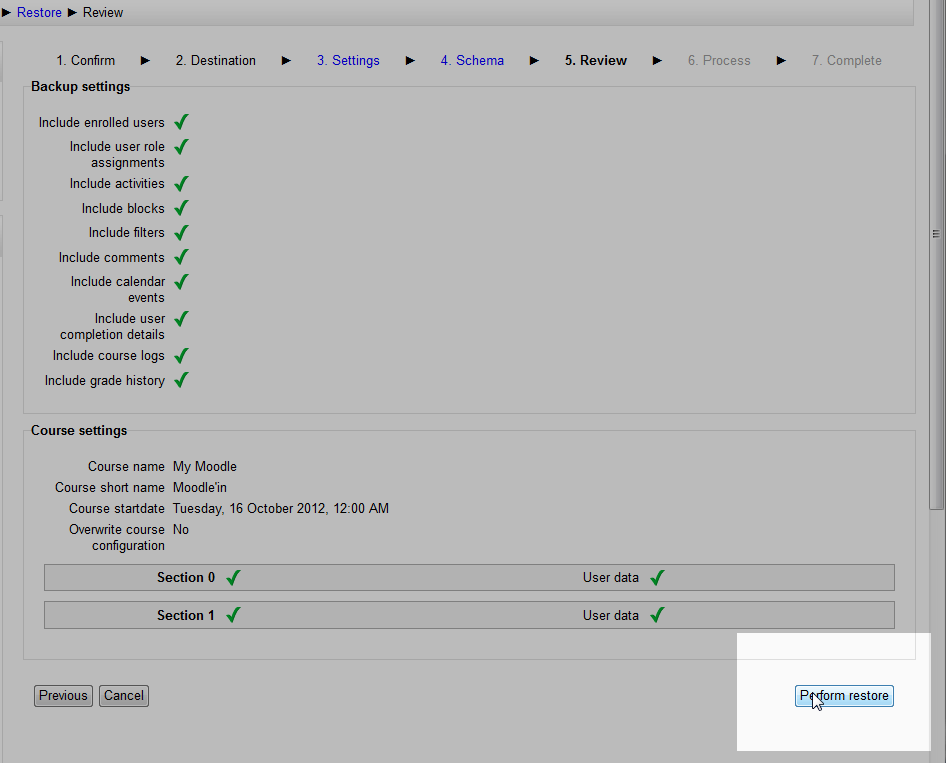
Now the review page loads. This page is good because when restoring backups, it is important to make sure the correct information is being restored. If for whatever reason the setting displays information that is unwanted, Click the Previous button to go back and fix the settings. Double check the settings then click Perform Restore.
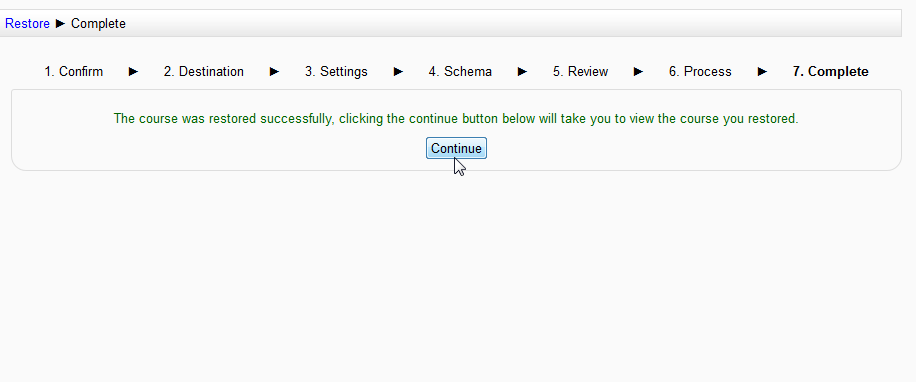
The backup restore will go through the Process and end on the Complete page where “The course was restored, clicking the continue button below will take you to view the course you restored” is displayed. Congratulations, Moodle was restored successfully.
This concludes the section for restoring moodle from a backup created through the Moodle Dashboard. Please visit the next section on Editing the User profile in the My Profile Settings of Moodle. For more information creating courses, please visit our education channel on Creating and restoring backups in Moodle. Also, see the Getting Started with Moodle course section as well.
