After learning how to create and edit membergroups in SMF, you will want to understand how to add and delete members to the groups. Post base groups do not need to have members added as they are assigned acutomatically as each member obtains the required post count. In order for users to be assigned or removed to Regular membergroups, they must be assigned from the back office by someone with the permissions to to do. Below are the instructions on how to manage your groups users in the SMF 2.0 back office.
Assigning users to membergroups
- Log into your SMF admin dashboard.
- This leads you to the Administration main page. Clicking on the Admin from the upper menu reveals a second menu. Hover over Members and hover again over MemberGroups from the popup submenu. A third submenu will appear with the option named Edit Membergroups. Click that to move on to the next section.
- You arrive on the group listing page. Locate the group name you want to assign users to and click on the name itself. In this example, we will be using the group named Special Ops.
- The new screen is the Manage Membergroups screen. You will see a summary of the group membership on the screen. Under the membership list is an area for you to add new members to the group. The field List Of Members To Add is where you add the names. To add more than one name, simply separate them with a comma.
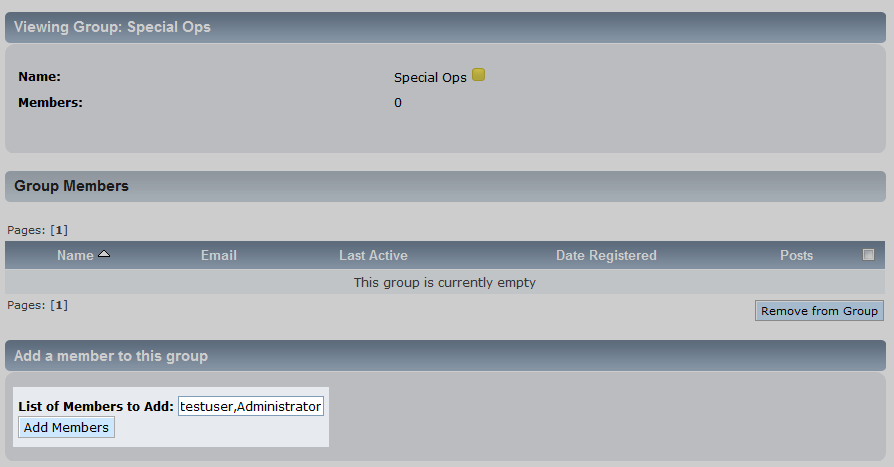
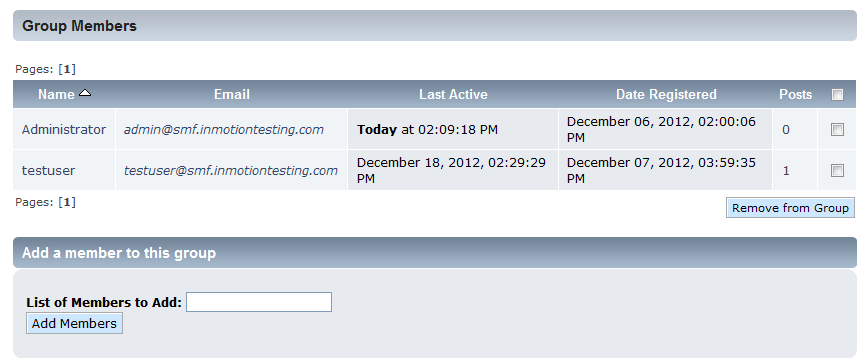
- Once you have entered the user or users you want to add to the group, click on the Add Members button to finalize the process. You will see the new members appear in the Group Members area on the screen.


Removing users from membergroups
- Log into your SMF admin dashboard.
- From the Administration main area, look for the Admin link in the upper menu and click that. In the lower menu that appears, simply hover over the Members link and then Membergroups option from the popup that appears. This causes a third submenu to appear. From there, click on the Edit Membergroups option.
- You are now on the Membergroups Edit page and should see a list of the groups. Click on the name of the group you wish to work with.
- You are led to a screen that displays the group members in the middle section, aptly names Group Members. Look to the far right column and you will see a checkbox for each row. Select the checkbox for each member you wish to remove from the group. In our example, we will be removing the Administrator user from the Special Ops group.
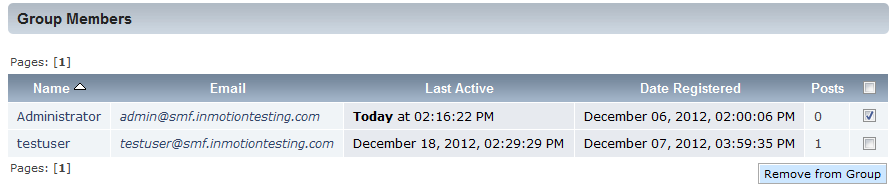
- Once you have selected the members for removal, click the Remove From Group button at the bottom of the section.
- The screen will refresh and the Group Members area should no longer display the deleted users. Check to ensure your desired user has been removed from the list.


