In this article we’ll walk you through installing the Max Failed Login Attempts plugin for Joomla to help combat a brute force attack on your website.
By default your Joomla installation will require a correct username and password to be entered before allowing access to the administrative section of your website. A malicious user or bot could try to keep logging in to your website again and again using combinations of common usernames and passwords to try to break in. This is called a brute force attack or sometimes referred to as brute forcing their way in.
What the Max Failed Login Attempts plugin will allow you to configure is the amount of failed login attempts you’d like to permit before blocking that user from further attempts for a set duration of time, and then it can e-mail you when this is triggered as well.
Now unfortunately this isn’t true brute force protection based on IP address blocking, because if the attacker is trying to login to the admin user for instance and then hits your login limit, they could then just start trying a different user like admin2 to get in. So they could potentially still use up a lot of server resources as they try to break into your site, but this plugin would at least make that process much more difficult for them to actually gain access, and also you could be alerted in the meantime to then go in and manually block their IP address from being allowed to return to your website.
- Login to your Joomla admin dashboard.
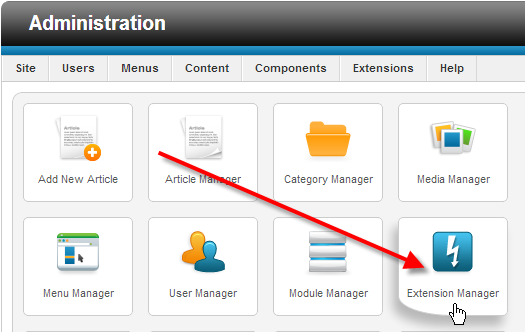
- Click on Extension Manager.
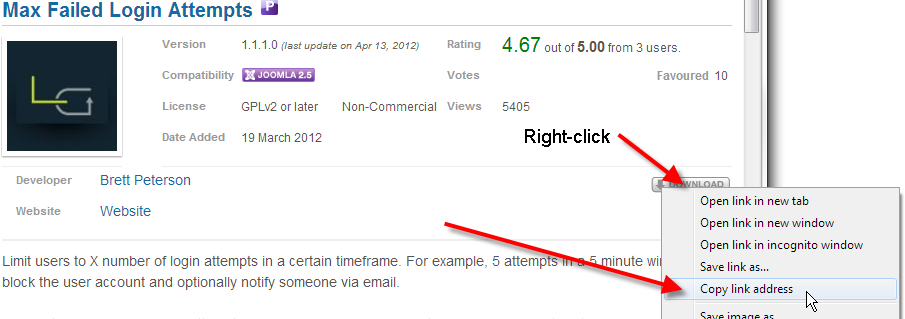
- The plugin itself can be found on the Joomla extension site at:
https://extensions.joomla.org/extensions/access-a-security/site-access/login-restriction/20032
You’ll want to right-click on the Download link on that page, and then select Copy link address.
- With the URL to the file download now in your clipboard, return to the Joomla Extension Manager and paste it into the Install URL field and then click on Install

- You should now get a success message letting you know the plugin has been successfully installed, and a notice to be sure to enabled it.

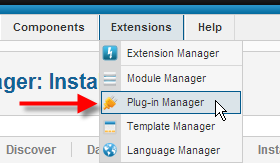
- From the top Extensions menu, select Plug-in Manager.
- Next click on the Authentication – Limit Failed Logins link from the left-hand column.
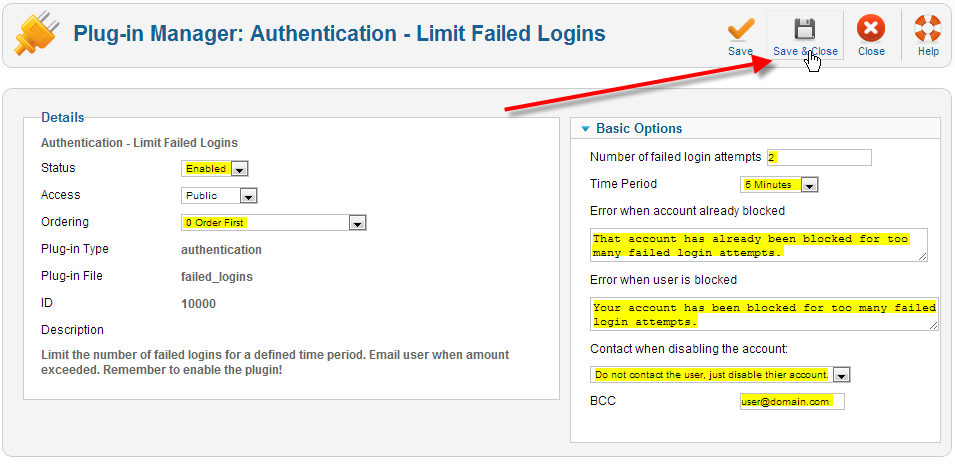
- Now you can cofigure the plugin’s options. Change the Status to Enabled.
Change the Ordering to 0 Order First
Then fill in the rest of the fields based on the settings you’d like to use.
You might want to change the default Contact when disabling the account setting to Do not contact the user, just disable their account. so that only you are getting notified of these blocks.
Then enter in your e-mail address in the BCC field, to receive e-mail notices when an account has been blocked. Finally click on Save & Close.
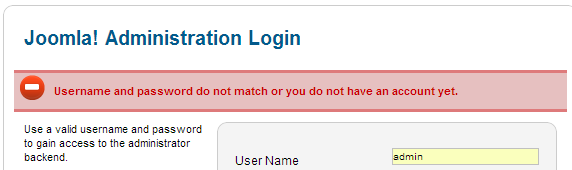
- Now if you tried to login using invalid credentials, you’ll first just get the normal failed login message.
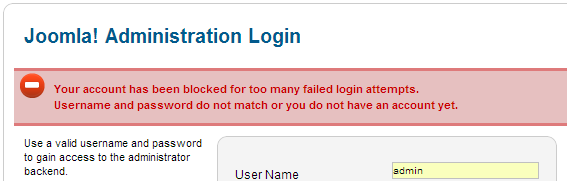
Hitting the login limit threshold that you’ve set for the first time you’ll get your blocked message you setup.
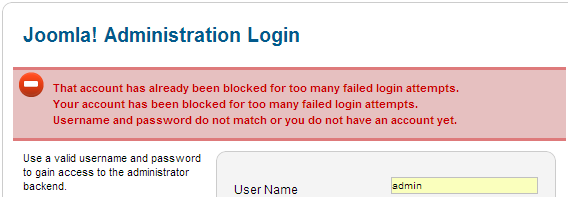
Trying to login to the account after it’s been blocked you’ll then get your already blocked message you setup.
You should also receive an e-mail alerting you of the user that has been disabled, and the IP address they were trying to connect with.
- Now if it was a valid user that simply forgot their password, they would just need to wait the set amount of time that you set before their account will be re-enabled. If you notice the same IP is getting blocked trying to access multiple users, or the same one again after it’s been un-blocked, you can then use the IP Deny Manager in cPanel to block them permanently from trying to access your website again.


Manually un-block a user
If you accidentally block yourself or you know a valid user has done this to themselves you can go ahead and un-block that user manually on your own instead of waiting for the timer to expire.
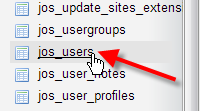
- Pull up your Joomla MySQL database in phpMyAdmin.
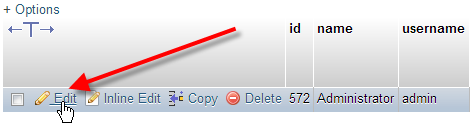
- In the left hand column, click on your jos_users table.
- Now click on Edit beside the user that has been blocked.
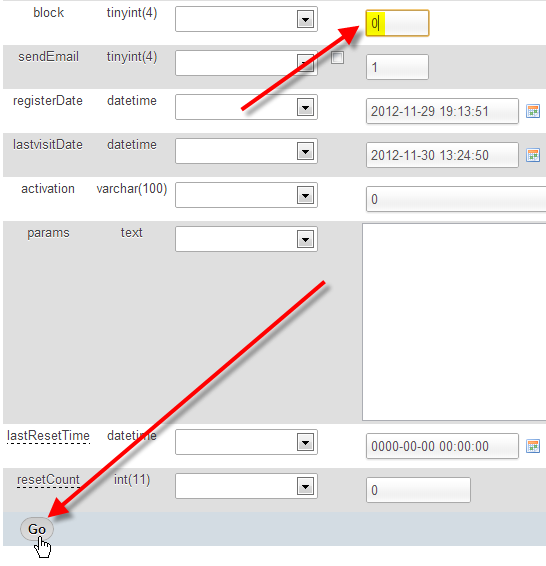
- In the block field, change the 1 to 0, then click on Go at the bottom left.


You should now know how to install the Max Failed Login Attempts plugin for Joomla, and also how to un-ban users manually yourself if you don’t want to wait for the timer to expire.