Tracking different statistics about your site and visitors can help you with improving your site. This data can help you determine popularity of different pages, whether certain campaigns are bringing in traffic, the best locations for your customers, and much more. Drupal has a module available for you to install and configure so you can use this information to your advantage. Below are the steps to installing and configuring the Google analytics module for your Drupal 7 site.
How to install and configure the Google analytics module in Drupal 7
- You will first need to download the module to your local computer. You can find that module here.
- Log into your Drupal 7 admin dashboard.
- From the top menu bar, locate the Modules option and click it.
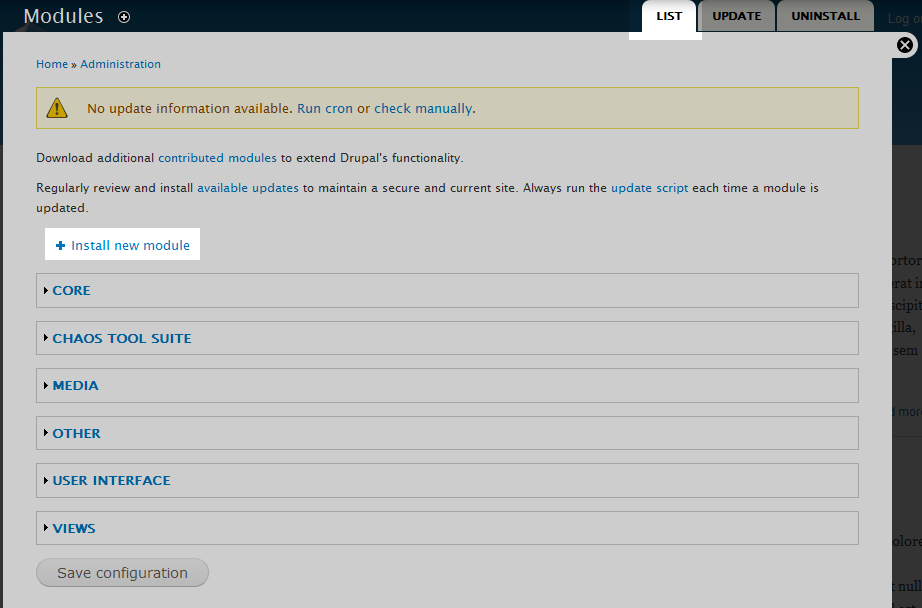
- You are now on the Modules List screen. Be sure you are on the List tab, found in the upper right corner of the page. Click on the Install New Module link found at the top of the page.
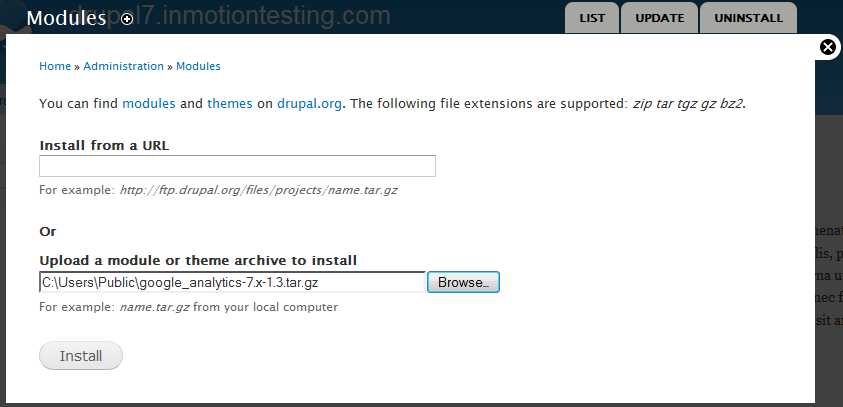
- On the module upload screen, click on the Browse button. From here, navigate to the folder in which the module is stored and click on Open. You should now see the path to the module in the Upload a module or theme archive to install. Click the Install button to complete the module installation.
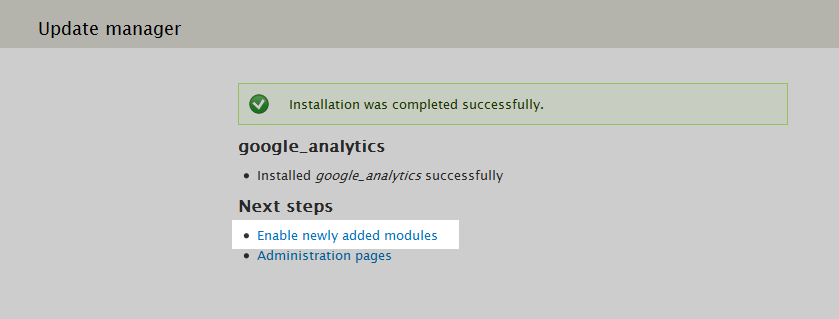
- Once the module installs, you will be sent to a page that displays a successful install message. From there, click on the link entitled Enable Newly Added Modules.
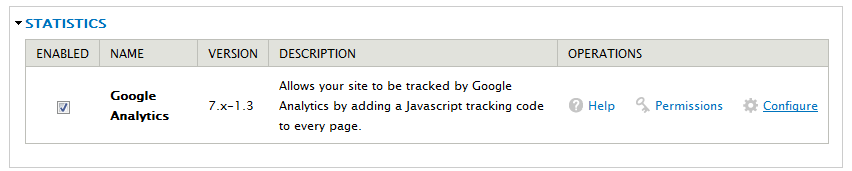
- You are taken back to the Modules list screen. From here, locate the Googel Analytics module in the Statistics category. Select the checkbox to the left of the module name and click on the Save Configuration button at the bottom of the page. Once it is enabled, scroll down to the module again and click on the Configure link that now displays on the right side of the module name.
- Now that you are on the configuration page for the Google Analyticsmodule, you will see there are four different sections for configuring.
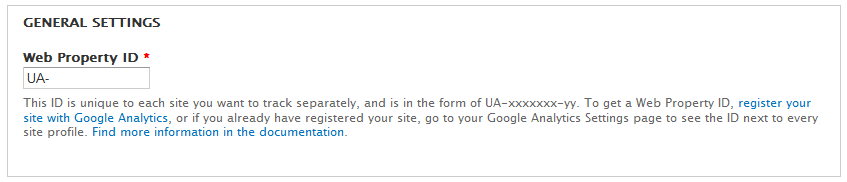
First is the General Settings. This is where you enter the ID for the site to track. You will need to sign up with a Google Analytics account to have an ID assigned for the site.
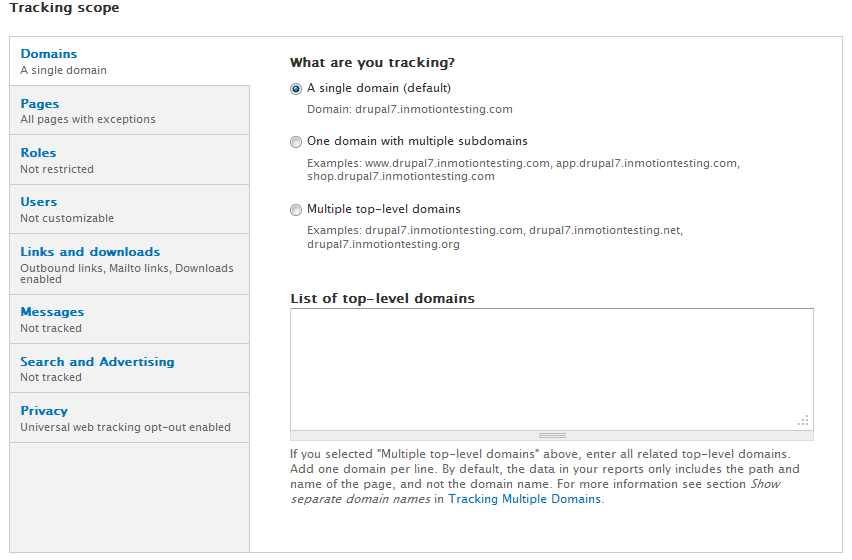
The next section is the Tracking Scope section. By default, it is set up to track the entire site, aevery page, for every user, etc. You can enter each section and customize it by selecting specific areas to track.
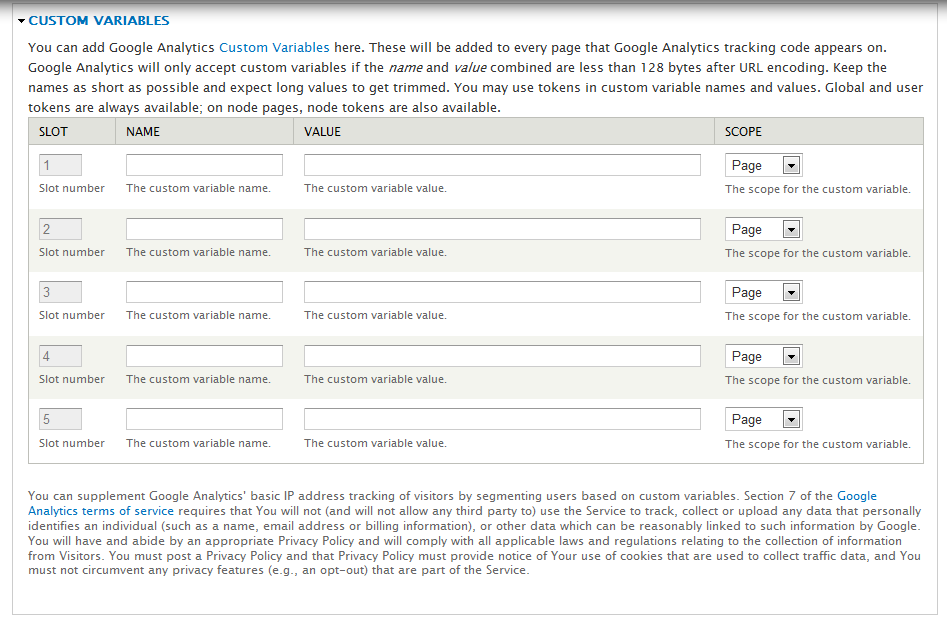
The third section is the Custom Variables section where you can set up specific tracking variables that are not part of the default analytics.
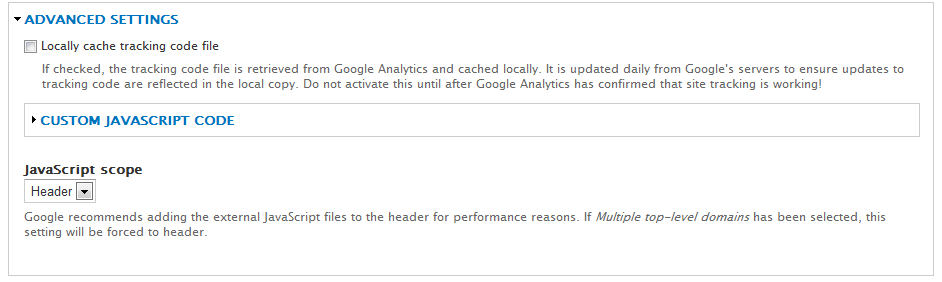
Last up is the Advanced Settings. In this section, you can set up where the data is cached, add custom javascript, and change where the module inserts the code.
- Once you have entered all the data, click on the Save Configuration button at the bottom of the page.


