---
title: "How to Install Apache Tomcat on Control Web Panel (CWP)"
description: "Apache Tomcat is a web server environment for running programs written in the Java programming language. It can serve dynamically generated sites with Servlet and JSP. Tomcat is one of the most..."
url: https://www.inmotionhosting.com/support/edu/control-web-panel/cwp-admin/server-software/apache-tomcat-cwp/
date: 2022-05-27
modified: 2024-06-03
author: "InMotion Hosting Contributor"
image: https://www.inmotionhosting.com/support/wp-content/uploads/2022/05/cwp-install-apache-tomcat.jpg
categories: ["Server Software"]
type: post
lang: en
---
# How to Install Apache Tomcat on Control Web Panel (CWP)
Apache Tomcat is a web server environment for running programs written in the Java programming language. It can serve dynamically generated sites with Servlet and JSP. Tomcat is one of the most popular choices for Java application server deployments. Below we’ll cover how to manage Tomcat on Control Web Panel (CWP).
- [Install Tomcat on CWP](#install)
- [Tomcat in User Panels](#users)
- [Harden Apache Tomcat Server Security](#harden)
- [Access Tomcat Applications](#apps)
- [Deploy a Tomcat Application](#deploy)
## Install Tomcat on CWP
Follow these steps to install Apache Tomcat.
1. [Log into CWP](https://www.inmotionhosting.com/support/edu/control-web-panel/install-control-web-panel-cwp/#login) as an administrator.
2. On the left, search for and select **Tomcat Manager**.
3. Select a Tomcat version to install from the dropdown menu, then **Install now**. Select **Continue** in the pop-up window. This will also install the CWP Tomcat engine.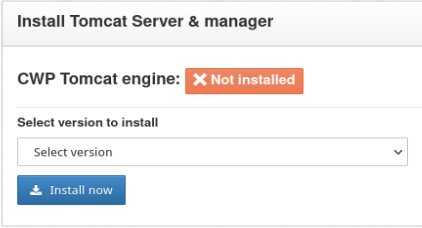
4. Upon refresh, you’ll see the Tomcat server status, port number, and version number. To the right, you’ll see that OpenJDK was installed. This is the open-source Java installation with Font Renderer and the latest features. For another OpenJDK version or the proprietary Oracle JRE/JDK, follow our guide on how to [install Java on CentOS](https://www.inmotionhosting.com/support/product-guides/vps-hosting/install-java-on-centos/).
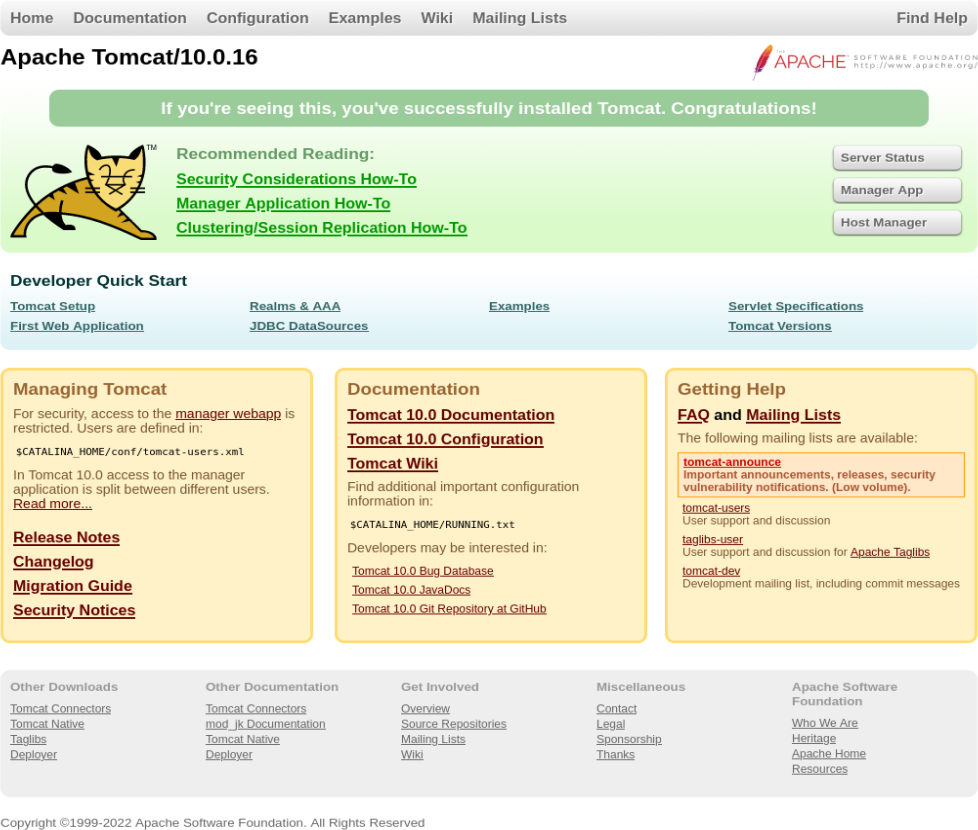
5. You should now be able to type “youservername:8080” into your web browser and view the Apache Tomcat default page. If not, ensure that port 8080 is open in your [CWP server firewall](https://www.inmotionhosting.com/support/edu/control-web-panel/install-control-web-panel-cwp/#csf) and try again.
### Tomcat in User Panels
If you want to allow regular users to manage Tomcat apps:
1. Select the **Configurations** tab at the top of the Tomcat management section.
2. Check the box for **Tomcat server available in user panel**. You can enable access for all accounts or specific ones. 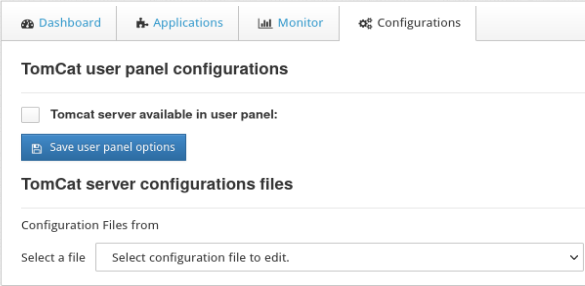
3. Once you’ve made your decision, select **Save user panel options**. Now, CWP ends users can access Tomcat apps from **Domains** > **Tomcat Manager**. Users currently logged in may need to refresh their browser page to see the new section.
During our testing, Tomcat Manager did not display in user panels. If you experience similar issues, contact the CWP team directly.
### Harden Apache Tomcat Server Security
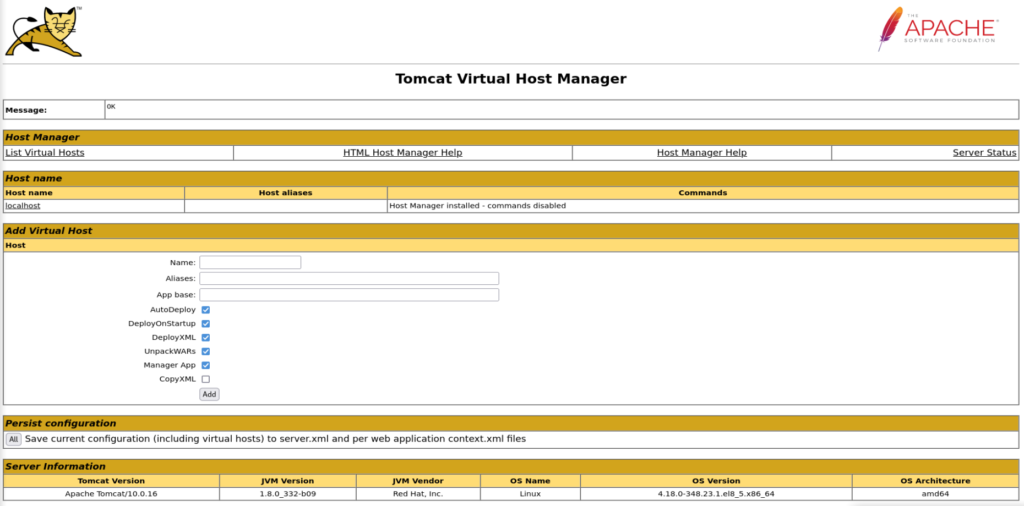
On the default Apache Tomcat version 10.0.16 page, you’ll see an important notice:
> “For security, access to the manager webapp is restricted. Users are defined in: $CATALINA_HOME/conf/tomcat-users.xml”
You can edit this file in the CWP terminal or Tomcat Manager.
Due to an unknown error, we could not use the Tomcat Manager to make these changes quickly. We will cover how to attempt this method on your CWP server and bypass the issue if required.
1. In CWP Tomcat Manager, click on the **Configuration** tab.
2. Under “TomCat server configuration files,” select **tomcat-users.xml** from the drop-down menu. The XML file will load at the bottom of the page.
3. Without making any changes, select **Save file**. If a notification in the upper-right corner states “Success,” this means you’re able to edit the file in the graphical interface. Continue to step 4.If an error shows in the upper-right corner stating “Invalid configuration file,” you’ll need to make changes from the terminal emulator. Note the file path to your tomcat-users.xml file. It should resemble “/usr/local/tomcat/tomcat10/conf/tomcat-users.xml.” At the top, select **Terminal** > **Simple Terminal**. Or you can log into your CWP server via SSH.Edit the file with a text editor: nano /usr/local/tomcat/tomcat10/conf/tomcat-users.xml
4. On or near line 36 you’ll see two “user username” lines encapsulated between two comment lines (“”):``Remove the comment lines.
5. Add “admin-gui” to the admin line as shown below, and update the passwords (and “admin” username to something else if desired).
6. Add more users to the Tomcat configuration file if necessary, using the same format. You may notice a “tomcat_cwpuser” at the bottom of the file. This is used by CWP to integrate Tomcat with CWP.
7. If editing the file in Tomcat Manager, select **Save file & reload server** at the top. If editing the file in the terminal, save changes. Then return to the CWP Tomcat Manager dashboard tab and select **Restart server**.
8. You should now be able to log into your Tomcat hosting panel with your new admin credentials at “yourserverhostname:8080/host-manager.”
## Access Tomcat Applications
The Applications tab is where you can deploy and manage Tomcat applications. Installed with the Tomcat server are:
- Servlet and JSP Examples (/examples)
- Tomcat Documentation (/docs)
- Tomcat Host Manager Application (/host-manager)
- Tomcat Manager Application (/manager)
- Welcome to Tomcat (/)
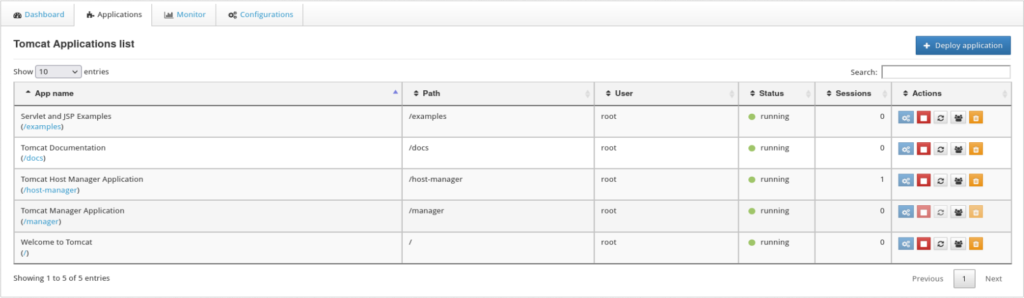
The table shows applications’ file path, assigned user, status, and number of sessions running. The action buttons allow you to edit, stop, reload, delete, and expire sessions for an app.
### Deploy a Tomcat Application
Follow these steps to deploy Tomcat applications as an admin user.
1. From the “Applications” tab, select **Deploy application **at the top.
2. Assign a CWP user. [Add a user](https://www.inmotionhosting.com/support/edu/control-web-panel/add-cwp-user/) if necessary.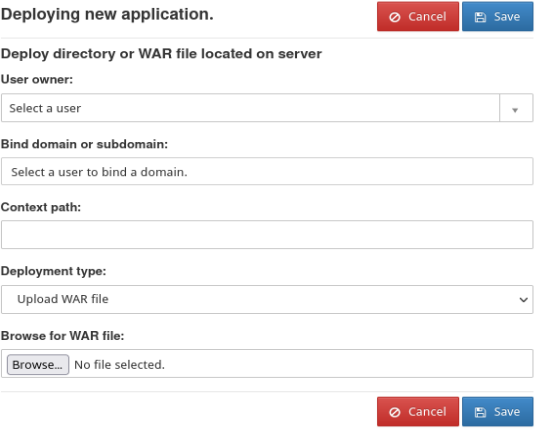
3. Select a [domain or subdomain](https://www.inmotionhosting.com/support/edu/control-web-panel/add-domains-cwp/).
4. Specify a context path.
5. Select a deployment from the drop-down list (WAR file, XML configuration file, or directory).
6. Select the necessary file or directory.
7. Select **Save**.
Learn about more ways to manage your [Control Web Panel server](https://www.inmotionhosting.com/support/edu/control-web-panel/).
**Scalable VPS Infrastructure, Fully Managed**
When shared hosting can’t handle your traffic, VPS delivers dedicated resources that scale with demand. Our team manages the technical complexity while you manage your business.
NVMe Storage High-Availability Ironclad Security Premium Support
[VPS Hosting](https://www.inmotionhosting.com/vps-hosting?mktgp=t&irgwc=1&affiliates=5001860&utm_campaign=Jumbotron&utm_source=supportcenter&utm_medium=cta&utm_term=vps-cta2)