The menu structure has been created and you have created menu item links for navigation. Now it is time to set the menu up to display on the screen. As mentioned before, this is not an additional menu, but will replace either the main or secondary menu that is on the site.
Enabling the custom menu.
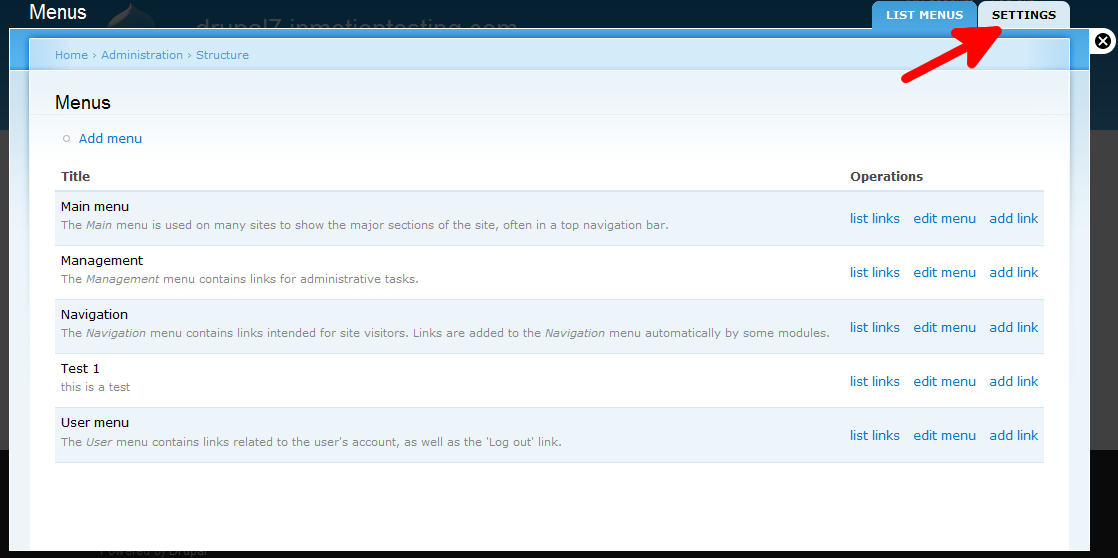
- Click on the Structure menu item from the top menu bar and then click on Menu.
- In the upper right corner of the screen, select the Settings tab.
- From this screen, you see the two options where you can select your menu placement: Source for the Main links and Source for the Secondary links. In this example, you can see I chose to replace the Main Menu under the Source for the Main links with my Test 1 menu.
Before After 
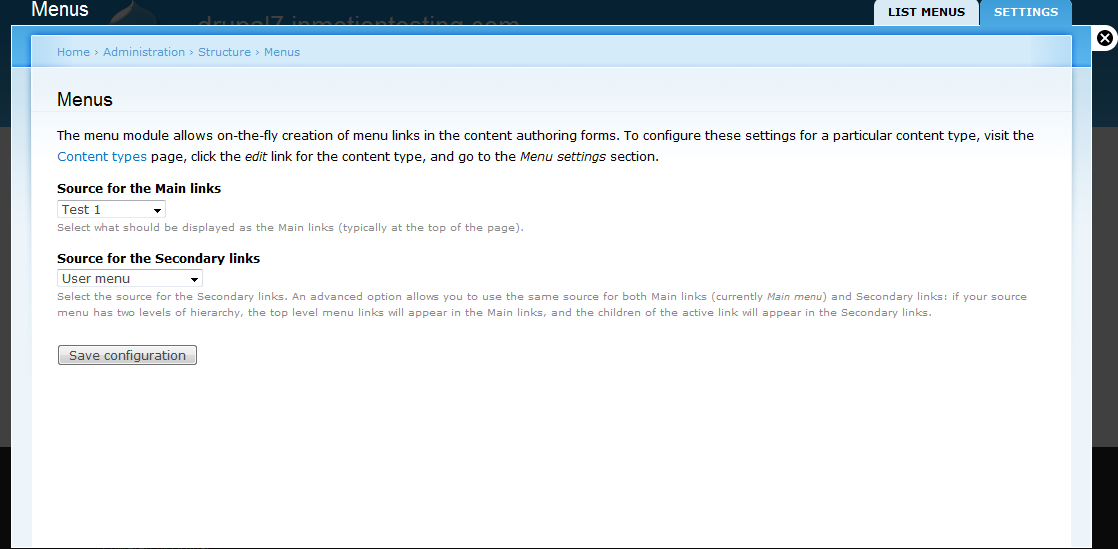
- Once finished, click the Save Configuration button at the bottom of the screen.
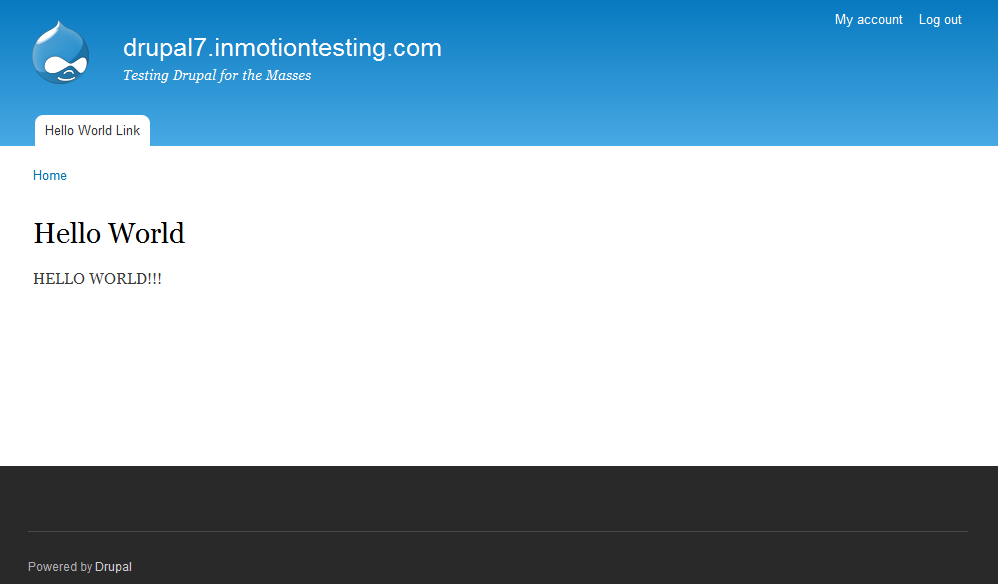
You have now completed the menu enabling process. Below is a sample before and after showing how your menu display changes by switching the main menu with the custom menu.
Before After 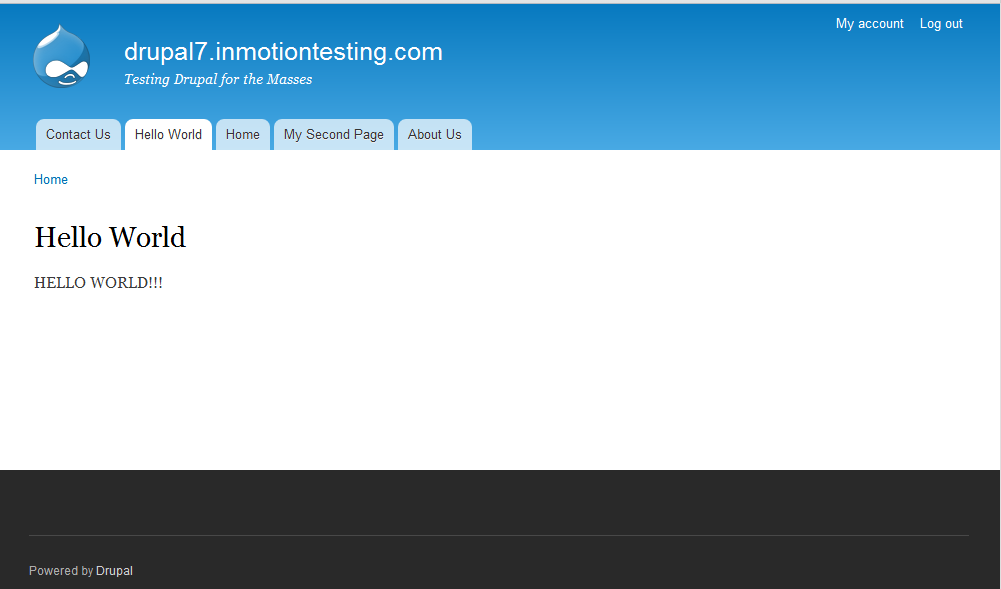


You now have enabled your custom menu on your Drupal 7 site! If you need further assistance please feel free to ask a question on our support center.