In this tutorial, we will walk you through the steps on how to install Joomla 3.0. As Joomla 3.0 was recently released, we are eager to install it on our joomla hosting account and begin using it!
Joomla 3.0 Requirements
The following requirement changes are in effect for Joomla 3.0:
- PHP 5.3.1 is the minimum version of PHP required
- PHP’s register_globals must be turned off
- PHP’s magic_quotes_gpc must be disabled
Joomla 3.0 Installation Steps
Download Joomla 3.0
The first step in installing Joomla 3.0 is to actually download it. Visit this page and download one of the compressed versions of Joomla 3.0, either .zip, .tar.gz, or .tar.bz2
Upload Joomla 3.0
After downloaded Joomla 3.0, upload it to your server. If your server allows you to uncompress files, then you can save time by uploading the compressed file and then uncompressing it on the server. Otherwise you will need to uncompress the file on your desktop and then use FTP to upload all of the individual files.
Create a database for Joomla 3.0
Joomla requires a database for installation. If you are on a cPanel server, use the MySQL Database wizard to setup your new database. If your hosting provider does not use cPanel, you’ll need to contact them for the steps on creating a new database.
Be sure to take note of your database name, database username, and database password. You will need these later during the installation.
Run the Joomla 3.0 Installation Wizard
In our testing we installed Joomla 3.0 into a subfolder named joomla3.0. To access the installation wizard we will go to https://domain.com/joomla3.0
If you get any error messages about the version of PHP your server is running, click here for further help.
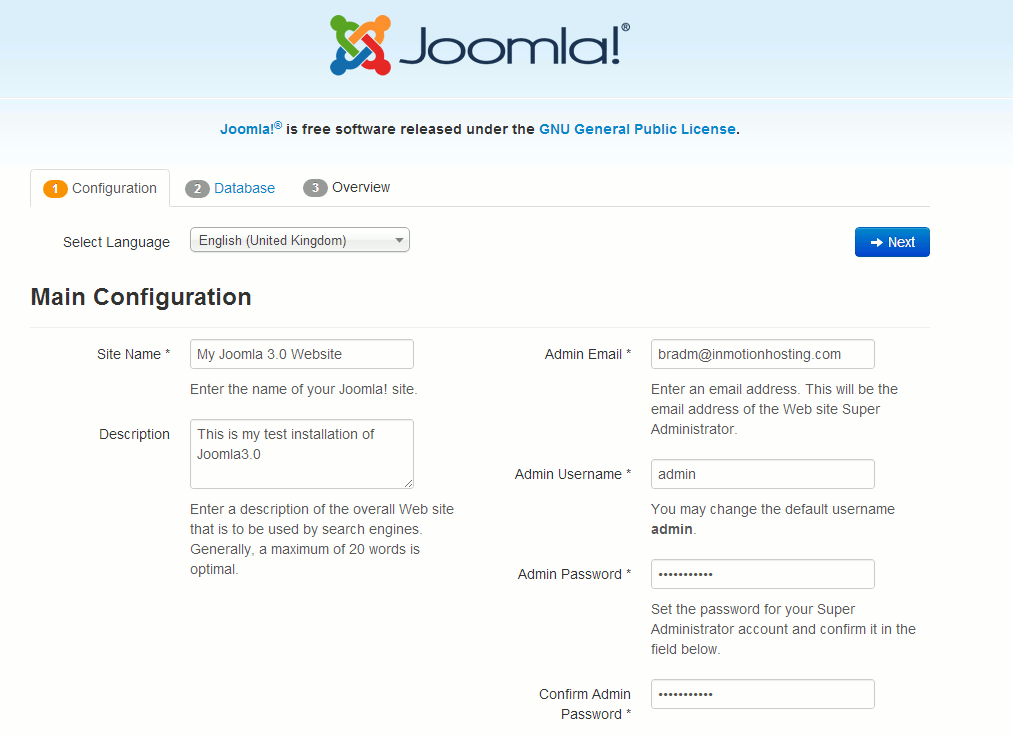
1. Configuration
On the configuration page, you’ll need to select your language, enter a name and description for your site, and setup your administrative details (such as username, password, and email address). Click the screenshot to the right to see how we filled out our configuration details. Click Next to continue the installation.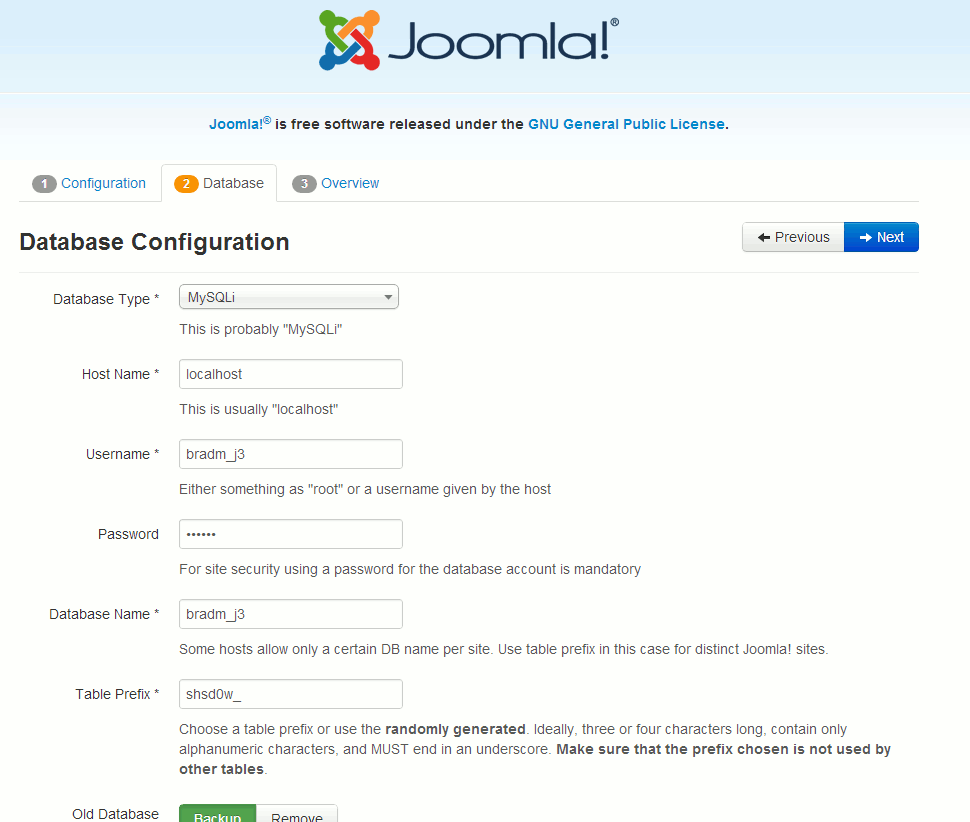
2. Database
In step 2, you will configure Joomla with the database you setup in Step 3 above. On most servers, you can set the Database Type to MySQLi and set the Host Name to localhost. When finished entering your database credentials, click Next.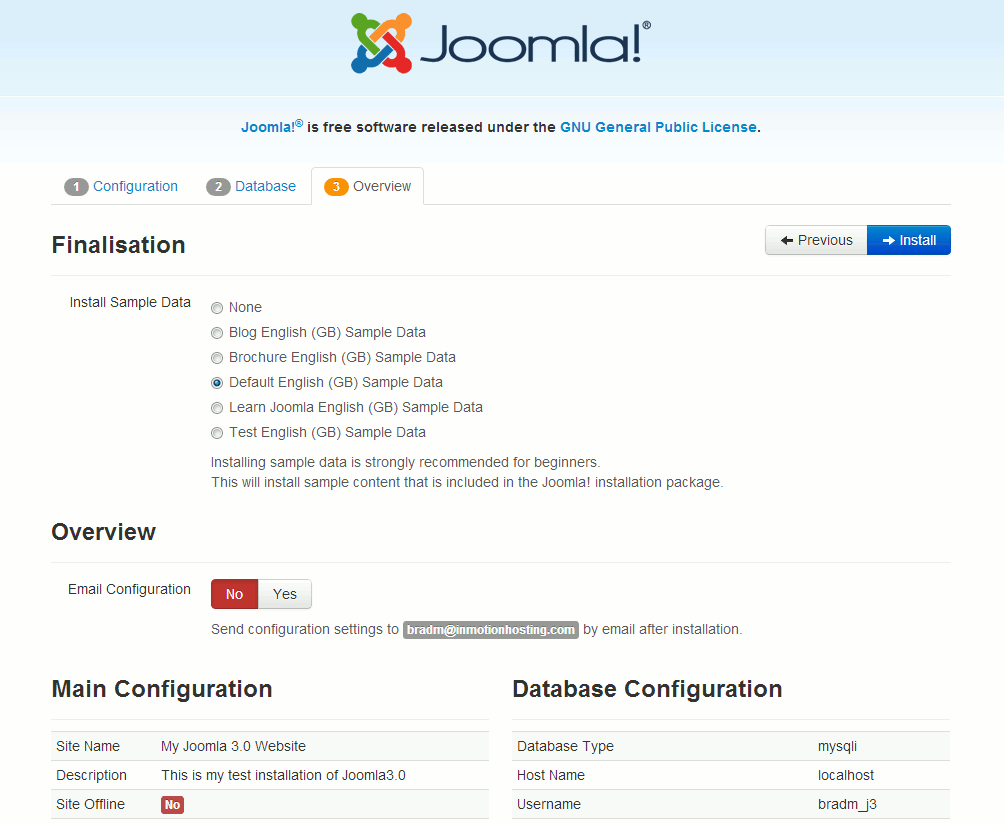
3. Overview
If this is your first time using Joomla 3.0, you may want to use the option to install sample data (learn more here about the different types of sample data included). This will help you learn how Joomla 3.0 works because your new Joomla website will include sample articles. Also, You can select Yes next to Email Configuration if you want to have a copy of the installation details emailed to you. When finished with this page, click the Install button.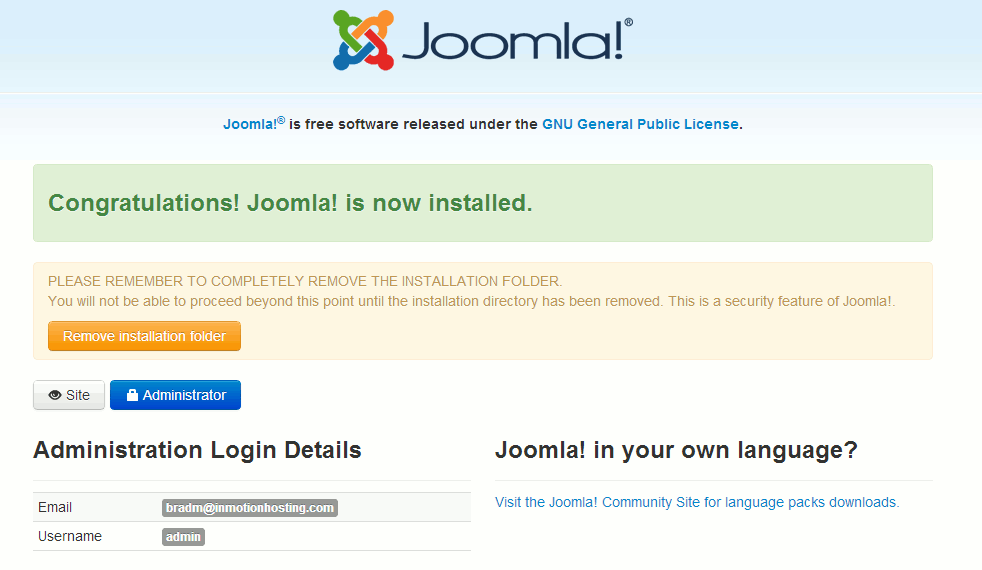
You should then see a success message, stating that Joomla 3.0 has been successfully installed.
At this point, click the Remove installation folder button. Now that you have installed Joomla 3.0, you can then log into your Joomla 3.0 dashboard and begin writing your first articles.


For the newbies (like me) installing Joomla on their add-on domains, in step 2, the Joomla files need to be uploaded to the corresponding sub-folder in public-html.
For instance, my add-on domain is https://www.cheztaobao.fr/, so the Joomla zip file needs to be uploaded to the folder public-html/cheztaobao.fr, and a Joomla folder needs to be created in the same folder.
Hope this helps.