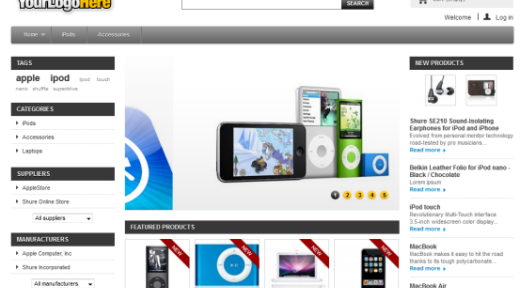
In a previous article, I introduced you to what Softaculous was all about: A utility software in your control panel which automates the installation of website applications. Today I’m going to demonstrate how to install Prestashop, an eCommerce Content Management System. Below is a screenshot of the user view of the Prestashop shopping channel installed without any modification. You can see there is plenty of opportunity to optimize the template to your liking, and I was pleasantly surprised with the amount of documentation available through the back-end to help you.

So don’t be afraid! Not only is Prestashop an easy install made especially fast through Softaculous, but I’m glad to see a plethora of supporting documentation and templates to continue optimizing to your heart’s content.

I will guide you through my firsthand experience of installing Prestashop, including some little errors to be aware of and what they mean.
Preparation To Install Prestashop:
Make sure you have enough allocated MySQL databases. Depending on your hosting package, if you already have a CMS website like WordPress installed, you may need to check your available allocation. One install of Prestashop will take up one additional database if you have that in your allowance. You can check this under your cPanel left-hand sidebar for Database allowances.
Add a subdomain if you want to separate your shopping area from your main URL. For example, shop.domain.com. You can do this through cPanel in the Domains Module; select Subdomains, and complete the form prompts in the frame when you click through.

How To Install Prestashop:
In your cPanel, open Softaculous, which you’ll find in the Software/Services module near the bottom.
In Softaculous, select the Prestashop application. Prestashop is one of the more popular applications, so it will likely appear in the homepage of your Softaculous. In case you don’t recognize their logo, it should also be filed from the left-hand sidebar of categories under eCommerce.

Once you click Install, you’ll be prompted with a single page input form. Check each form field. Make sure you check where you want Prestashop installed; it will give you subdomain or folder options. You do not need to create a folder, Softaculous will create one for you if you choose. Make sure you update your Admin Account settings to your correct email.

“Installation cannot proceed because the following files already exist in the target folder :”

Simply scroll to the end of the list of files, and check the box that says “Overwrite Files.”
It is likely that your first attempt to install may have failed if you didn’t have any remaining MySQL database allocation. If this is the case, you will see “The MySQL databases could not be selected” come up as an error message.
Hopefully the installation should go smoothly and all within 4 minutes. Softaculous will display a completion message and send you an email of your installation notes.
How To Administrate Prestashop:
To access your “Back Office,” go to yourdomain.com/admin123 as prompted by your Softaculous installation notes. Upon your first visit to the back-end, Prestashop will prompt you to change folder names for security reasons. To do this, leave the Softaculous application and return to cPanel Home; then go to your File Manager in your cPanel, which is located under the File module.


Once in the File Manager, finding the correct file is easy under the visual folder tree. Renaming a folder is as simple as right-clicking to bring up a drop down menu.

Your new Prestashop install should now give you “Back Office” access with these momentary security precautions in place. Simply go to yourdomain.com/admin123XXX, and upon completing the password prompts you will now have access to the Prestashop admin:

That’s it! You’re done. The back-end access is full of intuitive modules to add and navigate around. Honestly speaking, it probably would have taken you longer to read this article than complete the install itself! I managed to run through this install myself in just about 10 minutes with Softaculous and cPanel running. It’s more likely that you’ll manage a smooth install without bumping into any database errors as long as you follow the checkpoints I made at the beginning.