Secure Shell (SSH) access grants you command-line interface (CLI) access to your web server. One of the major advantages of SSH is a secure, remote connection to your server. The SSH program uses a password to connect, but it is more secure to use SSH keys, or SSH key pairs. This is a type of cryptographic challenge-response authentication to ensure integrity with SSH connections. SSH is included with all hosting plans but for “sudo” or root access VPS managed Hosting is required.
This guide is for using SSH with root access on a VPS or dedicated server. If you are trying to use SSH for a shared or reseller hosting account, follow our guide titled How to SSH into your Shared/Reseller Server (or for macOS).
In this article, we’ll outline the process for creating an SSH key pair for various Operating Systems (OSs):
Experience full control over your server environment and deploy the best operating and management systems that fit your needs with our reliable Cloud VPS Hosting!
Generate SSH Keys in Windows with PowerShell
Windows 10 provides OpenSSH natively, which may be accessed from the Command Prompt or PowerShell.
- Open the Start menu and type PowerShell.
- Select PowerShell and click the Run as Administrator option.
- Generate an SSH key pair:
ssh-keygen
- Press Enter again when you see a prompt to “Enter file in which to save the key”.
- When prompted, type a secure passphrase, and press Enter.
- When prompted, type the secure passphrase again to confirm, and press Enter.
- You should see something similar to the following.
Enter file in which to save the key (C:\Users\
/.ssh/id_rsa): Enter passphrase (empty for no passphrase): Enter same passphrase again: Your identification has been saved in C:\Users\ /.ssh/id_rsa. Your public key has been saved in C:\Users\ /.ssh/id_rsa.pub. The key fingerprint is: SHA256:m9eb6SIE28EmCLLR6Uj1A/UdFy6iZE48AEsJnMiu0Jc @ The key's randomart image is: +---[RSA 2048]----+ |*+==.. . o. | |=*= = . . + | |oO . @ + o . | |+.o E * = . | |o . o *S. | |. . oo . | | .o . . | | ... + | | . o= | +----[SHA256]-----+ - (Optional) Ensure your
~/.sshpermissions are correct:cd .ssh
icacls id_rsa.pub /inheritance:r
In the command below, replace
usernamewith your Windows username.icacls id_rsa.pub /grant:r username:"(R)"
Generate SSH Keys in Windows with PuTTY
PuTTY is a popular 3rd party application for configuring SSH access. If you prefer to use this graphical tool instead of the terminal, you can follow these steps.
These steps only work for PuTTY on Windows. Unix PuTTY users will need to use the puttygen CLI tool or the OpenSSH option below.
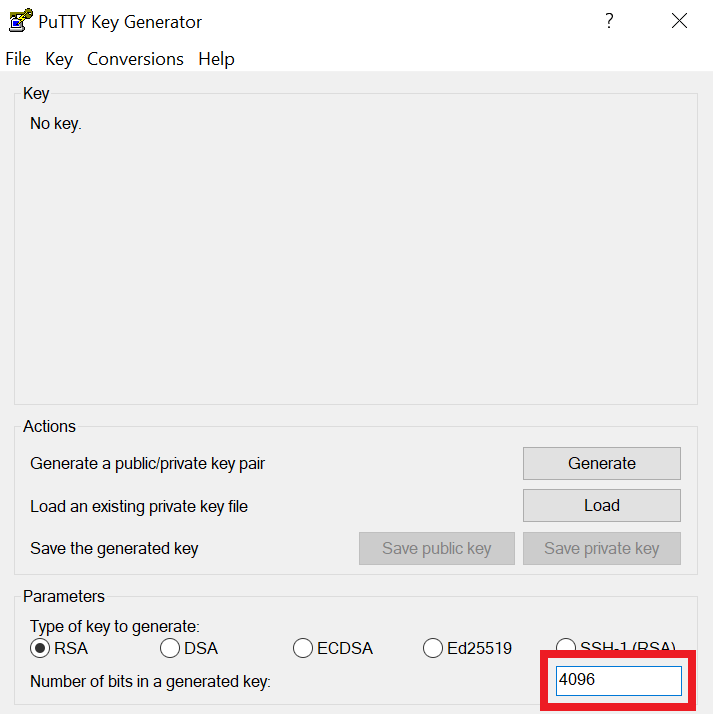
- Open the PuTTYgen application.
- For ‘Type of key to generate‘, select RSA.

- For ‘Number of bits in a generated key‘, select 4096.
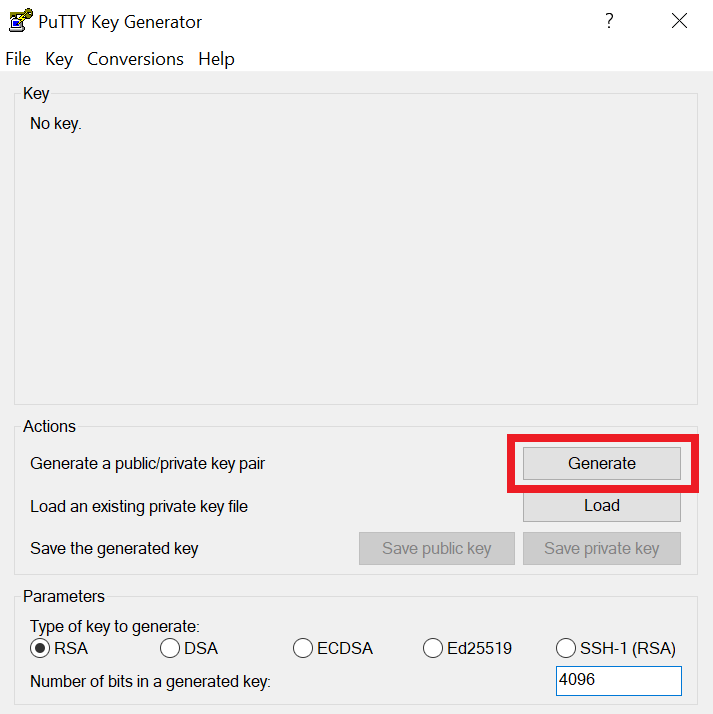
- Click Generate.
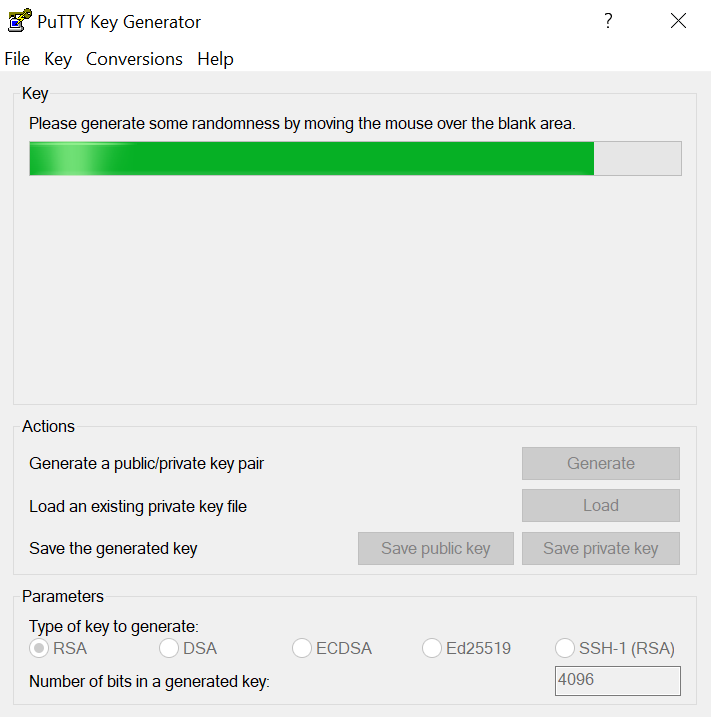
- Move your mouse pointer around in the Key section until the progress bar is full.
- Optional: Type a comment into the Key comment section to help with identifying this SSH key pair.
- Optional but recommended: Type a secure passphrase into the Key passphrase field, and again into the Confirm passphrase field.
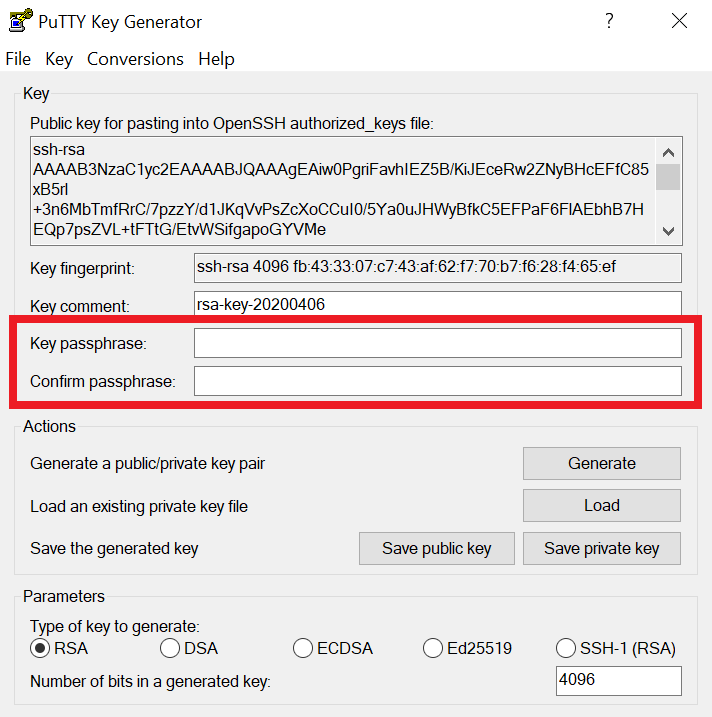
- Finally, click the Save public key, and also the Save private key buttons.

Be sure to save both keys in your user’s .ssh directory inside their home directory. For instance:C:\Users\userna5\.ssh\id_rsa.pubC:\Users\userna5\.ssh\id_rsa.ppk
The public key can be copied from the Key field to add an SSH Key for Cloud Server Hosting.
Generate SSH Keys in Unix or macOS Terminal
This section applies to OpenSSH users on *nix-based OSs including Linux, macOS, BSD.
- Open a Terminal from your application list.
- In your terminal, type the following command:
ssh-keygen -t rsa -b 4096
- Press Enter again when you see a prompt to “Enter file in which to save the key”.
- When prompted, type a secure passphrase, and press Enter.
- When prompted, type the secure passphrase again to confirm, and press Enter.
You should see the following successful message containing the details that pertain to your key that was generated:userna5@localhost ~ $ ssh-keygen -t rsa -b 4096 Generating public/private rsa key pair. Enter file in which to save the key (/home/userna5/.ssh/id_rsa): Enter passphrase (empty for no passphrase): Enter same passphrase again: Your identification has been saved in /home/userna5/.ssh/id_rsa. Your public key has been saved in /home/userna5/.ssh/id_rsa.pub. The key fingerprint is: SHA256:PRxLu/LU6ZfFDve1sTIR0nK86NJVYRxRONCz0N5oy7U userna5@localhost The key's randomart image is: +---[RSA 4096]----+ | .+.+=| | . *+ | | o oo.*.| | + * ==.o| | S * =o++.| | = =+E=| | . = + .**| | = + oooo| | o ..o | +----[SHA256]-----+
- (Optional) Ensure your ~/.ssh permissions are correct. To ensure your ~/.ssh folder has the correct permissions:
chmod 0700 ~/.ssh
- Then, correct the permissions of the files within the ~/.ssh folder:
chmod 0600 ~/.ssh/*
“Your public key has been saved in /home/userna5/.ssh/id_rsa.pub“. The text in this file is the public key that you will need to add an SSH Key to your Linux Cloud Server. Then, you’re ready to SSH into your Linux server.
If you are unable to locate this file simply type in
cd ~/.sshto navigate to your .ssh folder then use thels -alhcommand to list all files in that directory.