Our last article described how to create a supply order. This article, next in our Managing Supply Order course, will go over validating the order. This is the second step of the Supply Order process. An important thing to remember is that any editing needs to be done in this step. After an order is validated, it will no longer be able to be edited. Also, keep in mind orders cannot be deleted. They can only be canceled. Below are the steps for finishing the creation and validating a Supply Order in PrestaShop 1.5.
In order to manage a Supply Order the Advanced Stock Management option must be enabled.
How to validate a new Supply Order in PrestaShop 1.5
- Log into your PrestaShop 1.5 dashboard.
- Using the top menu bar, hover over the Stock tab and click on the Supply Order option from the menu.
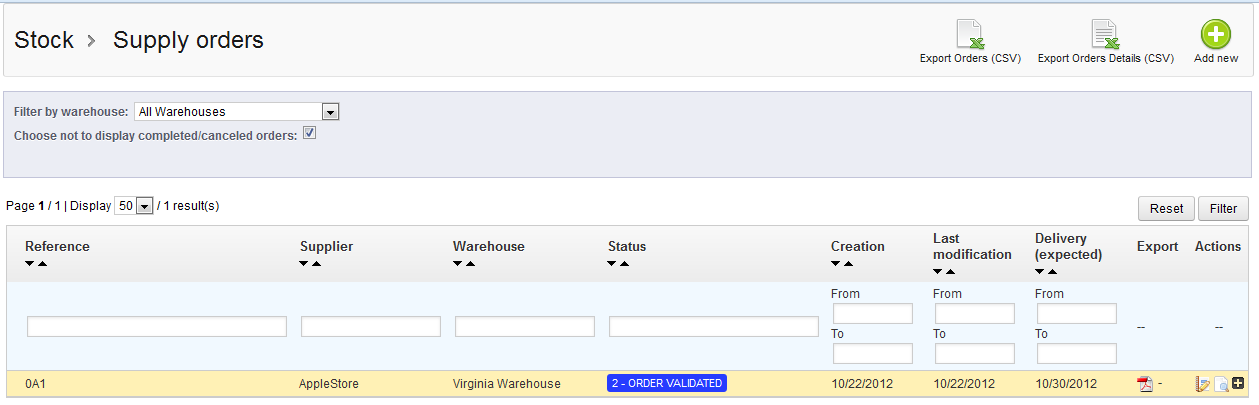
- You are now on the Supply Orders screen. The existing Supply Orders appear in the table in the middle of the screen. Locate your Supply Order and click on the Edit
 button. This will take you to the Edit screen so you can order products.
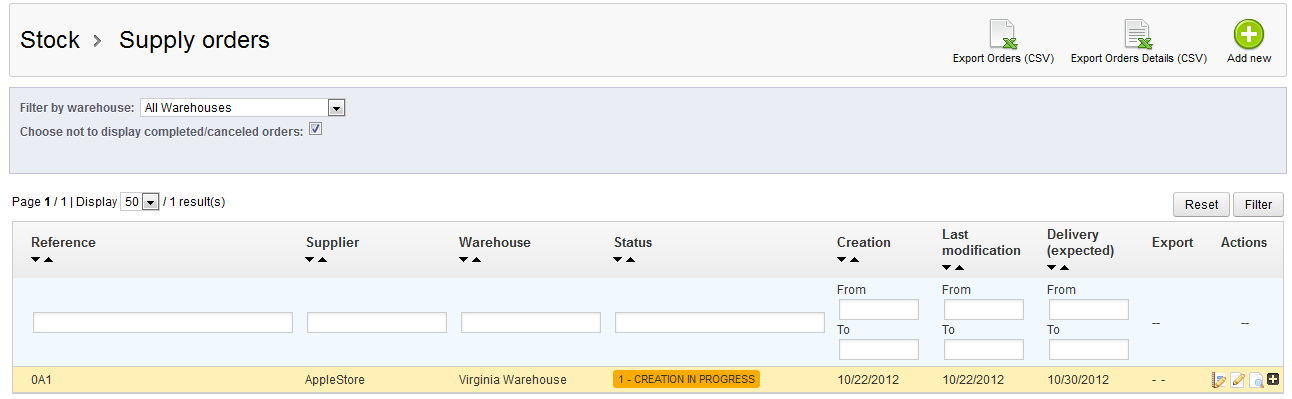
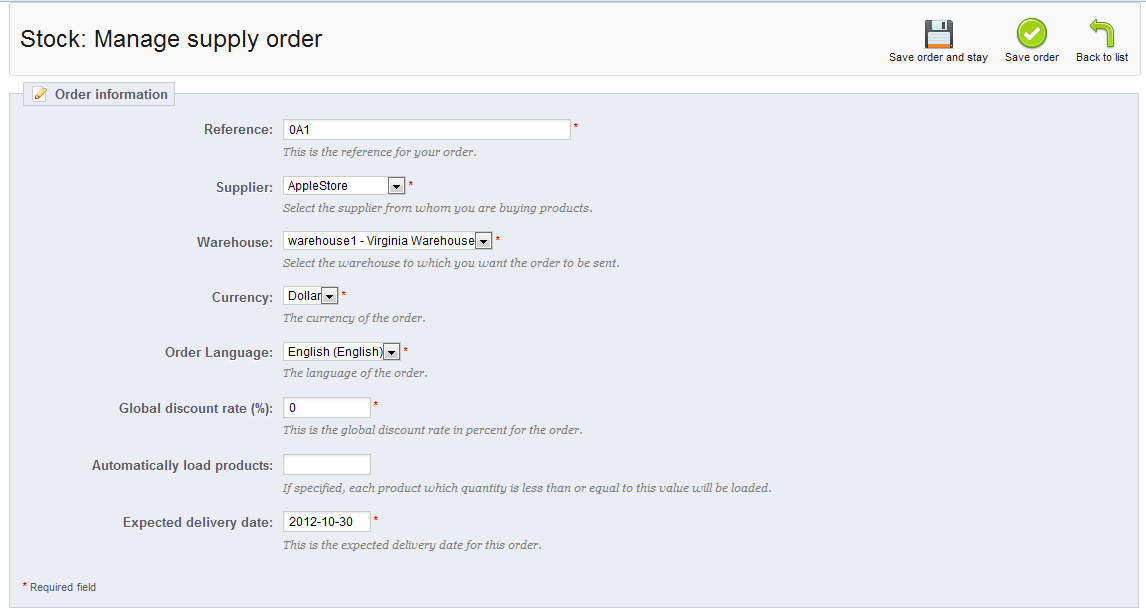
- You are now on the Supply Order Edit screen. Before you order your products, you must take the time to edit any of the data you need with the fields as you will no longer be able to edit this information once you change the order. Once you have made any changes, scroll down to the next section.
- You are now at the product section entitled Manage the products you want to order from your supplier. This is where you need to set the order for the products. Begin by typing in the name of the product you wish to order in the field. A pop-up list will appear to assist you in choosing the right product/combination. Find the product from the list and click the green plus icon to the right. This adds the product to the order.
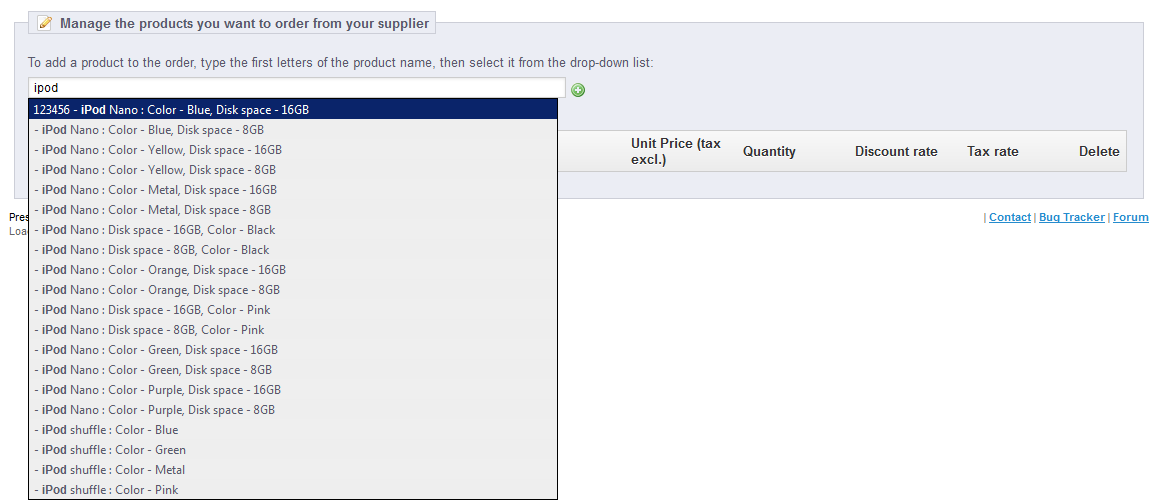
- Enter the additional product data for the order. You can add more than one product if you wish and can delete any products from the order during this step only.

- Once completed, click the green Save button in the upper right corner of the screen. This will complete your order and save it. Remember, after this step you will no longer be able to edit your order. You will be taken to the main Supply Order screen once more. Find your Supply Order again and click on the Change State
 button. This will take you to the next screen.
 - Once on this screen, you will notice the next state is already selected. To confirm and save this state, simply click on the green Save button. This will save your order status and take you once again to the Supply Order list screen where you will see the new status.