Each article added within the PHP-Fusion interface can use images during the edit or creation of the article. The following tutorial steps through uploading the graphics into the PHP-Fusion installation and then adding them in to the article created within PHP-Fusion.
Inserting Graphics into PHP-Fusion Articles
Upload Article Graphics into PHP-Fusion Interface
Before you can add graphics into an article using the PHP-fusion interface, you will need to upload each image. The following steps walk you through this process.
- Login to the PHP-Fusion Admin Panel.
- Click on the Admin Panel Link.

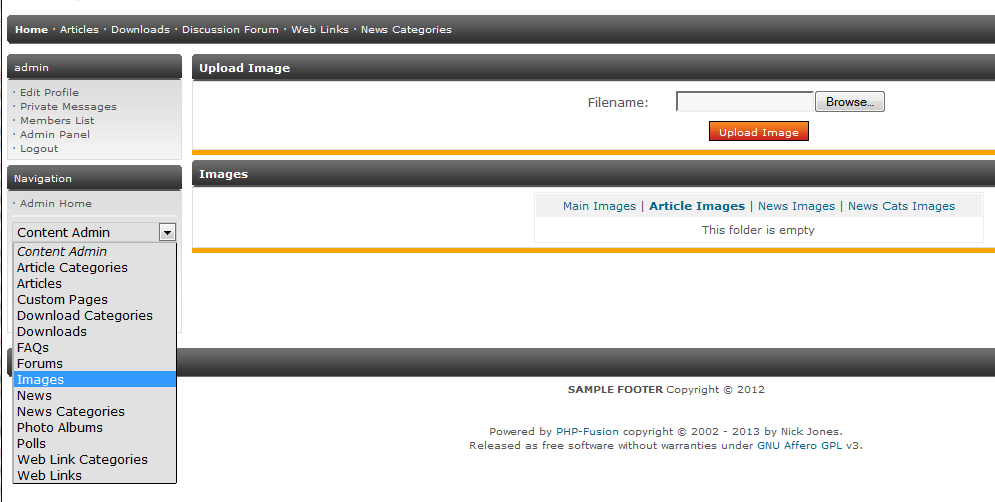
There are two ways to get to the IMAGES option. You can click on the IMAGES icon in the right side of the interface, or you can click in the NAVIGATION section on left, click on the drop-down arrow for Content Admin, then click on IMAGES in the resulting drop-down menu.
- After you click on the IMAGES icon, or the IMAGES option in the drop-down menu you will see the images that have been previously listed in the MAIN IMAGES section. You will need to click on ARTICLE IMAGES, because this is where the images for all articles will need to be stored. Click on ARTICLE IMAGES (under the IMAGES BAR) in order to proceed.
- When you click on the Article Images section you will see the images that have been uploaded previously (or there may not be any listed if this is a new installation). Click on the BROWSE button in order to select the image you wish to upload.
- After you select your image, click on OPEN.

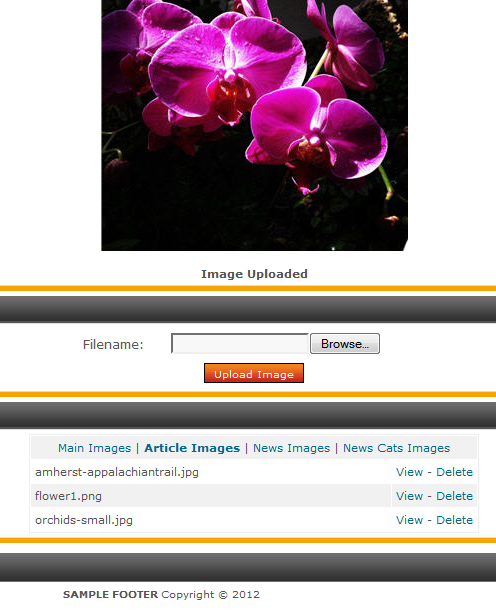
Finally, click on UPLOAD IMAGE and the image will be uploaded to the PHP-Fusion installation.
Adding the Image to the Article
After the image or images have been uploaded, then you can begin editing or creating your article so that you can add images.
- Login to the PHP-Fusion Admin Panel.
- Click on the Admin Panel Link.

There are two ways to get to the ARTICLES option. You can click on the ARTICLES icon in the middle of the interface, or you can click in the NAVIGATION section on left, click on the drop-down arrow for Content Admin, then click on ARTICLES in the resulting drop-down menu.
- If you are creating a new article, then click on the SUBJECT field in the Add Article section and then name the article. Otherwise, at the top of the interface (under Current Articles) click on the drop-down arrow select your article and then click on the EDIT button.
- Next, select the area where you wish to add your image by clicking in the area of the article with your mouse.

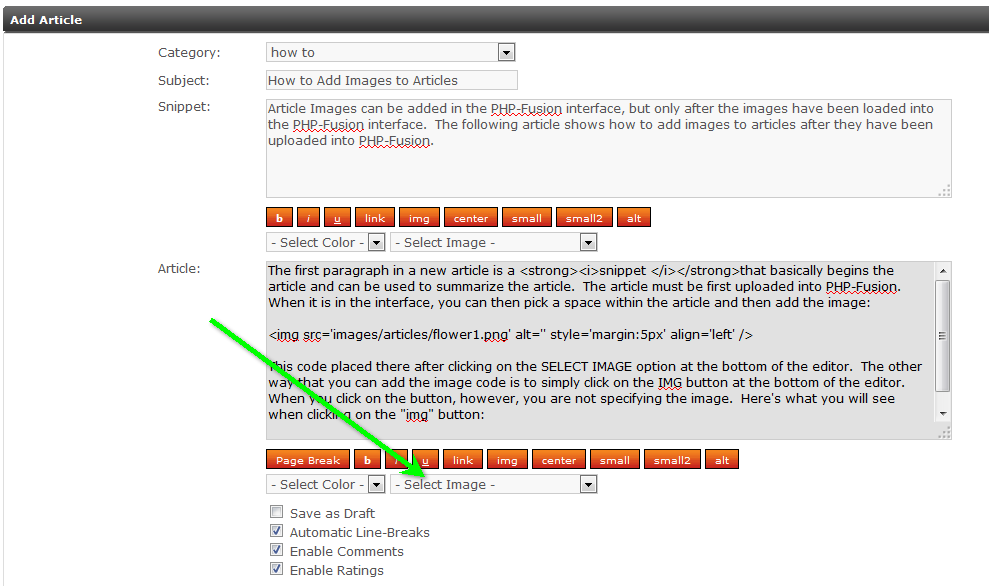
There are two ways to add the image: Using the SELECT IMAGE drop-down menu, or by clicking on the IMG button in the interface. Click on the SELECT IMAGE drop-down menu first.
- Note, that when you click on the image that you want to use, it will not put the physical image in the article. You will see the HTML code for the image link. You can use the formatting options to adjust the image position and size. For more information on using HTML tags, use you favorite HTML resource, or checkout this link: HTML Image tutorial.

Add another image to your article, but this time, try using the IMG button. Click on the IMG button. When you do so, you will see the following:
<img src=”/support/images /articles/’ style=’margin:5px’ alt=” align=’left’ /&rt
This code is incomplete and requires the file name of the graphic you wish to use. Note that it already notes the path of the image. This means that it will only work when the image is already located in that path. To complete the code, type in the name of a graphic you wish to use.
- Scroll to the bottom of the page and click on the SAVE ARTICLE button in order to save your entries.
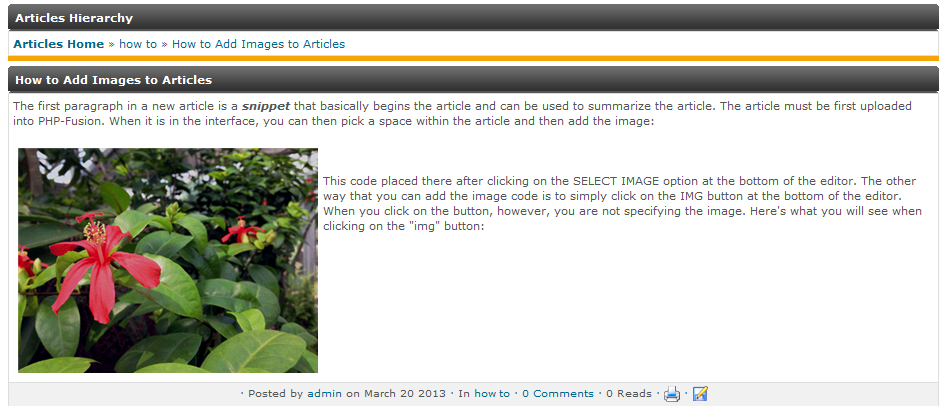
This completes the addition of a graphic/image to an article. The screenshot below shows how a typical PHP-Fusion article will appear with an added image:
If you wish to learn more on adding a new article into PHP-Fusion, please go to Adding New Articles in PHP-Fusion.
